I was determined to get a few minutes to digital scrapbook this weekend. And a few minutes was all I got…at the very end of the weekend (it counts as the weekend if I haven’t gone to bed on Sunday night, right?…even if it’s actually Monday morning? LOL!)
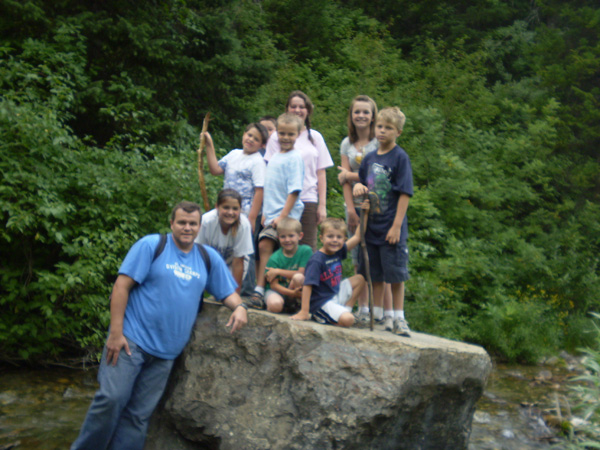
Rarely do I trust my camera to my kids…and almost never out of my sight. But I do try to send a camera with them…especially at events like this family hike. Unfortunately my favorite photo from the trip was blurry…BADLY blurry 
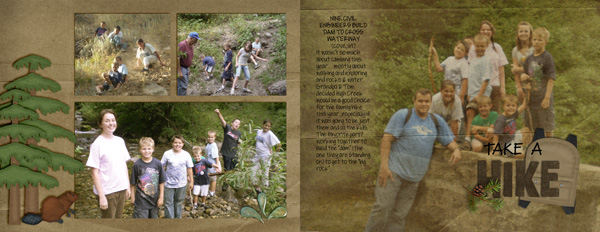
There are several creative ways to include a photo like this in digital scrapbooking. This time I’m using my favorite way: make it BIG and blend it in.
I placed the photo on the right hand side of my spread and changed the blending mode to soft light. The faces weren’t as clear as I would’ve liked, so I duplicated the photo layer and erased all but the faces area, to help them stand out. Unfortunately that made my text difficult to read. I tried white text, but it looked odd on the page, so I also partially erased the photo under my text until it was easy to read.
A beaver from Forest Friends, a couple of trees & a splash from On The Water, and an embellished word art title from On the Trail word art & this spread was completed super quick.
Oh, and notice my journaling…I started my journaling as if it were a newspaper article. The headline reads: NINE CIVIL ENGINEERS BUILD DAM TO CROSS WATERWAY (Cove, Ut) — a quick & easy attention grabbing device.
Hope this inspires you in your memory keeping!


 Hi! I'm Chelle: a 40 something mom of 7. My husband & I live in a rural community in the rocky mountains with our 4 children still at home. In the winters we enjoy sledding & snuggling by the fire. I the cool fall evenings we love relaxing around the campfire & meeting friends at the county fair. Admiring the stars


Great! Thanks Chelle…
Thank you so much, Chelle! I have way too many blurry photos that are the only photos for those events, this will help a lot!! I love all your tutorials =)
Wow, that is great and love the layouts! Thanks so much for sharing the tips.
I love this idea, Chelle! Isn’t it always the best photo that’s blurry?? So frustrating. Thanks for sharing this – I’ll definitely use it.
Great idea!! 😀