Congrats to RKSP! You won the toadally collection. Please email chelle to claim your kit: chelles.creations1@gmail.com
Sneak Peek | Enter to Win
I had a blast in Vegas this past weekend. I’ll do an official wrap up soon, but in the meantime, I wanted to show you the new collection I have coming up this weekend:
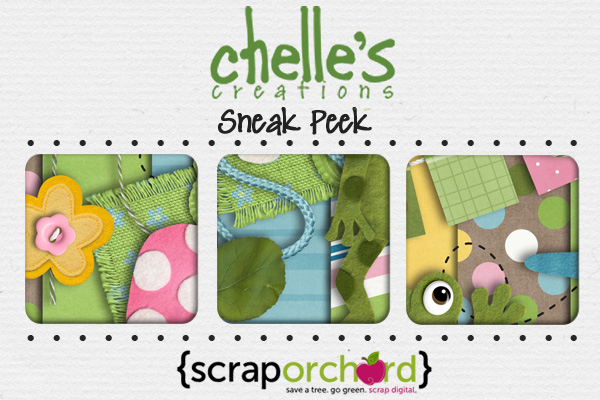
You can enter to win the mini-kit & extras in any or all of these ways:
1. Comment on this blog post.
2. Like this Facebook post. Or post about the sneak on your own wall and link it to this blog post.
3. Tweet about the contest.
Remember, since the winner is chosen using a random number generator, be sure to come back and post when you’ve done #2 & #3 each in their own comment.
Deadline: 11:59 PM EST Wednesday.

Lucky Word Art Freebie @ ScrapOrchard | Digital Scrapbooking Freebies
Did you see the word art freebie I’m giving away on the ScrapOrchard blog today?

Check it out!
It’s a great building block…add your own details: Lucky you, Lucky Me, Lucky in Love, Lucky Day…..

Chelle Scraps…
I know. You were wondering if I really do know how to scrap. LOL!
Four years ago my timid 11 year old “tried out” for Dairy Ambassador.
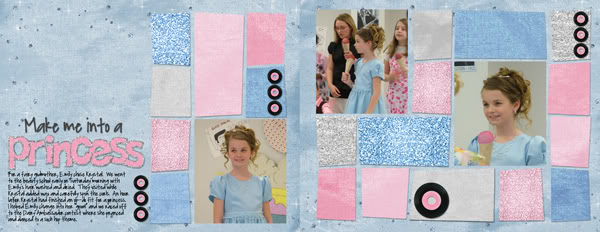
(scrapped a long time ago)
Last year she tried out again and made it.
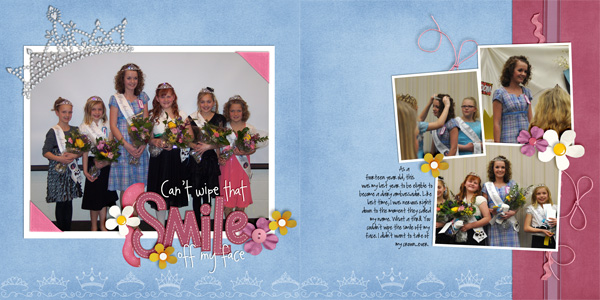
(scrapped this week — with Happily Ever After and my new Rainbow collection…did I tell you how HANDY it is?)
Yesterday she handed of her crown to a new set of Dairy Ambassadors. I was so proud as I watched her conduct the program & teach dances to the “nominees” and her fellow ambassadors. In fact, I’ve enjoyed watching her leadership skills grow and develop all through the year. With the help of my fabulous CT (THANKS LADIES!) I presented her with a fun scrapbook of her year…and we gave one to each of the girls she served with. They’d seen her book earlier in the day, but they were THRILLED to have their own copy. (Isn’t DIGI great!)
Here’s the other layout I contributed:

Now if I can just remember that warm fuzzy feeling while I’m teaching her to drive this week. LOL!
Friday Freebie! March Madness | Digital Scrapbooking Freebies
Happy March scrappers! I have a themey wordart freebie from Chelle’s Slam Dunk kit for all you Hoosier fans out there! Can’t wait to see it used on your pages showcasing your favorite team!

Click image above for download
See ya next time!

Rule of Thirds for Photography | DIgital Scrapbooking Photo Tips
What is the Rule of Thirds? The basic principle behind the rule of thirds is to imagine breaking an image down into thirds (both horizontally and vertically) so that you have 9 parts.
As you’re getting ready to take a photo, you would have imagined this grid in your mind through your viewfinder, or in the LCD display that you use to frame your shot. Some cameras have settings to turn on this grid. The ‘rule of thirds’ now identifies four important parts of the image that you should consider placing points of interest in as you frame your image–the four places the lines cross.
The theory is that if you place points of interest in the intersections or along the lines that your photo becomes more balanced and will enable a viewer of the image to interact with it more naturally. Studies have shown that when viewing images that people’s eyes usually go to one of the intersection points most naturally rather than the center of the shot – using the rule of thirds works with this natural way of viewing an image rather than working against it.
Read more: http://www.digital-photography-school.com/rule-of-thirds#ixzz1nqSrgSmf
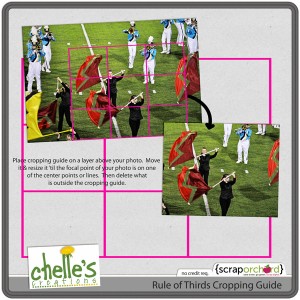
BUT…I’m not always that good at framing my photos. Sometimes my subject is moving. Or I need to quickly capture a photo. The Rule of Thirds can also be used when cropping your photos to scrap them. The concept is the same. Crop the photo so that the point of interest of your photo falls along one of the lines or at the cross-points.
I’ve made a .png “photo cropping guide” for you to use until you get accustomed to doing this.
Place the cropping guide on a layer above your photo. Resize and move it around until the point of interest is in the cross-hairs OR along one of the lines. Select the area OUTSIDE the cropping guide, select the inverse, and crop.
Here’s some samples from the CT:
From Roxana using Make a Splash. See how her son is along the right hand 1/3 line?
From Carol using On the Water. Check out how the space needle is right along the left hand 1/3 line.
Try using the rule of thirds next time you pick up your camera. And the next time you are scrapping, be sure to crop your photos using this rule. We’d love to see your layouts! Link us up in the comments!
(Leading) Making Journaling FIt on Lines | Digital Scrapbooking Tutorials
Have you taken a look at the tutorials here? This is an oldie but goodie.
I LOVE the “undo” part of digi-scrapping…and typing my journaling so there are no errors, but I also like the look of “hand-written” journaling on all those fun journal elements…especially the ones with lines.
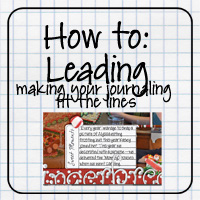
There is a simple tool in photoshop & photoshop elements for quickly and easily lining up your journaling on those lines. It’s called adjusting the leading.
Here’s how to do it:
Step 1: Make a text box. With the text tool, click down in the upper left corner of the journaling element, then drag down to the bottom right corner without letting up on the mouse button. When you are in the bottom corner THEN let go. You should see your new text box highlighted (the marching border)
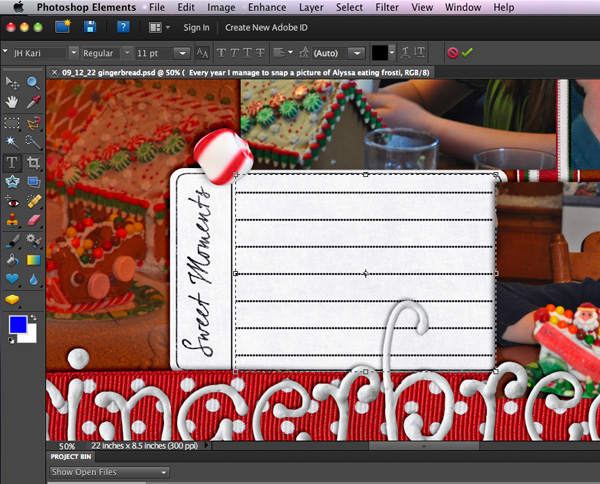
Step 2: Paste your text in the box. I suggest you write your story in a program with spell-check, then paste it into Photoshop/Photoshop Elements. You may need to edit it to fit. Move the text so that the TOP line of your journaling is sitting nicely on the top line of your journaling element.
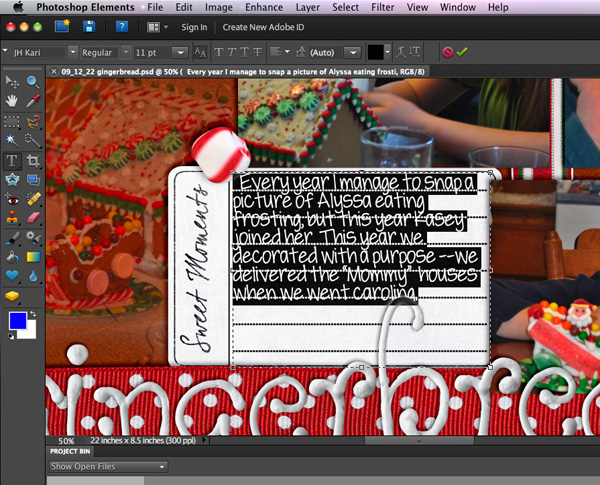
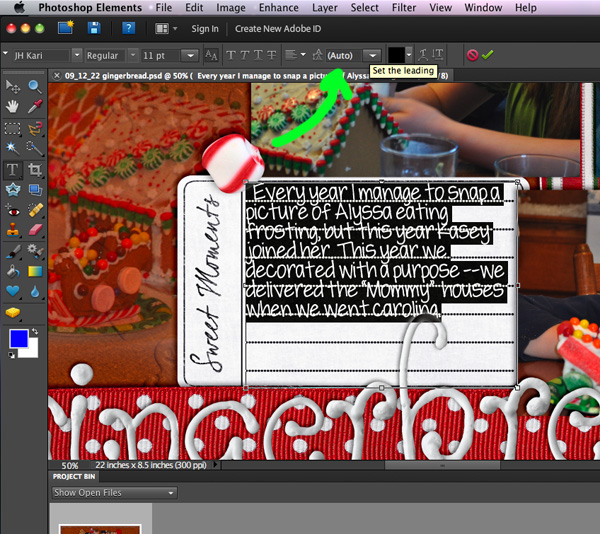
Now we’ll be adjusting the leading. THIS is the little box where we adjust it. (In Photoshop it’s under Window>Character.)
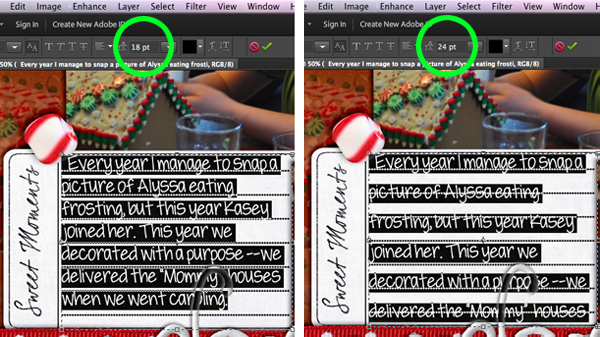
Step 3: Highlight all of your text (Ctrl-A) Then using the drop-down box try some of the preset numbers. Here I tried 18 (too small) then 24 (too large)
Step 4: Be a little goldilocks and figure out the exact amount to make your text line up with your journaling element lines. Mine turned out to be 19.2
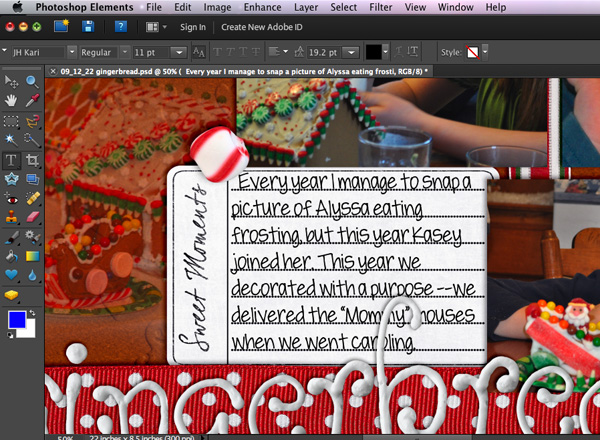
That’s all there is to it. Now you can have “hand written” journaling “on the lines” on all your layouts. It also works great on lined papers…like those in back to school kits.
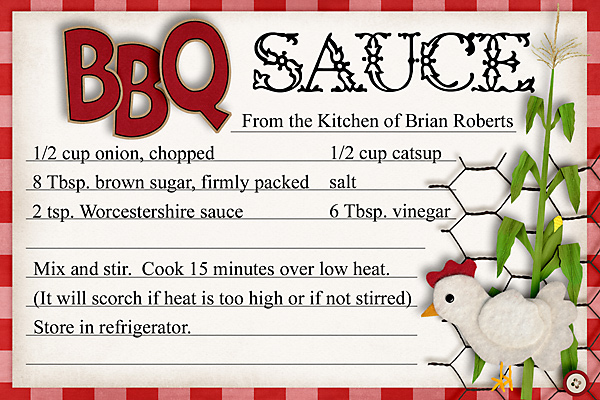
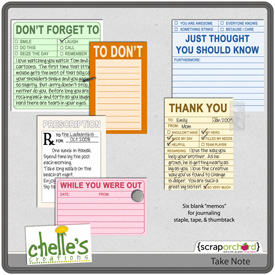
Here’s a couple of freebie journaling elements to practice on:

Here’s a few samples from the CT:
From Karen using Gone Fishing:
From Carol using Chilling & Grilling:
If I had to do it again…
…I would back up my files starting with day 1. I didn’t understand the importance of back-ups until I was WAY into digi-scrapping. In fact, I’d been designing for 18 months. I had TONS of files. Every time I heard a horror story of someone’s EHD failing, I would shudder and hide my head. It took forever to do my initial online backup. Two months, I think. (Not as long as it predicted, but still a LONG time.) And yes, it was difficult to use the computer during that time. I got to the point where I would shut the back-up rate down to next to nothing while I was working, then turn it up whenever I left the laptop. Some days when I was designing, it felt like I was going backwards…I was creating new files faster than it could back them up.
But eventually it finished. And now it backs up continuously. I don’t even notice it. I have been to the website & checked to see if new stuff is there (it is)…checked to see if my EHD is there (it is).
I have had a couple of EHDs fail on me. One of them DD15 accidentally knocked off the counter within a few days of my filling it up. OUCH! And one just got too old? I lost half of 2007 & all of 2008. Fortunately my favorite photos are printed in photo books, but I can’t use them again…unless I pay $1500 for a restoration company to TRY to get data off the disk. If backing up sounds expensive, the cost of restoration will put it in perspective.
For the record, I use BackBlaze. It was the best option available when I started an online backup, mostly because it recognized EHDs as long as they were plugged in at least once every 2 weeks. Perfect for my laptop.
The Daily Digi did a post about Backing Up. Steph recommends CrashPlan. And if I had to do it again today, I’d use crashplan and I’d pay the extra $100 or so for seeding. That means they’ll send you a 1T EHD. You put your stuff on it and send it back. That is your initial backup…the one that took my computer 2 months running non-stop.
Whatever you decide to do, DO SOMETHING. Before you are the one in the photo.


