Tips: Letterpress and Embossed Look

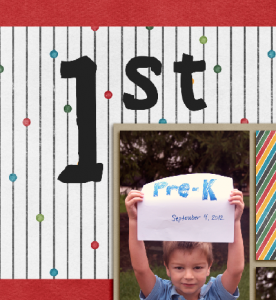
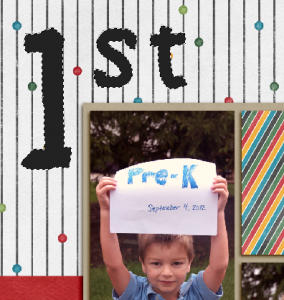
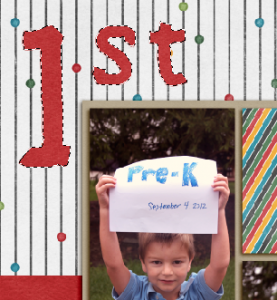
Hi Everyone!  Hope this week is treating you well!  I’m Jenn, aka jk703, here to share an interesting way to add a new technique to your pages. Last year, right before Hurricane Sandy, I found a few new way to add the Embossing technique to your papers and you could even use the patterns that came in the kits!  That was a fun tutorial for me. I was always stumped about how to actually make my text look a bit like it was in a Letterpress style. While I am still a bit stumped, I’d love to share what I, and my co-CT members have found so far!

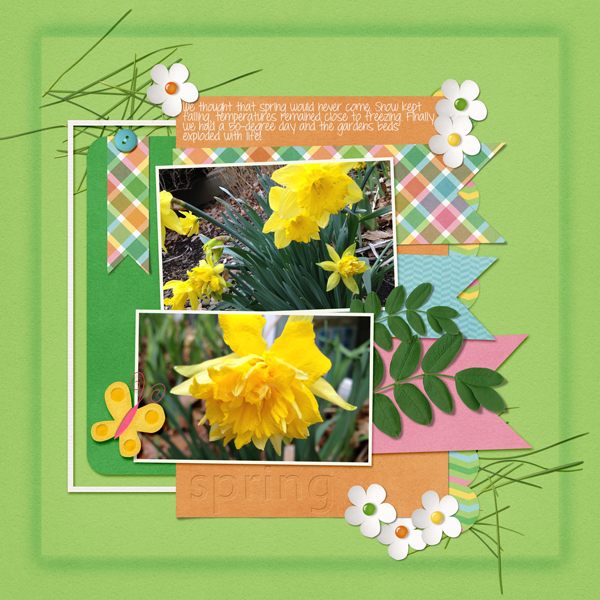
Letterpress is basically an old style print, that pushed the letters into the paper – using a printing press. While this is not the norm in today’s world, it is a fun way to add to your page. For me, when creating this blog post, I noticed that sometimes when looking at an example, it could look either embossed or letterpressed – depending on my view. Some images may appear as if they are pressing into the paper, yet a minute later, appear as if they are dry embossed. Either way, I hope you learn a new trick today!

This will be a photo heavy tutorial, so you might want to let the page fully load.

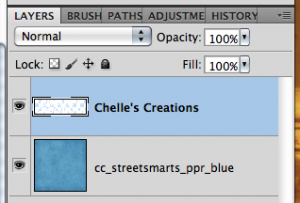
Ok – here is my layers. For my examples, I used Chelle’s Street Smarts kit. Start by using the Type Tool, type in the words you would like to use, and pick a fun font. What font you choose will also determine how the end result will look. For this post, I used Lemondrop. Once I’ve typed up what I’d like to work with, I’ve right clicked and “Rasterized Layer.”

LP1

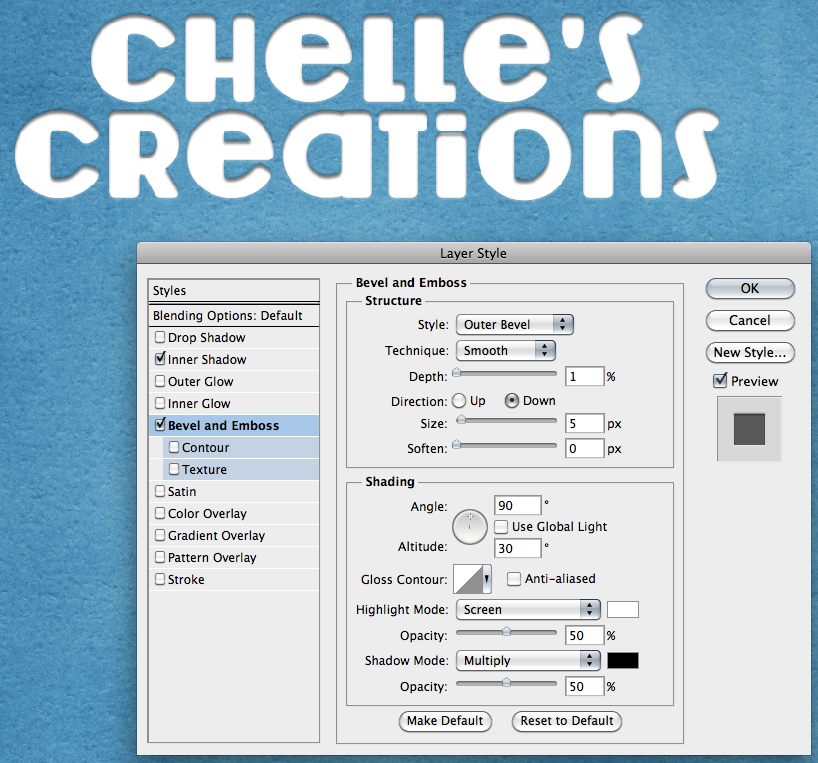
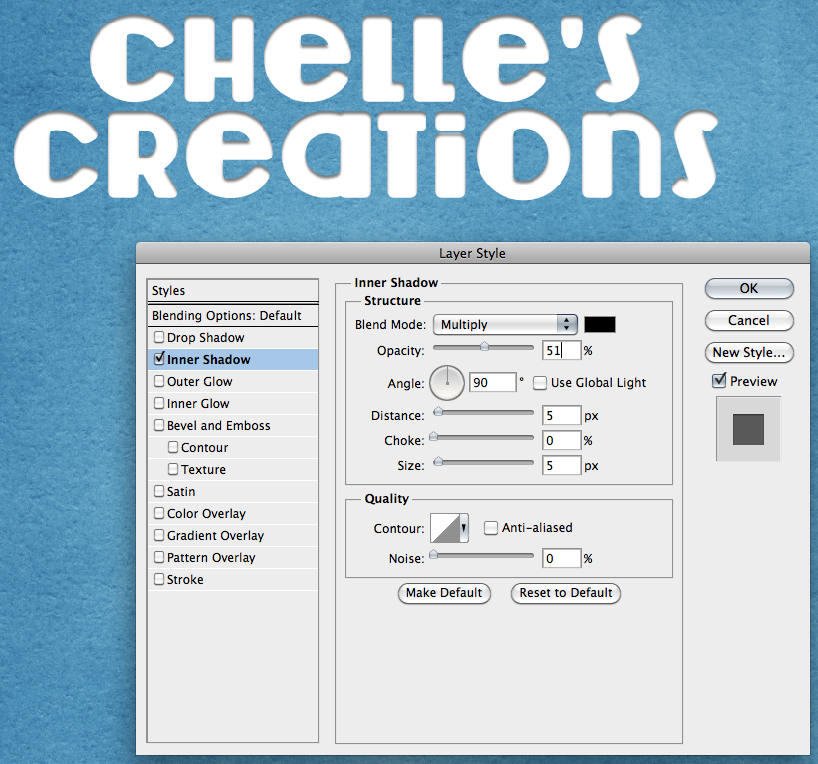
Next, you will double click on the type layer, and the style menu will pop up. There will be multiple screens that you will be working with here, so take your time when entering the info. At the same time, you can play around with the settings – change it to what you like or how you want your words to appear for your page.

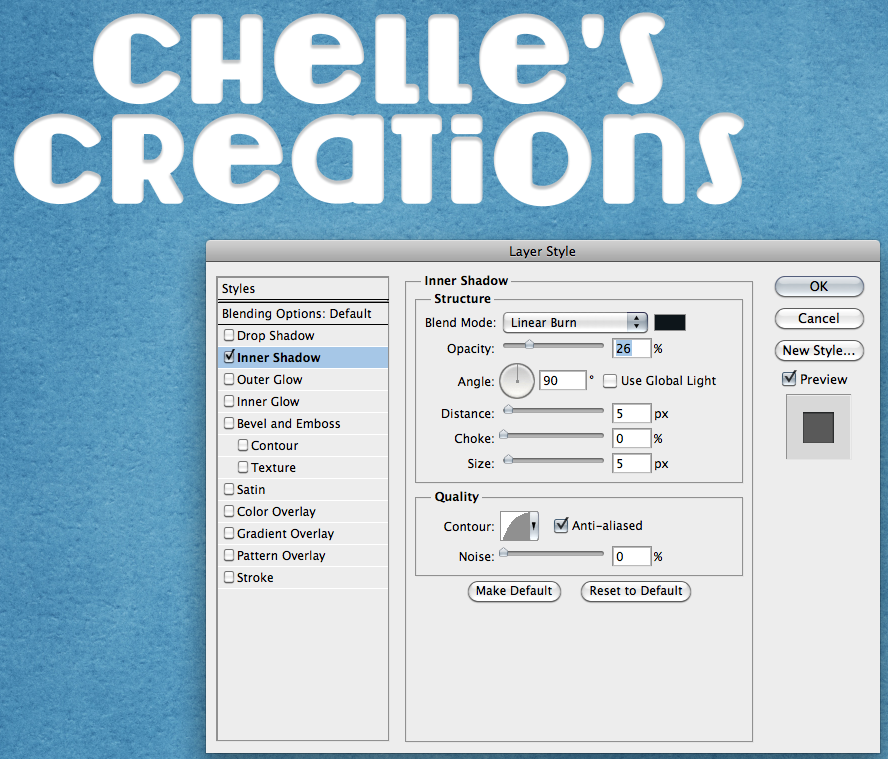
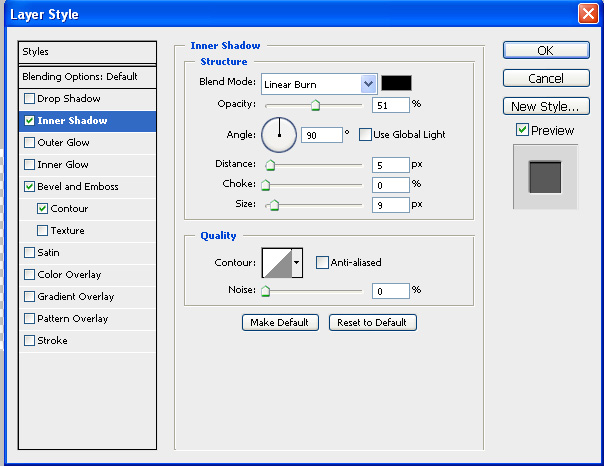
Adding Inner Shadow:
LP2

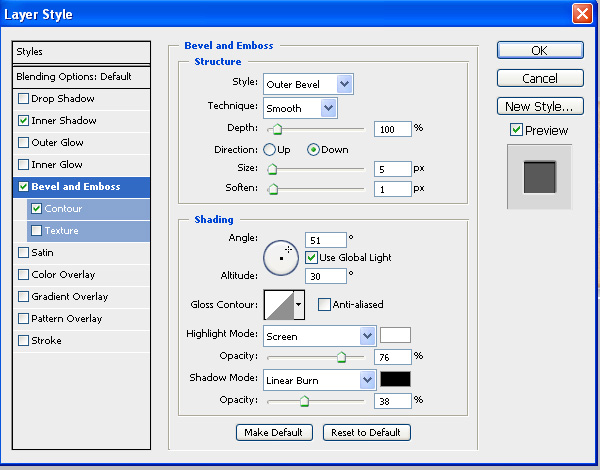
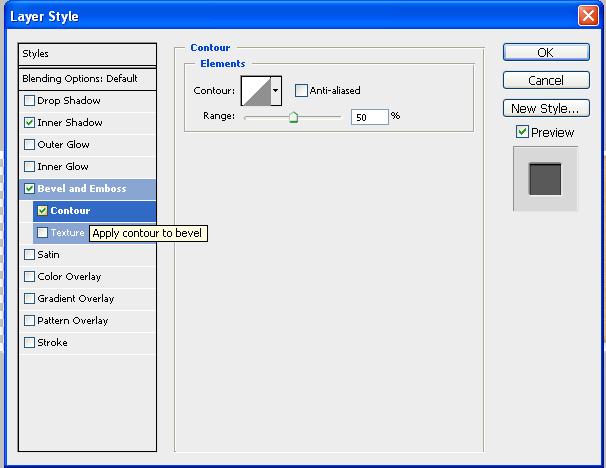
Adding Bevel and Emboss:LP3

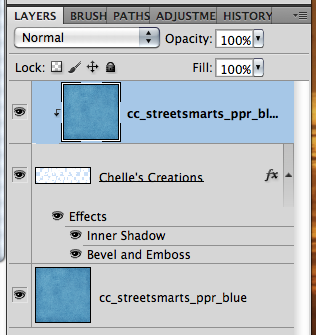
 Here is what my layers look like at this point – and then if I add a paper clipped to my type layer.

LP4 LP5

Here is another version, where I changed the Inner Shadow to Linear Burn, and lowered the opacity. I also played a bit with the Contour to change it up. You can see the Contour is rounded a bit in the little thumbnail. I used the same setting for the Bevel and Emboss as above.

LP6

The result… a bit less embossed looking.

LP8

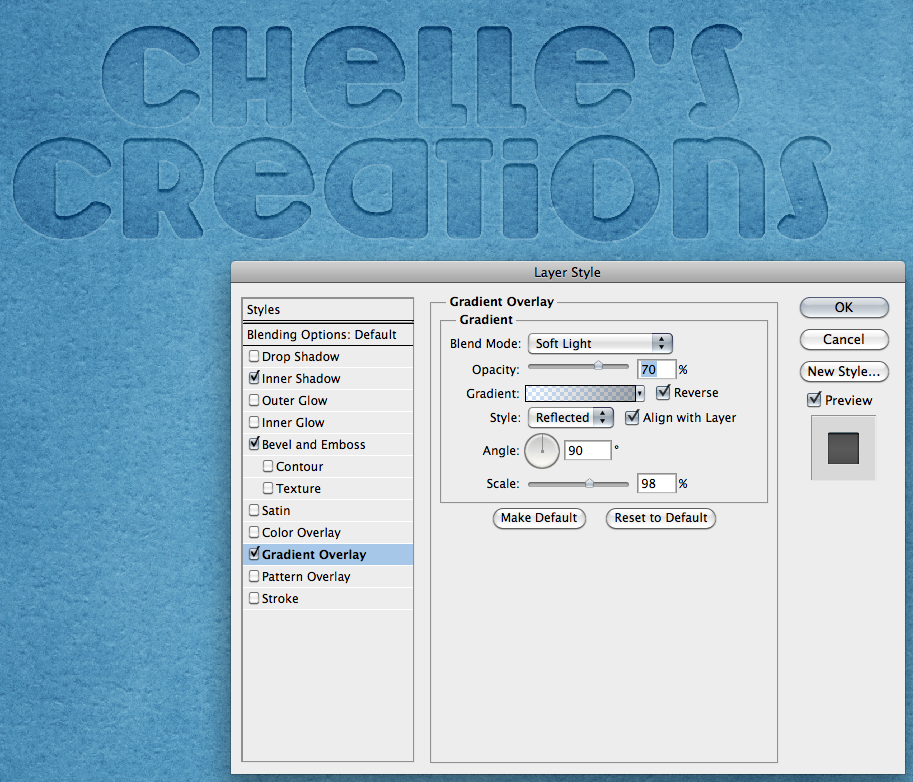
Next, I added a fun style, Gradient Overlay. Check out the setting below. This was actually my favorite of the outcomes!

LP9

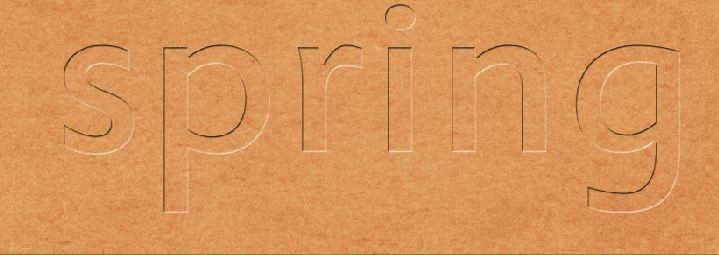
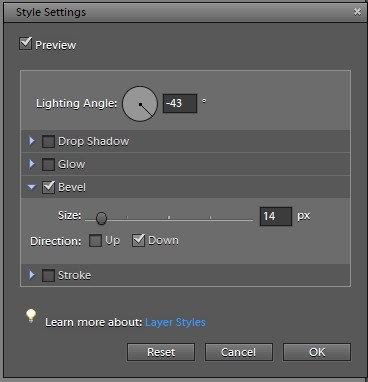
Leslie (lab130) offered some great advice when trying to do this from a PSE standpoint. Here is what she said. “Using PSE. What I did is apply a low inner shadow. Then I went to Layer > Layer Style > Scale Effects and reduced the scale of the inner shadow until it was something I liked (~50%). Then I did an emboss (this one is pressed INTO the paper, since my shadows are to the lower right). I did an bevel of 1px and Direction > Down. I also scaled that effect down by Layer > Layer Style > Scale Effects. Then I clipped the same paper to the text as was on the background.” She also mentioned that it’s just so much easier to skip the inner shadow and just put a bevel in. Here is what her page looked like using the Bevel, using Chelle’s Hippity Hop Hop kit:
LPLS1

LPLS2

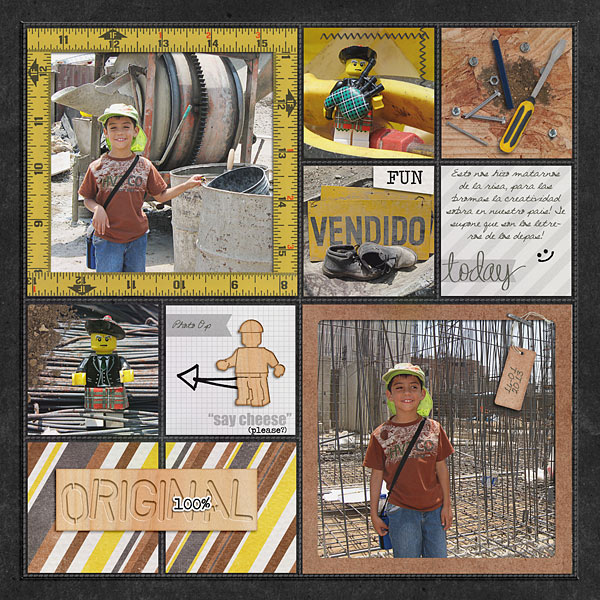
Roxana (roxnamdm) xreated this awesome page, and really made the Wood Veneer Toolkit Title really looks fantastic! Here are her pages and settings. She used the Wood Veneer Tool Kit, Under Construction, Mark My Words and Square Pockets.

Inner Shadow:

RXLP3

Bevel and Emboss:

RXLP4

Contour:

RXLP5

Outcome:

RXLP2

Awesome layout – check out how perfect the title looks!

RXLP1

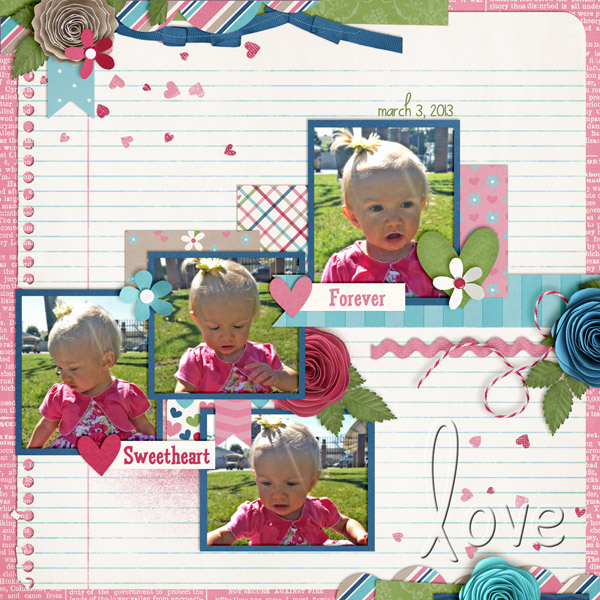
Kassie (kass_23) used Love Grows for her page and completed a Bevel Down in PSE for her look:
KSLP2

KSLP!

There you have it – embossed or letterpressed – depending on what your eye tells you!  :)  Give it a try, and experiment with the style settings. You will find something that you particularly love and will be drawn to use it again!

Have a great day!

Jenn (jk703)

Adding a Bokeh Texture

Adding a Bokeh Texture

Hi everyone…. It’s Thursday and that makes me happy! This is Jenn (aka jk703) and I get to bring you a fun and super easy tutorial today. We are going to add a little oomph to your photos, by adding a bokeh texture. Bokeh what?!? I know… sounds odd and even when it’s typed it looks odd – but I promise it is fun.

In the past, bokeh was always known as the blur that is in your photos, mostly around the things that are in focus. You take a picture of a child, and the area all around the child is in a blurry state, while the child remains in focus. The blurry areas, aka areas out of the depth of field, are referred to as bokeh. Bokeh usually, though not always, has reflective out of focus points of light. Nowadays, with improvements with cameras and equipment, bokeh is used to refer to those specific out of focus lights or shapes in your photo.

Bokeh is easy to add to your photo, but it takes time, patience and a little effort. You will need to play with different bokeh textures to find the ones that fits with your photo. That is the biggest hurdle to this tutorial – trying out many bokeh textures. Good thing there is only about 5 steps to add the texture! :) ok… let’s get to it.

So… where can you get bokeh textures?  Try out this awesome site – Lost and Taken – specifically this post about 94 Free Colorful Bokeh Textures  – http://lostandtaken.com/blog/2012/1/25/94-free-colorful-bokeh-textures.html. Here is their About Page to learn more about this wonderful site. Once you have downloaded the textures, take a peek at them to see what you like, and what may work with your photo. Also, pick a couple that you think would look bad with your photo too. lol!

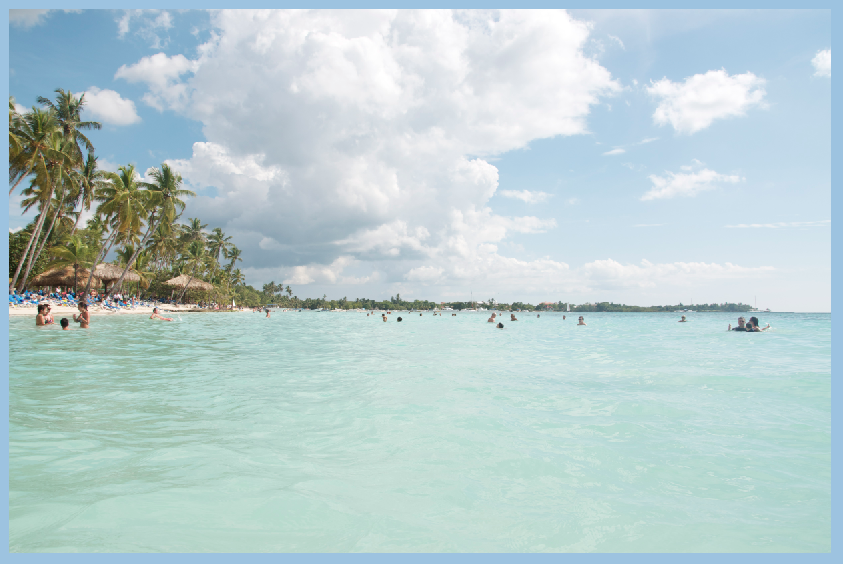
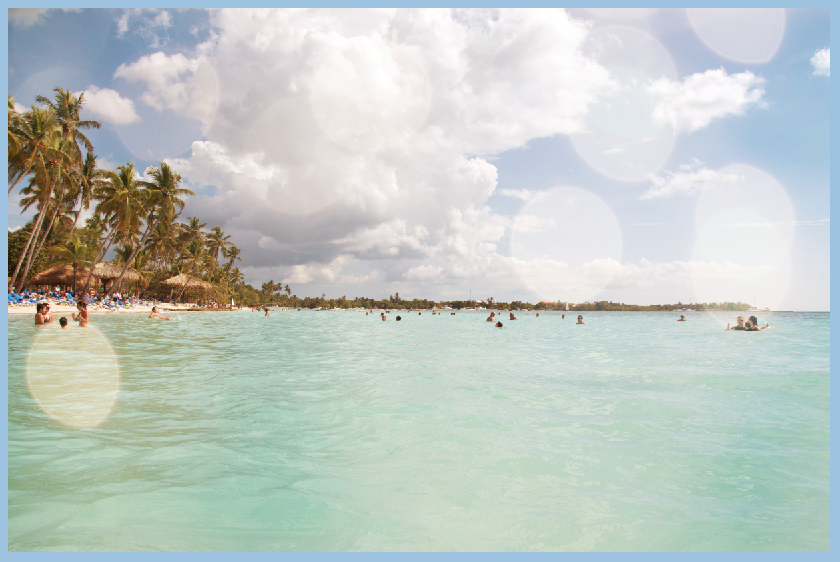
First up, open up both your photo and the bokeh texture that you want to use. Here is my photo of La Romana, DR:

Screen shot 2013-04-02 at 10.12.47 PM

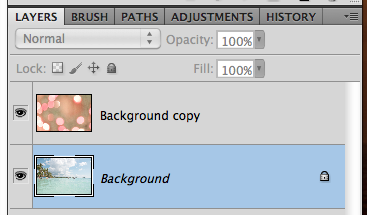
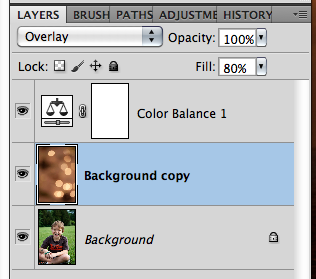
Next, click over to the bokeh texture, and Copy it into your photo’s file.  Make sure to have your Bokeh on top of your image in the Layers Palette. Screen shot 2013-04-02 at 10.13.41 PM

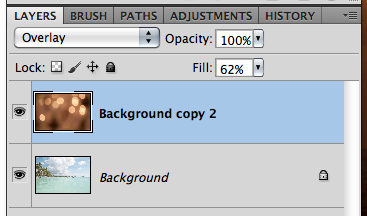
With the Bokeh layer selected in the Layers Palette, change the blend mode to Overlay. Screen shot 2013-04-02 at 10.14.17 PM

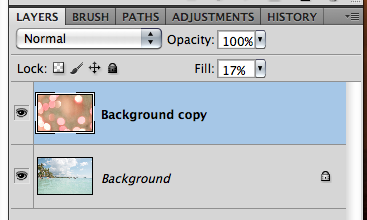
Once you have overlay selected, you will then play with the opacity of the bokeh layer.

Screen shot 2013-04-02 at 10.14.44 PM

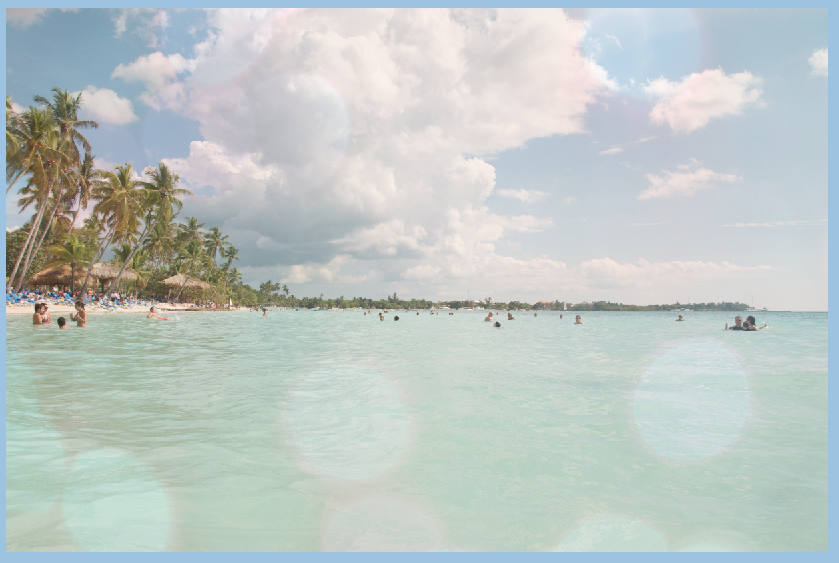
Here is what my image looks like with the Bokeh overlay and opacity played with. Simple, subtle and pretty. Screen shot 2013-04-02 at 10.14.35 PM

Here is another boken and it’s effect. Screen shot 2013-04-02 at 10.19.11 PM

Screen shot 2013-04-02 at 10.18.51 PM

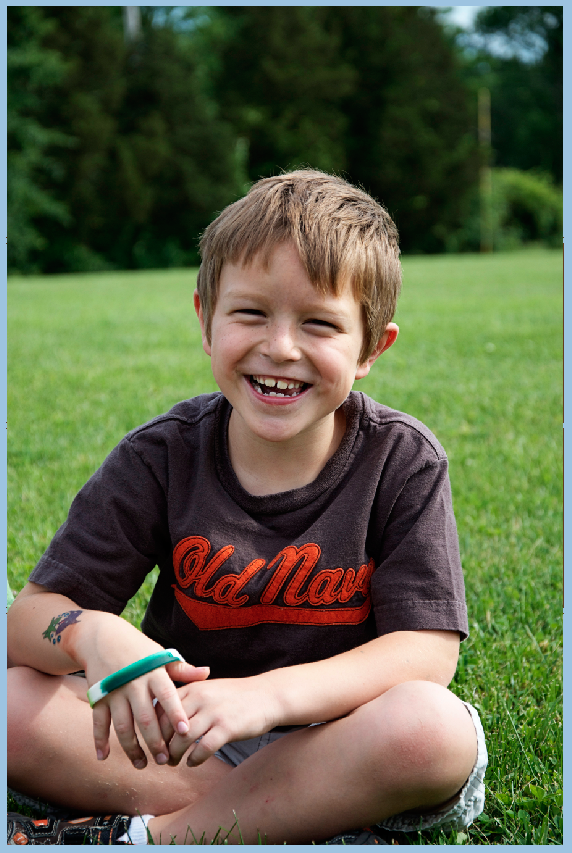
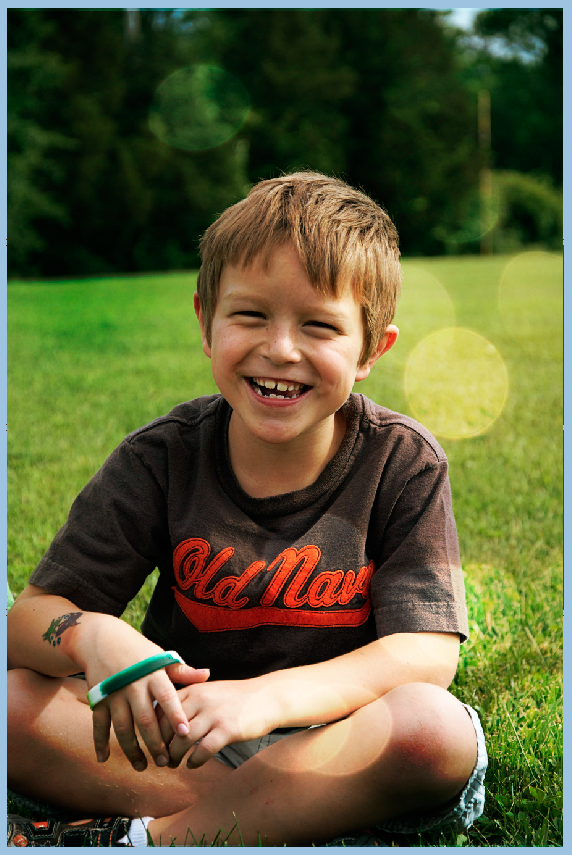
One last one with my son and a bokeh effect. If you find that your image takes on too much of one color, you can always make an Adjustment Layer to remove that cast of color. For these images, I created an Adjustment Layer to remove some of the orange coloring. Screen shot 2013-04-02 at 10.52.38 PMScreen shot 2013-04-02 at 10.54.22 PM

Screen shot 2013-04-02 at 10.52.51 PM

 Here is what the CT came up with….

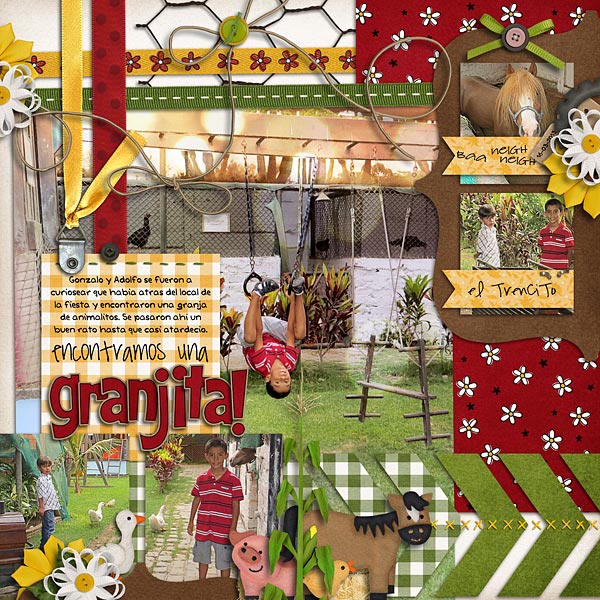
Roxana (Roxanamdm) said it took her some time to choose the bokehs and then the correct color and opacity. It wasn’t easy to find the right bokeh for her photo. I used Bookeh #21 and #12. EIEIO was used.

41-granja-web
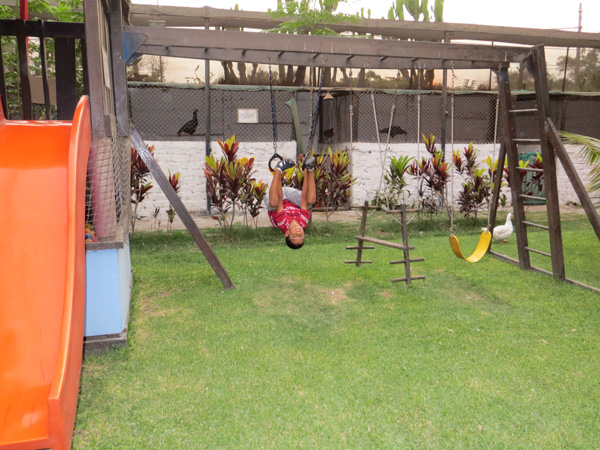
Her original image…. img_0110
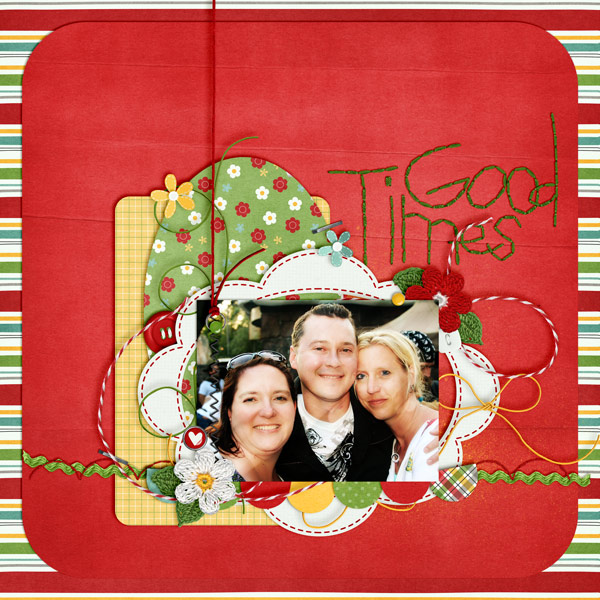
Here is Mel’s (KSCroppyChick) layout…
Good-Times-MKA
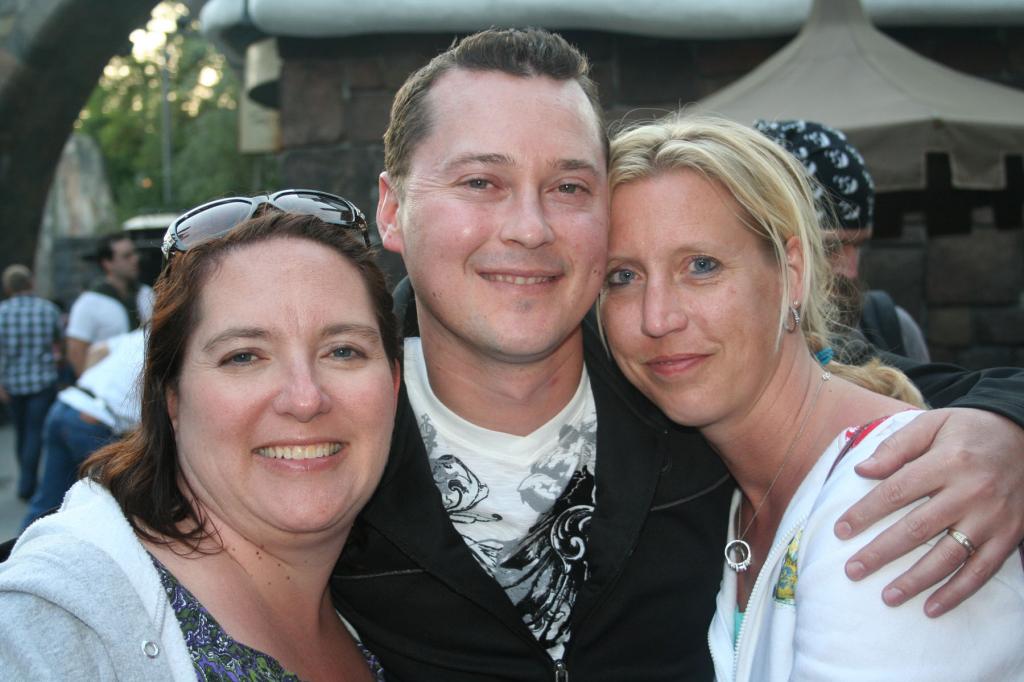
Original
Lastly, Ophelia created this page. She didn’t use the bokeh texture that is linked above – she made an overlay with a star bokeh that she made herself. It’s on the photo in the lower left corner. Cool, right?!
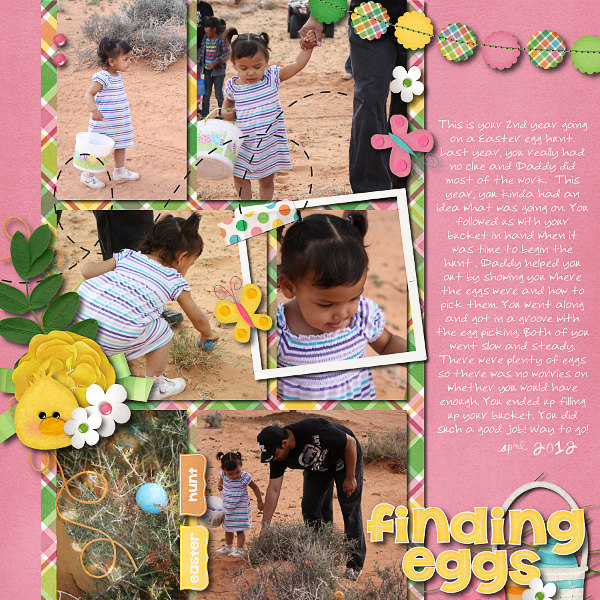
2012-04-08-findingeggs_sm-1
I hope you give it a chance, and play with the bokeh’s… they can be a lot of fun!  Happy scrapping!
Jenn (aka jk703)
by Jenn
Tutorial: Artistic Filter Blends

Tutorial: Artistic Filter Blends

Hi Everyone!  It’s Jenn, aka jk703, here to share a fun and super simple technique for you!  This technique is pretty subtle, but really allows you to stretch your stash!  We are going to use Filters in Photoshop to change our patterns and background papers. Artisitc Filter Blends really are easy, and fun to use. For my layouts, I used one of my favorite kits of Chelle’s, called Oh Snap! Let’s get to it!

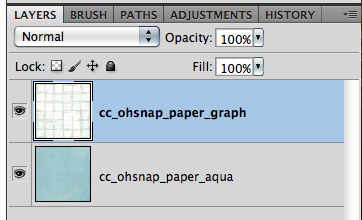
Layer at least two papers in the layers palette.

Screen shot 2013-03-20 at 10.01.00 PM

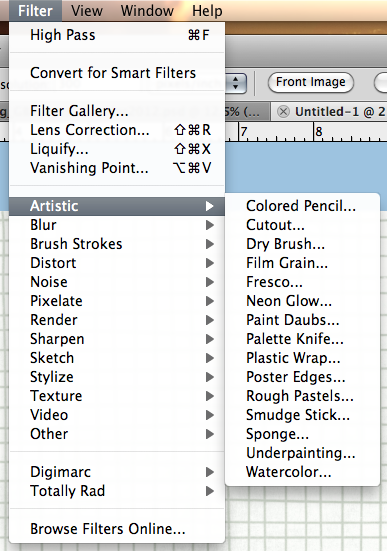
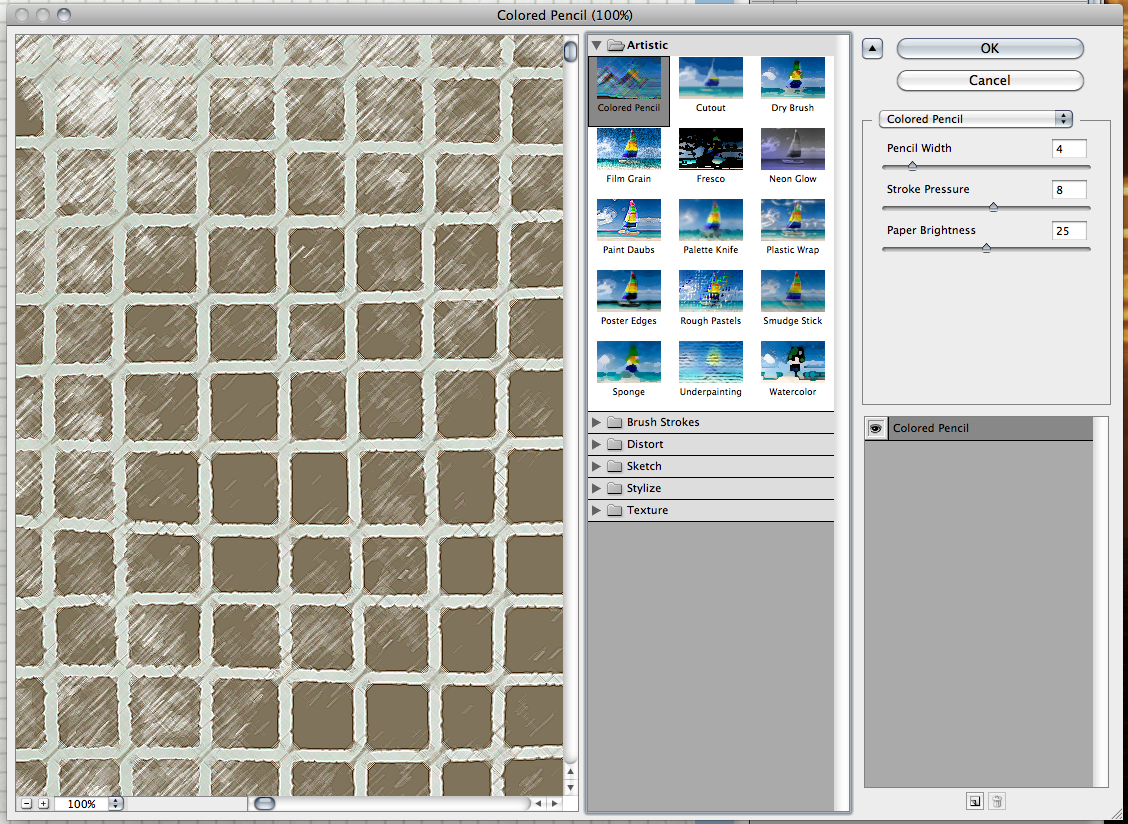
With the top layer chosen, click on Filter > Artistic > Colored Pencil. (Don’t worry, you can pick any once the menus pop up).  Screen shot 2013-03-20 at 10.01.18 PM

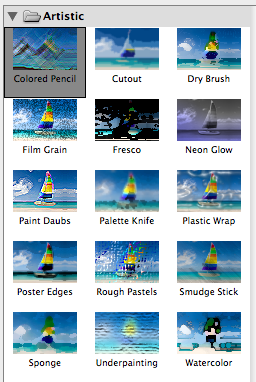
Once the Filters Menu pops up, you can click on each filter to see how each will interact with the paper that you chose. Screen shot 2013-03-20 at 10.13.30 PM

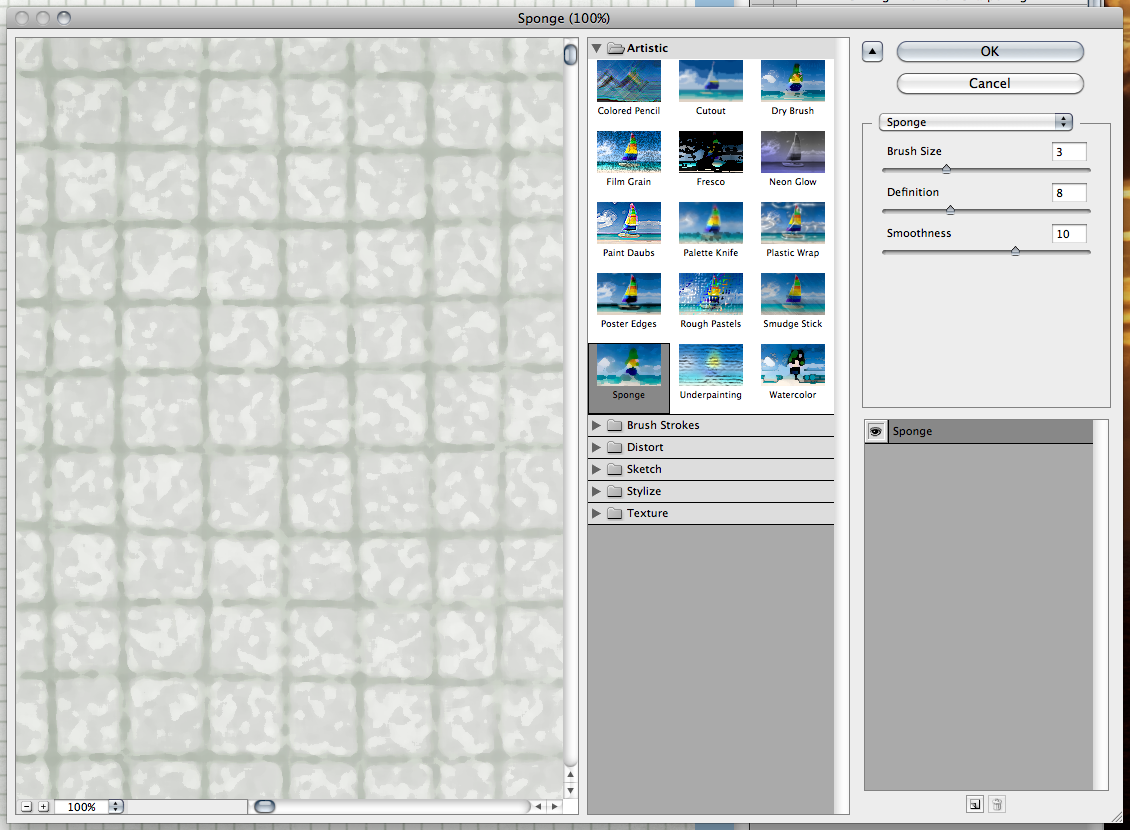
Play with each filters sliders to change any aspects – such as lighting, brush size and detail, stroke size and detail, and even definition.
When a filter is decided on, click ok.

Your paper will then change in your layers palette to the filterized version. :)

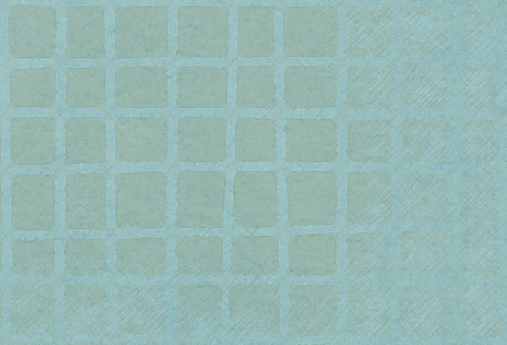
Go through the blend modes to blend it with the paper below. Play with the sliders for Opacity and Fill. Presto!  You have a new artisitc paper that you can use for your backgrounds, paper pieces, and strips. Here are some examples.

Colored Pencils:

CP1

Paper using Colored Pencils and a Multiply Blend Mode:

CP3

Sponge Filter:

Spg1

Paper using Sponge Filter and a Color Burn Blend Mode:

Spg3

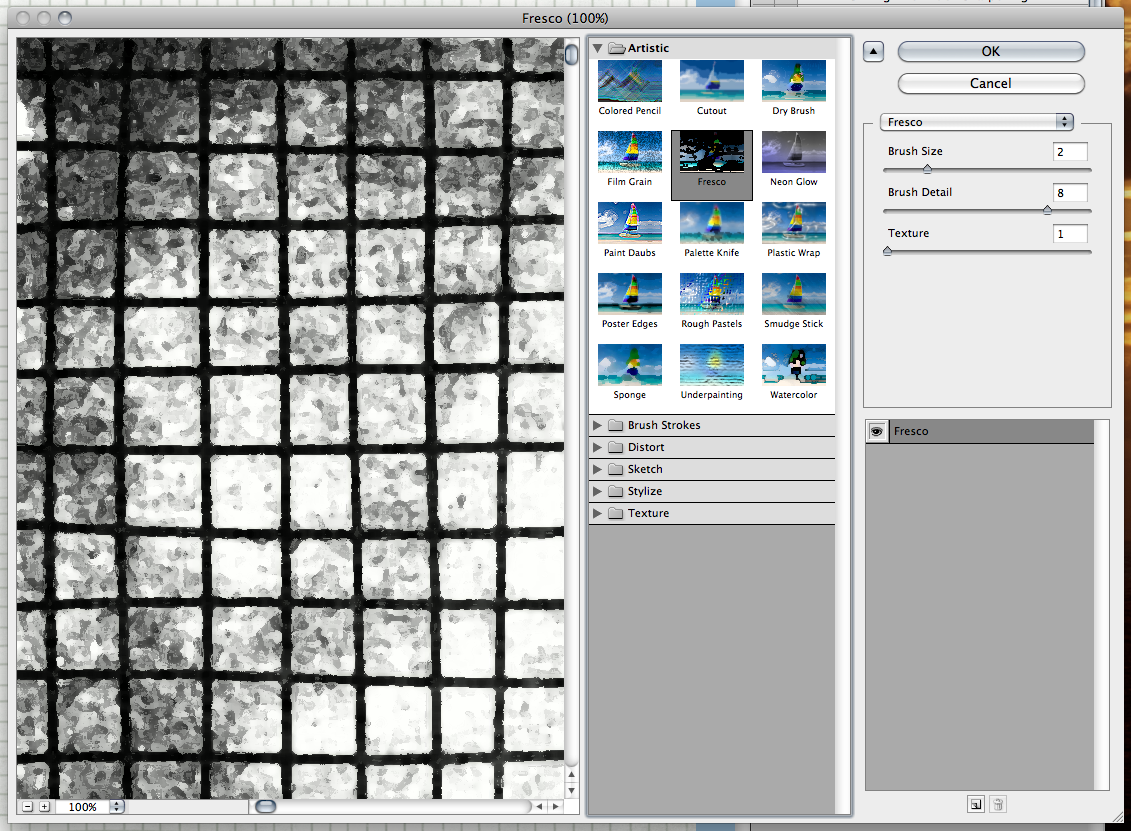
Fresco Filter:

FRE1

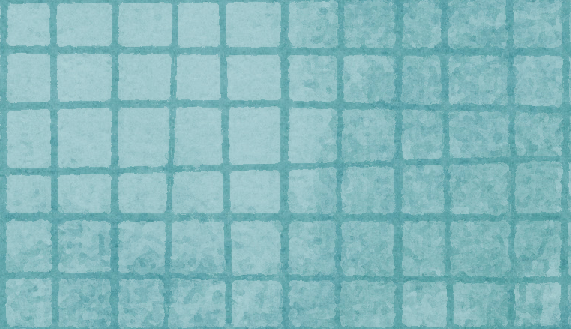
Fresco Filter with a Color Burn Blend Mode:

Fres4

Really easy, right!?  Here is a layout that Roxana (aka Roxanamdm) created. She said she used the Rough Pastels Filter on the brown flowered paper, but first deleted the brown color and then applied the filter, to keep just the flowers as the background is actually the wood grain paper. Now, the flowers kinda match the rub ons. Blended mode Normal and enlarged to 250% so the details are clearly seen when printed.

42-cousins-web

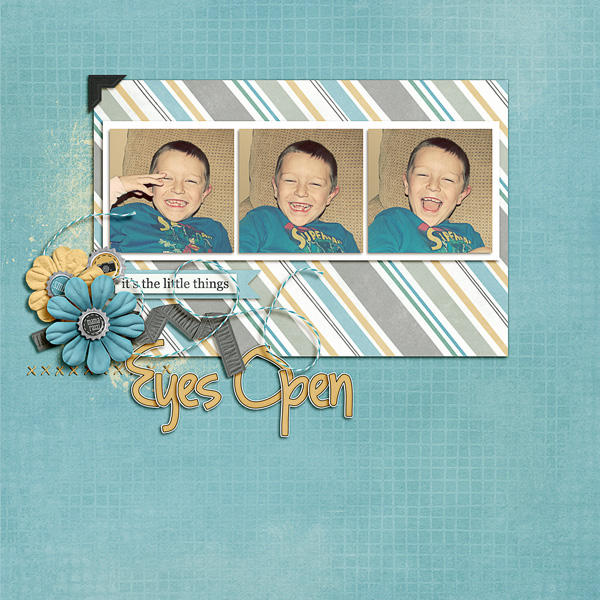
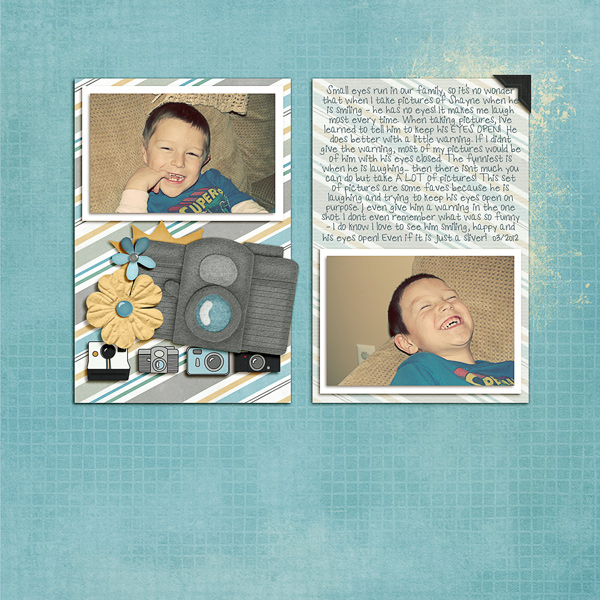
Here are the layouts that I created.

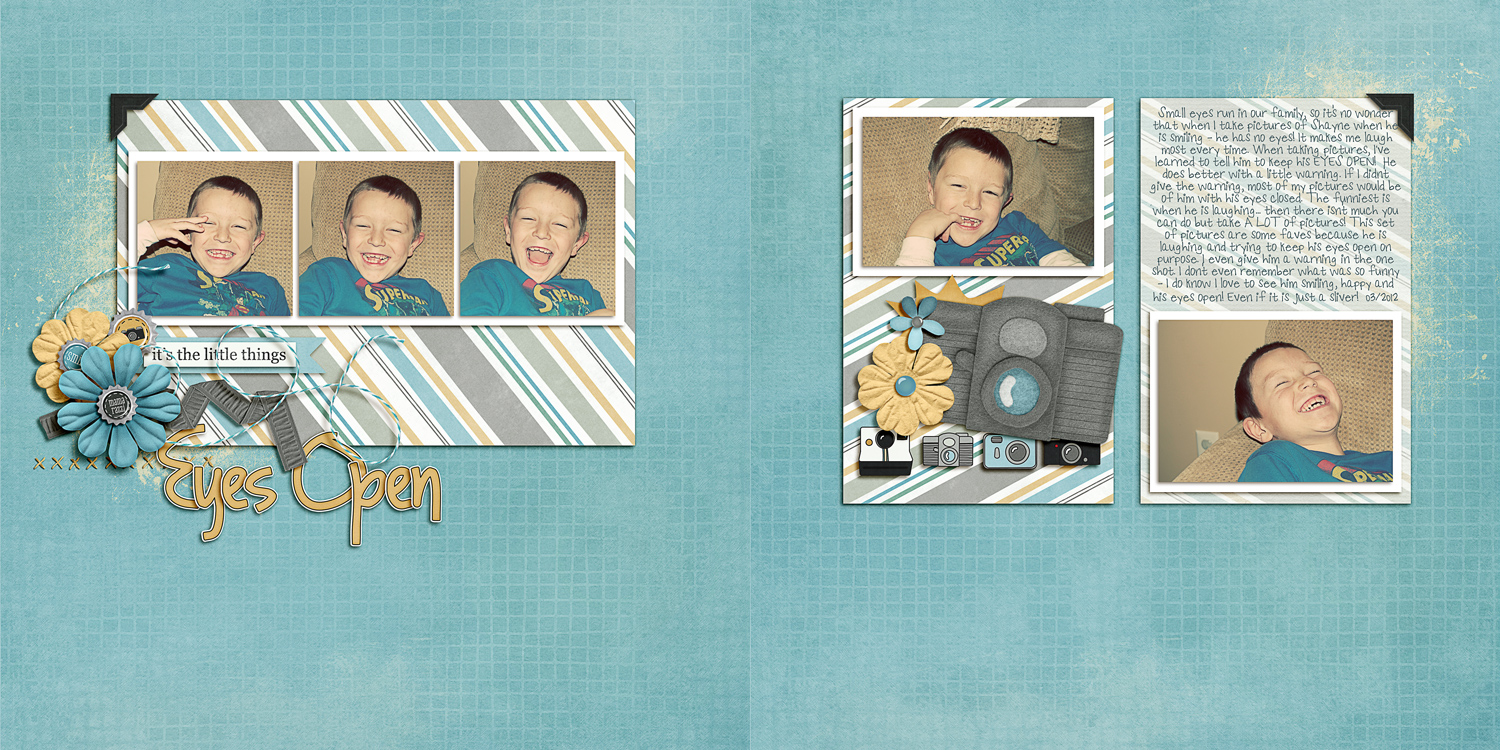
SO_CC_OSnp_Swl_SimpPhtCdTem1_WMWndyMsy_Hsg_GB3_EyesOpenMar2012_WEBDbl

SO_CC_OSnp_Swl_SimpPhtCdTem1_WMWndyMsy_Hsg_GB3_EyesOpenMar2012_WEBLft

SO_CC_OSnp_Swl_SimpPhtCdTem1_WMWndyMsy_Hsg_GB3_EyesOpenMar2012_WEBRght

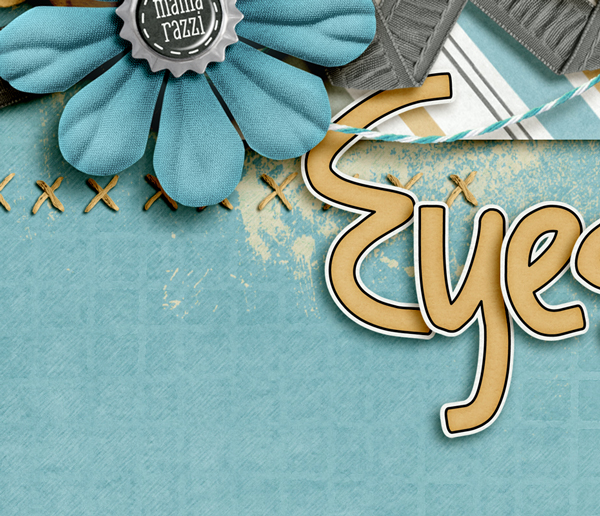
CloseUp_WEB2

Fun, simple and super cute. Give it a try!  Thanks for visiting today!

by Jenn

Fonts as Shapes in SBC 4.0

SBC 4.0 offers a couple fun ways to use fonts. Inside the program, you can use any font and fill it with paper by going to the Insert ribbon and then in the text category selecting shape. I love doing this to add some papers and outlines to my fonts. But did you know that you can also make shapes from fonts? Making a font into shapes will allow you to fill your font with photos AND be able to adjust them just the way you want them.  You probably already have some dingbat fonts installed on your computer and SBC4.0 had a few of them pre-installed as shapes to use. I have gone searching for a few additional dingbats that would be GREAT for using as elements or photo holders.

What to do to turn your fonts into shapes:

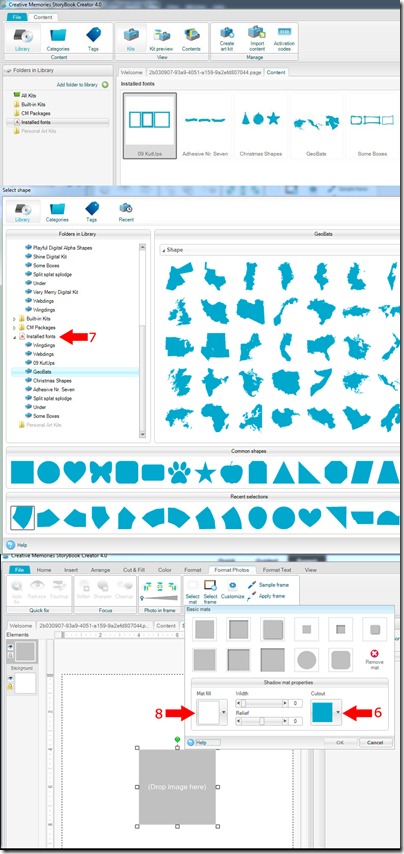
Make Font into a shape11) Find the fonts you want to make into shapes. Install them to your computer.
2) If you already had SBC 4.0 running, you’ll need to restart the program for the font to be recognized.
3) At the startup screen, select “Manage Content”. In the left hand column, you’ll see “Installed Fonts”.
4) Right click on that and select, “Add a font”. Scroll through your list to find the fonts you want to turn into shapes. Then select “Add” at the bottom.  [At this point, if you just want to use the shape, you can simply insert it by going to the Insert Ribbon and then Shape and find the font shape you want.  If you want to make it a live shape, able to move or scale a photo or paper inside it, read on.] 5) Insert an Empty Frame from the Insert Ribbon and select it.
6) Go to the Format Photos Ribbon and select “Select Mat”. Click on the Cutout button.
7) In the left hand column, select “Installed Fonts”. You should see the font you just installed. Select that
font and scroll in the font preview area for the shape you want and select it.
8) Before you exit out of the “Select Mat” pop-up window, change the “Mat fill” to transparent. This will allow your shape to have no background visible on your page.
9) Fill your shape with paper or a photo.

If you like horses, find a horse font. Birds, find a bird font. Install it, fill it with paper or a photo, and off you go. Find a frames font and fill those with paper and you’ll instantly have fun frames for any SBC+ project. Have fun playing. Here are some links to fonts you can try:

http://www.dafont.com/geobats.font
http://cleversomeday.wordpress.com/2…r-die-cutters/
http://www.fonts2u.com/dj-horses-1.font
http://bestdesignoptions.com/?p=10816

And here are some examples of pages made from our team using this technique:

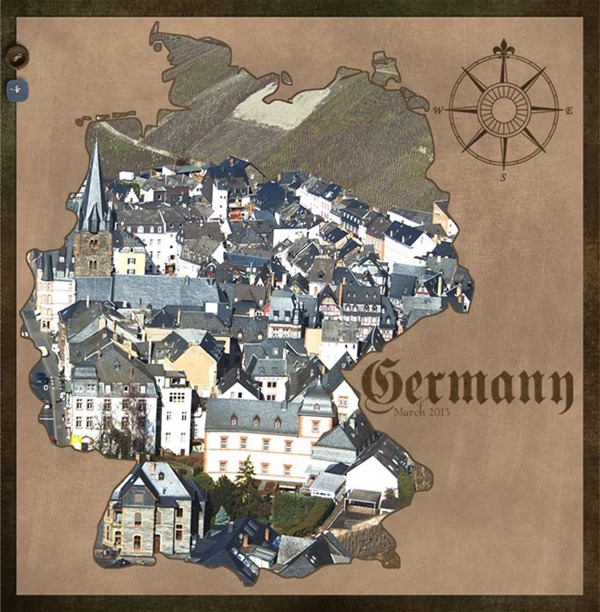
Here, I (aka lab130) used Chelle’s On The Trail and Geobats  font for my Germany shape.  I’ll use this as the title page for my recent trip to Germany. Germany

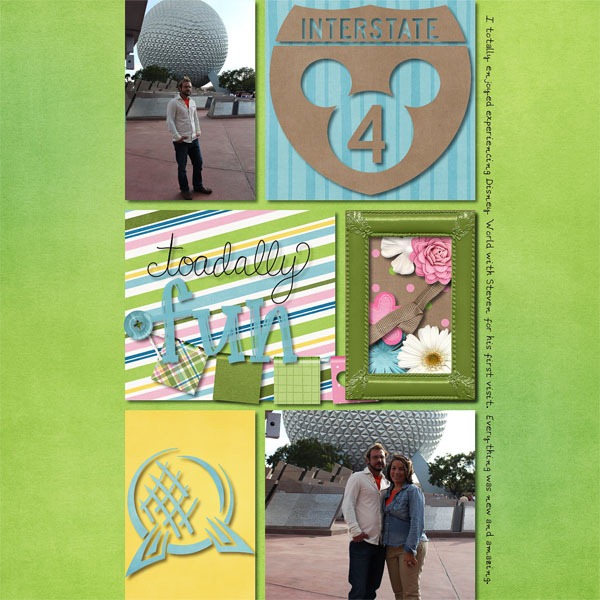
Here, Lynett  (aka Lynett_Rock) uses Disney Dings to make some great shapes.  I’m going to have to get this font for myself, I think!   The kit she used is Toadally.
epcotstevensfirstvisit_zps4c0f47da
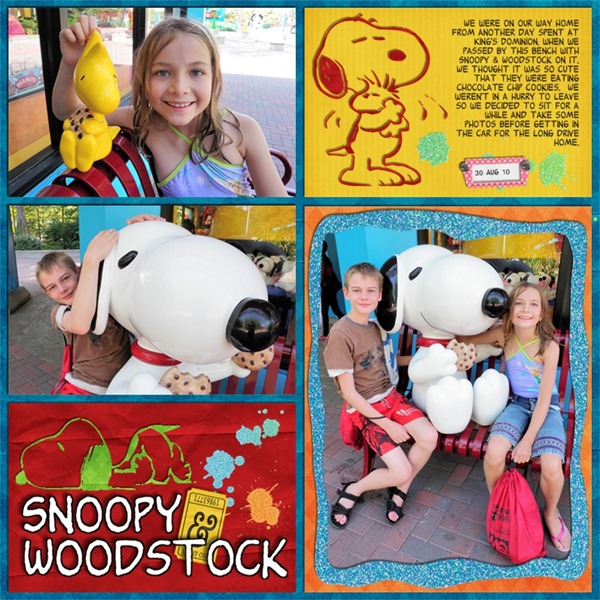
Here, Jan (aka QuiltyMom) uses her Snoopy Dings to make Snoopy shapes and fill them with paper.  Aren’t they cute?? She used Ticket to Ride and In the Pocket.

snoopy

Try out this technique and post your pages to Scrap Orchard with the hashtag #SBCfonts.  I’d love to see what you do with this!

by_Leslie

Tip: ScrapPin Basics


Hi Everyone!  It’s Jenn, aka jk703 here to give you a little explanation and some references for the new Scrap Orchard Gallery: ScrapPin. It is the new way to see so many more layouts, comment and love layouts as well as share the love of digital scrapbooking with other scrappers! Once you get the hang of it, the change will be ok. I know… it looks totally new, overwhelming and you are so confused, right!?  Don’t worry – let’s get some info to you and then the links to some of the tutorials and you will be good to go.

First, ScrapPin is similar to an old “cork board” – an easy way to share our digital scrapbook pages by pinning them up for others to see. It is the new gallery at Scrap Orchard, and allows you to upload a layout or by re-pinning a layout to one of your “cork boards.” Any pin that you see in the ScrapPin gallery can be pinned and re-pinned. Note that all re-pins and pins will include a path to the original source of the image and it’s creator.

You will have to join the ScrapPin gallery, either by signing up or through Facebook, Twitter, or directly at the site. Please note that you do NOT need Facebook or Twitter to sign up. After you have registered, you will want to begin pinning your layouts. When uploading a pin to the ScrapPin gallery, you will want to create a board. Boards are created by you, can be edited or deleted, and how you create them is entirely up to you. You can have boards sorted by person, season, designer, hybrid, or whatever you like. Each time you upload, you will have a choice as to what board you would like to add your new pin to. At this point, you will also have the ability to choose a category. The ScrapPin categories are Digital Scrapbooking, Hybrid Scrapbooking, Miscellaneous, and Photography.

Once you have  uploaded a pin to the gallery, your image is available to everyone to admire. They may like your layout, re-pin your layout and even comment on your layout. Liking a layout is simply saying that you like it. Re-pinning a layout could be compared to the old gallery’s Favorites. Comments are wonderful when received and many like to leave feedback for each other. In the old gallery, once you saved a layout to your favorites, you could go back and check them out whoever you wanted. Now, it is the same idea, you can go back and look at all the layouts that you re-pinned for inspiration. You can pin layouts, hybrid projects and photography. Posting in the ScrapPin gallery also allows other users to follow you and your layouts, selectively by board or all of your boards.

When uploading your pin, and you’ve created your board, you will want to enter the credits in for the items that you used to create your layout. Scrap Orchard required you to have some products that are currently in the store, so be sure this is the case (you wouldn’t want your layout accidentally deleted). As for your credits, all you need to list are the items that you used for your layout or project. Credits should include the product name and designer, for each item that you have used for your layout. The next important item are the ScrapPin Hash Tags. Hash tags are when there is a # symbol plus text/words, (example #chelle). When hash tags are used, they can tell you the designers, challenge, and even a description of the kind or type of layout with a quick glance. These are important for the ScrapPin Gallery search feature, and especially important for challenges. After the products and hash tags, you can include a link to the product if you wish. Just as a note, Chelle’s hash tags are #cc and #Chelle. We’d love for you to use them so we can find your layouts and leave you some love!

Here is a run down of all the tutorials that Kami and Mel have made available to help you use the new ScrapPin Gallery:

When I asked the CT what there favorite parts of the ScrapPin Gallery was… here are the answers that I received:

Kassie (kass_23) said that she loves the search box. You can find anything from a kit name to a designer. I also really love the “like” option :)
Brandy (superscrappinmom) mentioned that in the old gallery you had to go through about 10 different steps to upload a layout (including finding the file on my computer, typing in a title and credits, selecting which galleries it needs to go in, clicking through all the different screens, etc). Now I just have the pinning link on my toolbar so I just click it, click my layout, type credits, and click submit. Super easy! AND if I make a mistake and need to edit, I can just click the little edit button and do it once, whereas in the old gallery it had to be edited for each gallery you posted it to.

Hope that is some helpful information and explanations. We love to see your layouts in the gallery, so get on over and register today!

Thanks for coming by!

by_Jenn


Tutorial: High Pass Sharpening for Softening

Tutorial: High Pass Sharpening for Softening


Hello Hello on this last day of February!  I can’t believe it’s almost over already (yes, I repeat this in December too!) The time flies, and most times I wish for a pause button, and there are a few that I wish for a fast forward option!  It’s Jenn here, aka jk703, to bring you a quick and easy tutorial to soften things up!  I know when I have some pictures, I feel a bit exposed and stark. Well, when I feel this about the way a picture looks, I like to soften it up. For this tutorial, we are using the High Pass Filter to soften skin… Here we go…

1. Open an copy of your image, and create a duplicate layer. Here is my son, Colin.

soft1

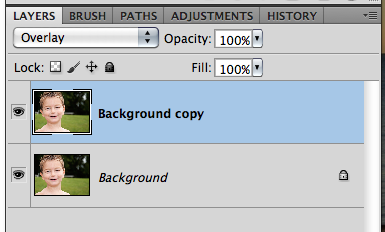
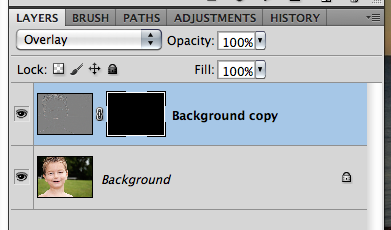
2. Change the Blend Mode to Overlay. Your image may become super saturated and bright.

Soft2


Soft3

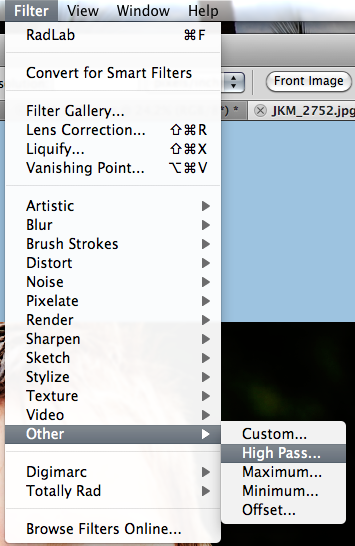
3. On the Menu Bar, Choose Filter > Other > High Pass.

Soft4
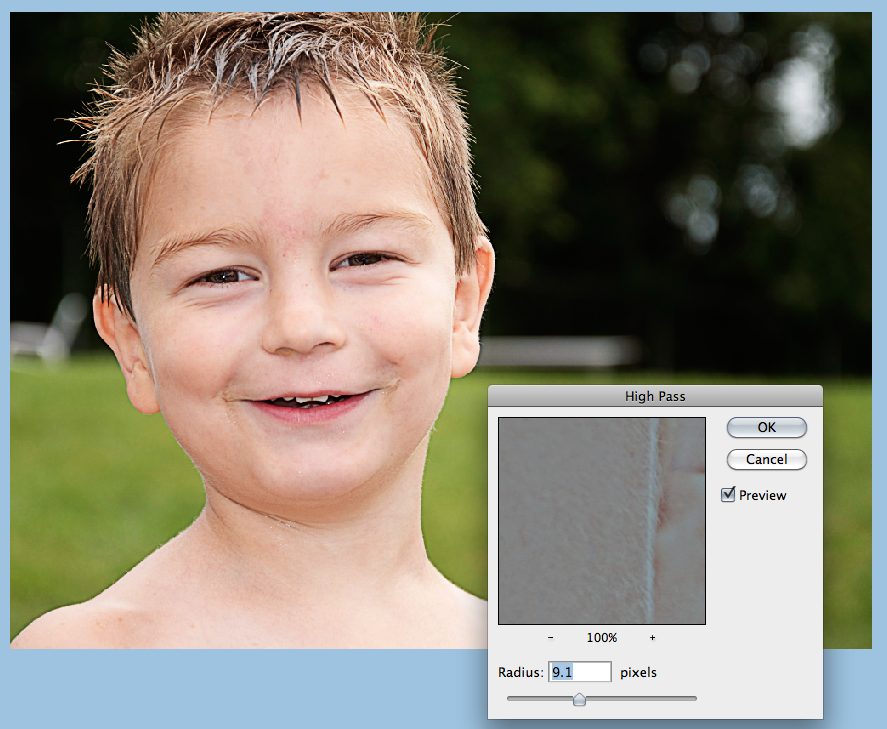
4. Move the slider to about 9-10 pixels. Your image will get really really sharp.

Soft5

5. Press Command + I (I like Igloo) or Control on a PC. This will Inverse the sharpness and make it super soft. So, your image will get a changed color appearance, and softening.

Soft6

6. Press and hold the Option Key (Alt on a PC). Click on the Add a Mask on the bottom of the Layers Palette (the square with a circle button). You should get a black mask box next to the overlay layer.

Soft7

7. Click on the black mask in the layer – you will see slight edgers around the corners to know you chose that box. (See above image, check out the corners of the black mask box).

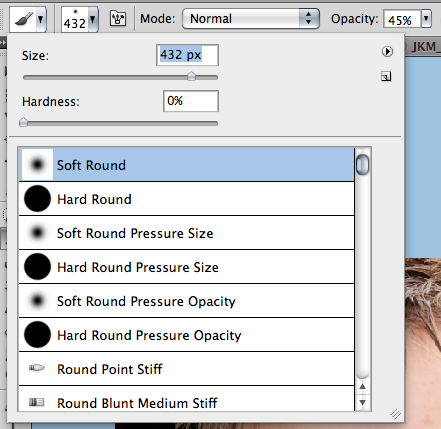
8. Click on the Brush Tool. Use a white, soft, round brush, and change the opacity to around 40-50%.

brush

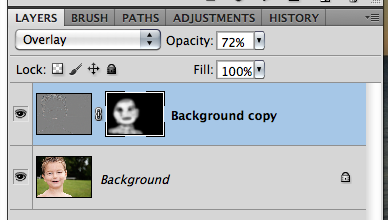
9. Brush on the masked layer and you will soften the skin.

Soft9

My after picture is just a tad softer than my original. It’s softens his skin just a little, while giving a little more sharpness to his hair and features.

Soft10

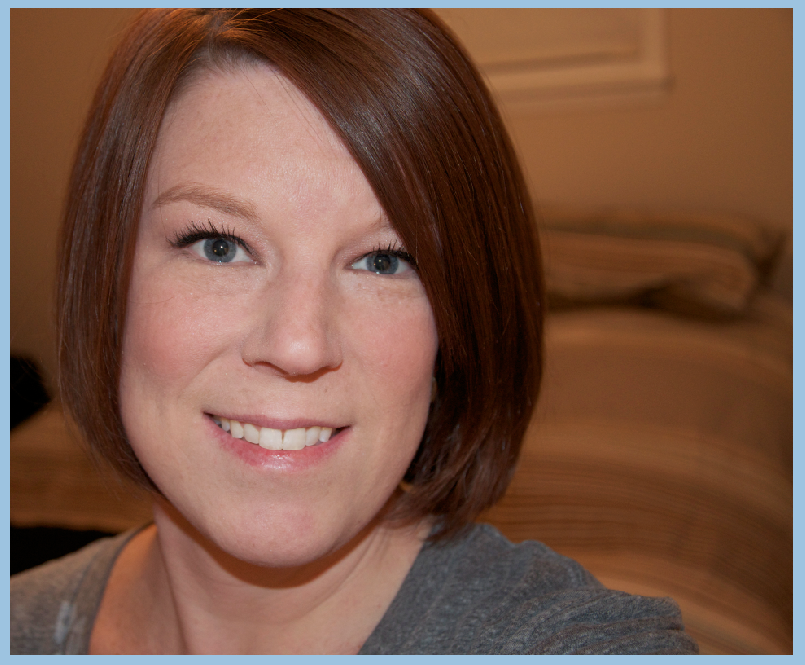
ok… Here goes. This is awesome for up close and personal face shots. Many people take “selfies,” which are pictures of themselves… and depending on the camera, this can be a super sharp picture of you. I wanted to show an up close and personal pic that I took of me… so… gulp, here is my before and after. The skin is the biggest change, and really makes me feel as if my bumpy skin, blemishes and wrinkles are a little less obvious.

Before:

BeforeSoft1

After:

BeforeSoft2

Here is what my co-CT members came up with for my tutorial!  They are pretty awesome!

Jennifer (jmljensen) used this before and after shot for her layout!  Isn’t it gorgeous?!

Jennifer Before After

She used Chelle’s Indian Summer to create this beautiful layout!  I love the title work and big cluster!

Jennifer

Leslie (lab130) used her nephew as her adorable subject. Here is the before….

original

and the after…

softening

Here is her page… Leslie used Chelle’s Blessings Kit and the wonderful Watercolor Brushes for this masterpiece!

Graham-2

That’s today’s tutorial!  Thanks for stopping by, and we hope you come back again!

by_Jenn

Tutorial Stroked Overlays for Paper and Photos

Tutorial Stroked Overlays for Paper and Photos

Hey everyone!  Happy Valentine’s Day if you are in the US!  This is Jenn, aka jk703, here for today’s tutorial for Stroked Overlays. This is to add a little edging around your paper or photo. A simple technique, yet it can add a little pop to the page. Let’s get started.

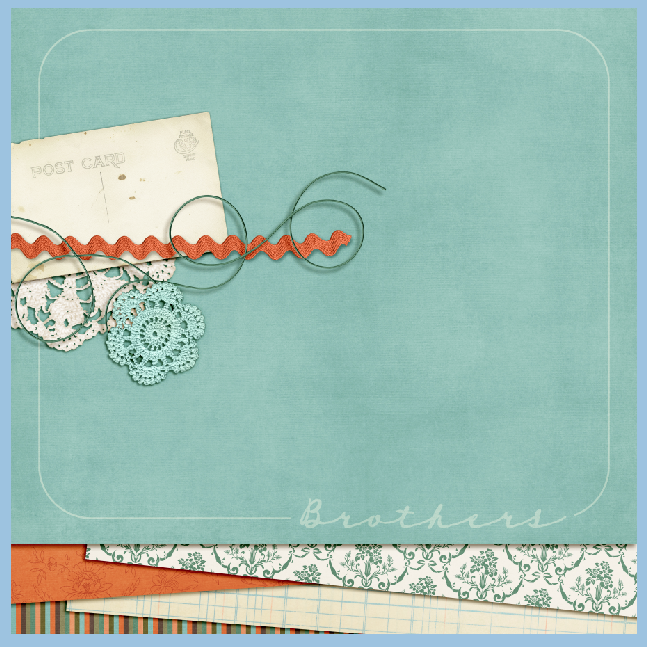
Here is my layout that I am working on. I’ve used Chelle’s Family Tree for my example.

Using the Shape Tool… Create a Shape… any shape you like. I chose a rectangle (and later I changed it to a rounded rectangle). Then click on the Shape’s thumbnail in the Layer’s Palette. This will bring the ants marching around your shape.

2

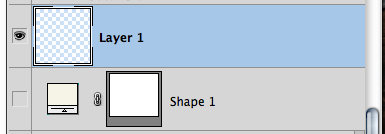
Create a new layer by clicking on the square with the folded edge that is on the bottom of the Layers Palette. If this is a paper, then you can hide the shape layer. If this is a picture, please leave the shape unhidden. 3
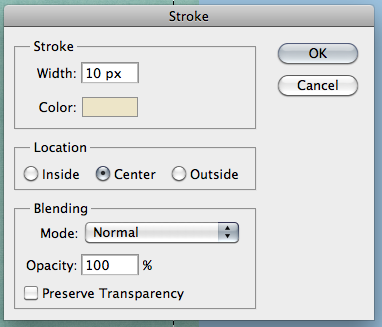
My example is for a paper, so I have hidden my shape layer. With this new layer selected, click on Edit > Stroke. A pop up will appear… you can make your choices for color, size and blend mode.

5

6

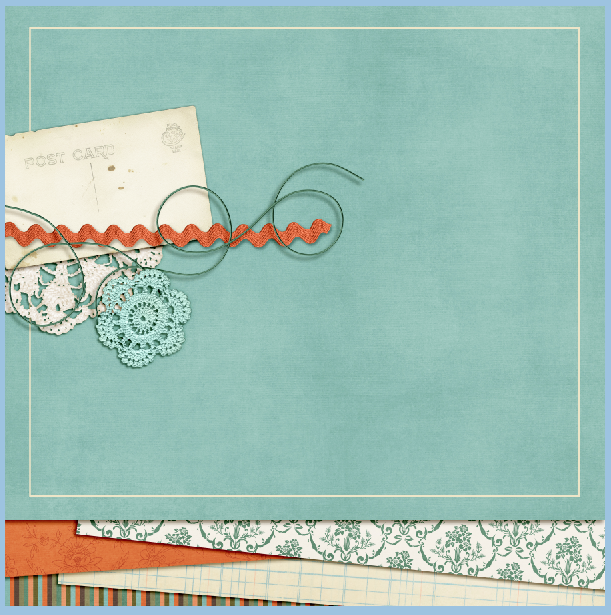
Once you click ok, press Command + D (Control + D for PC). You will have a stroke of your shape, super easy! (I will refer to this as the stroked layer) You can change it up to have rounded edges, blend modes, and colors.

7
Rounded Rectangle version:
8
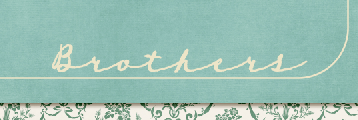
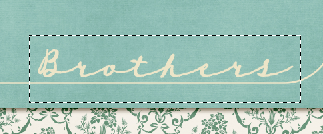
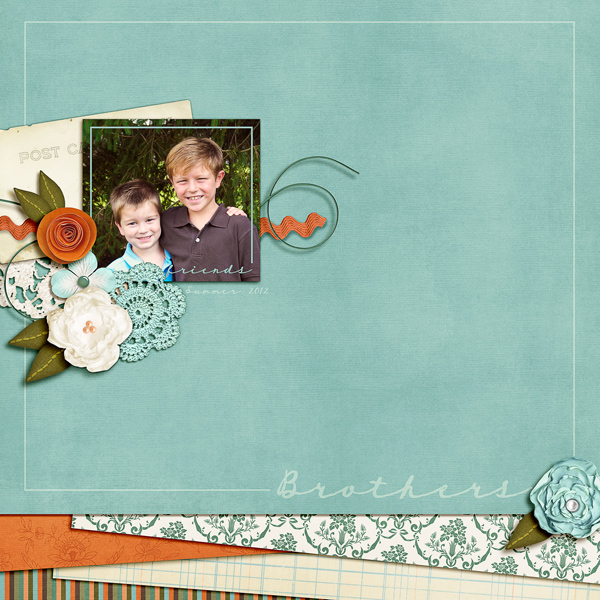
To go a step further, I’m going to add a title to my stroke. With the Type Tool, I’ve typed Brothers, and placed it above my stroked line.
9
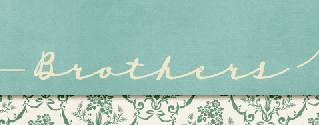
Next, in the Layers Palette, I’ve chosen the stroked layer I just created. Then I selected the Rectangular Marquee Tool. I’ve clicked and dragged a rectangle over the word I typed in – “Brothers.” Once I have my rectangular Marquee in the right spot; I let go of the mouse. I pressed the delete button and the part of the line within the rectangular marquee was deleted. Switching to the Move Tool, I was able to scoot my Type Layer down to fall within the line.
10
11
12Here is a paper overlay stroke… with a title mixed in, blend mode changed to Soft light. My font is TXT Longhand.
13
For Photo Overlays…
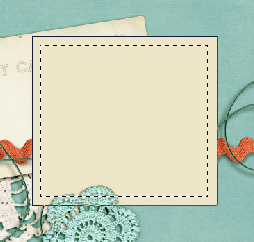
If you are working on a layer that is for a photo or something else that you want to outline don’t hide the shape layer. That will become your photo mask. Click on the shape’s thumbnail in the Layer’s Palette to get the marching ants. Create a new layer, and then click on Select > Modify > Contract. A pop up menu will appear. I chose a contraction of 50 pixels, and click ok. Add the stroke as stated above. You will have a stroke on the inside of your photo mat. You can follow the same steps to remove part of the stroke to add words, or maybe a date.
14
15
Here are some pages that the CT did using this tutorial!
Leslie (lab130) said she used the smudge tool to make the lines imperfect. Blend mode is Overlay. She used the Back 2 School Bundle by Chelle for her layout.
LABeahm_stroke-tutorial
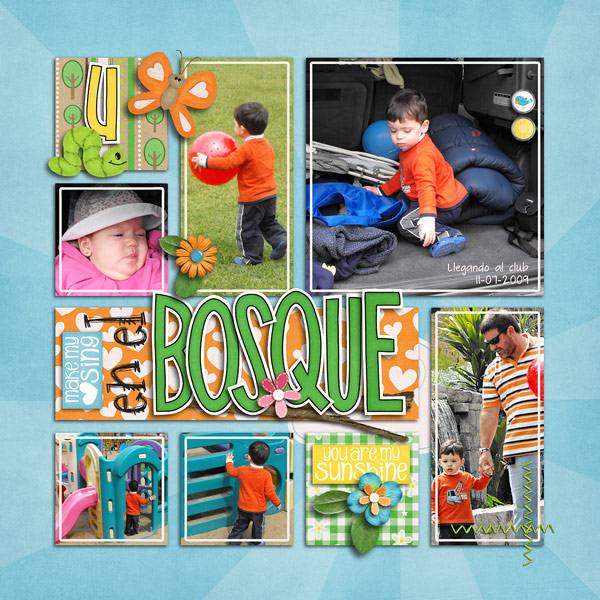
Roxana (roxanamdm) used Leafy Treetops and Scribbles 2. She put strokes on the pictures, used blend mode of Normal and 100%.
22-bosqueleft-web
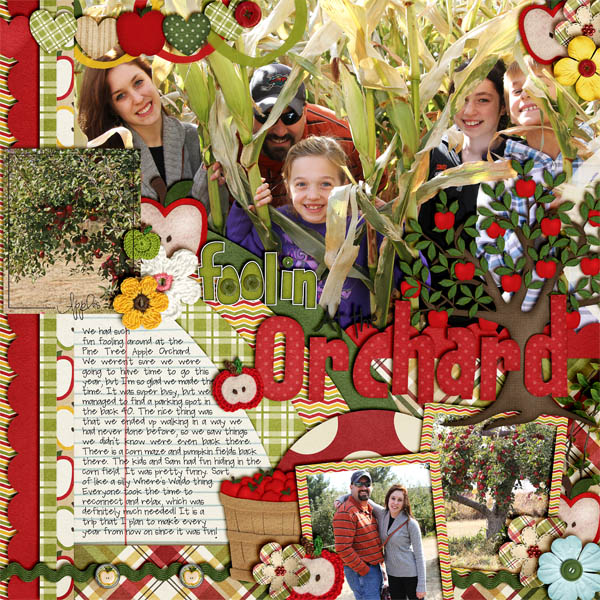
Jenn (jennshultz) tried out the tutorial and made this page using Apple of My Eye from Chelle. She made a stroke on the smaller picture, and added the word Apple.
foolinattheorchard
And here is my final layout. I went back and forth with the rounded edges and couldn’t decide. For now, I left the straight edges and think it looks nice with the angles of papers on the bottom of the layout!
SO_CC_FamilyTree_BrothersFriends_Sum2012_txtLonghand_WEB
I hope you’ll give it a try! It’s fun and once you give a try, it will be easy too! Have fun! Thanks for visiting, and we hope to see you again soon!
by_Jenn
Blend Mode Tips and Comparisons | Digital Scrapbooking Tips

Blend Mode Tips and Comparisons | Digital Scrapbooking Tips

Hi Everyone!  Hope you are all doing ok!  It’s Jenn, aka jk703, here from the super cold (for us) this week!  It’s the coldest we’ve seen in a while in New Jersey, so I’m happy to stay bundled inside and under a few extra layers of warmth!

With layers in mind, we are going to take a peek at Blend Modes and how they compare to each other. First, Blend Modes are ways that we can change the look of our layers. They can blend layers together to create new looks and effects. There is a base layer and then the “painted or edited” layer. Blend modes will let the layers own, highlights or shadow, details to show through from the underlying image.

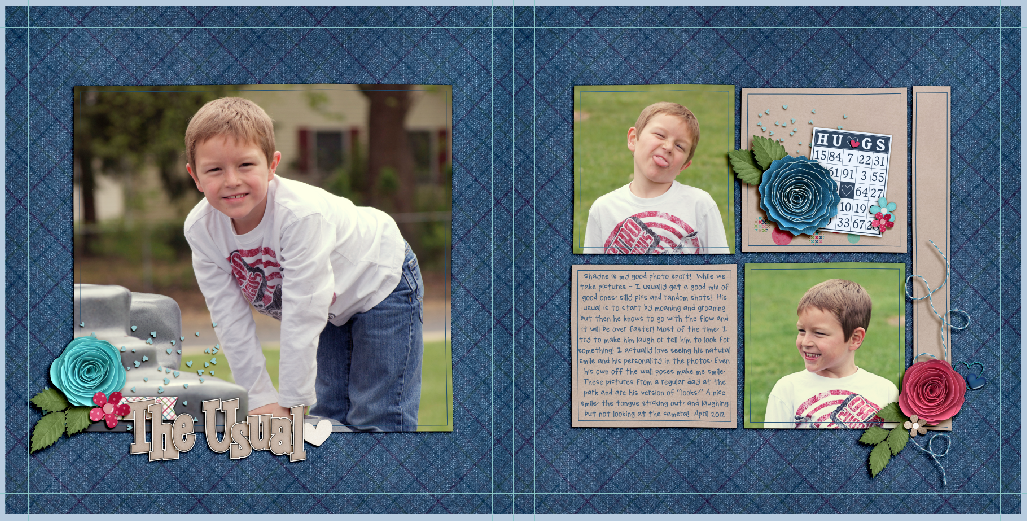
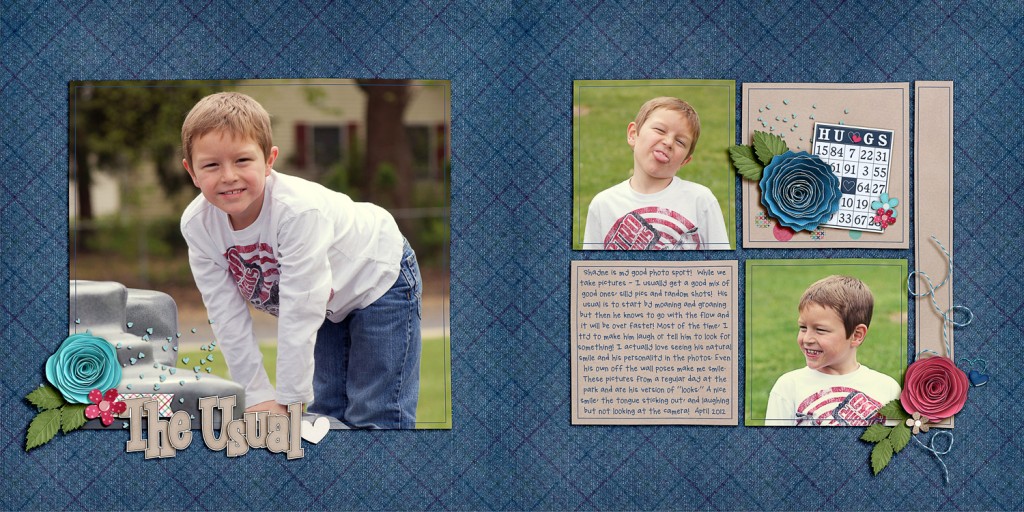
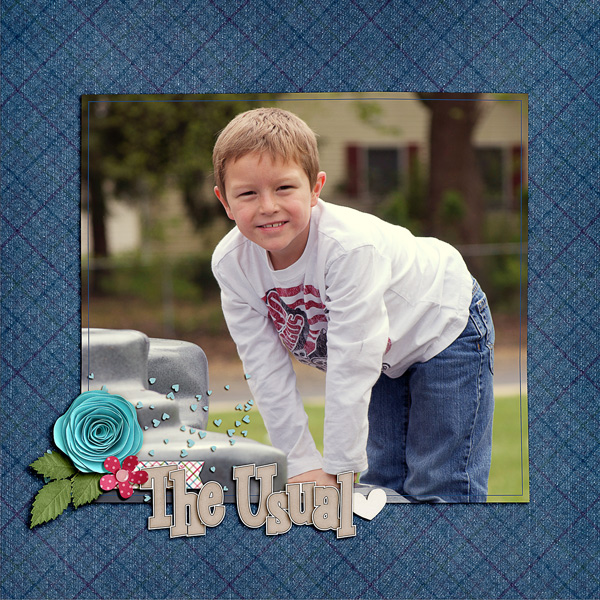
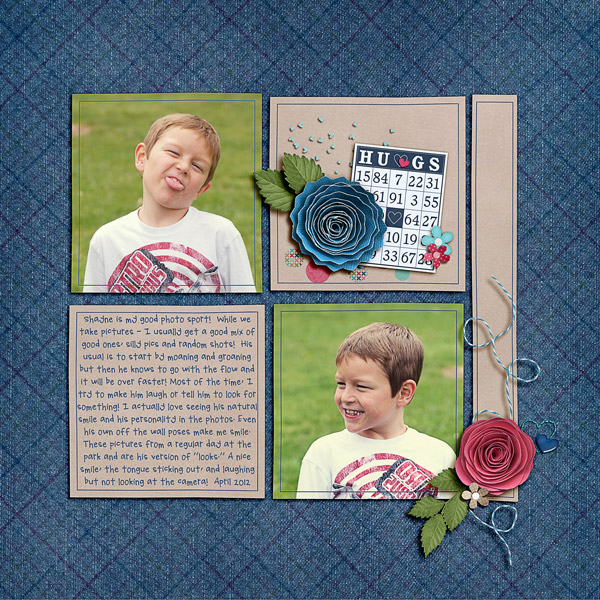
For this post, my base layers will be “Normal” and at 100% fill and 100% opacity.  Combining the two layers can create some beautiful effects, and enhance your papers, ellies or photos in digital scrapbooking. Here is my layout that I created. My background is actually a combination of blend modes and papers. I used Chelle’s Love Grows Bundle for my “The Usual” layouts.

Blend1

Here is the list of Blend Modes that are available to you:

Blend3

Here are some easy explanations for my favorite blend modes – from my point of view and usage.

  • Normal = no change or blending
  • Darken = replaces pixels that are lighter than the original layer. If they are lighter, they are replaced.
  • Multiply = takes the base layer color and multiplies it to the blend color layer, which makes darker color. Great for overexposed images.
  • Color Burn = darkens the base layer color to reflect the blend color layer. White has no effect of this blend mode.
  • Linear Burn = darkens like Color Burn, but takes away the brightness.
  • Lighten = chooses either the base color or the blend color, whichever is lighter.
  • Screen = color from both layers are multiplied by the inverse colors. The result color is always a lighter color. Screen is the typical fix for an underexposed image because it lightens it.
  • Overlay = applying a multiply or screen effect depending on the base color. Great for enhancing colors.
  • Soft Light = Darkens or lightens colors, depending on the blend color layer. It is like shining a diffused  or muted light on the layers.
  • Luminosity =  lightness is changed to that of the blend layer while preserving the base colour and saturation. Great for blending.

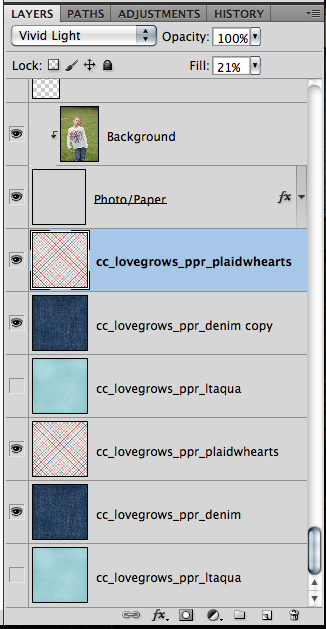
Currently, my paper layers look like this… As you can see, I have a lighter plaid paper on top of the denim paper. I also have a teal paper under my denim paper. This is because I was indecisive when choosing my final background. I decided that the dark denim looked best. For this blog post, the teal paper does not affect or change the color of my background as I have turned off the viewing of those 2 layers.

Blend2

Right now, you can see that my light plaid paper has a blend mode of Vivid Light chosen, and a fill of 21%. A very important tip:  lowering the opacity of the layer will weaken both the layer and its effects. By lowering the layer’s fill, it will weaken the layer without affecting the appearance of the effects. I see what I like when I create, but many times I choose Fill over Opacity. :)

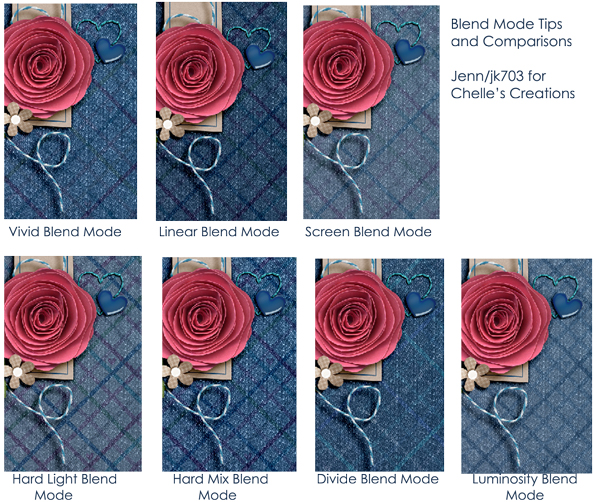
BlendModesChelle1.24.13

Here are my final pages:

SO_CC_LoveGrows_SwL_KeepRealDblTmp_TheHillary_ShayneUsual_Apr2012_DblWEB


SO_CC_LoveGrows_SwL_KeepRealDblTmp_TheHillary_ShayneUsual_Apr2012_WEBLft


SO_CC_LoveGrows_SwL_KeepRealDblTmp_TheHillary_ShayneUsual_Apr2012WEBRght


Here is what the CT did with their blending!

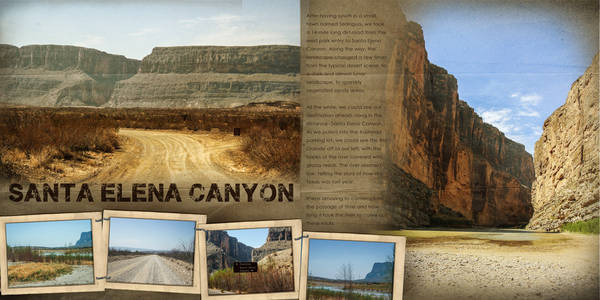
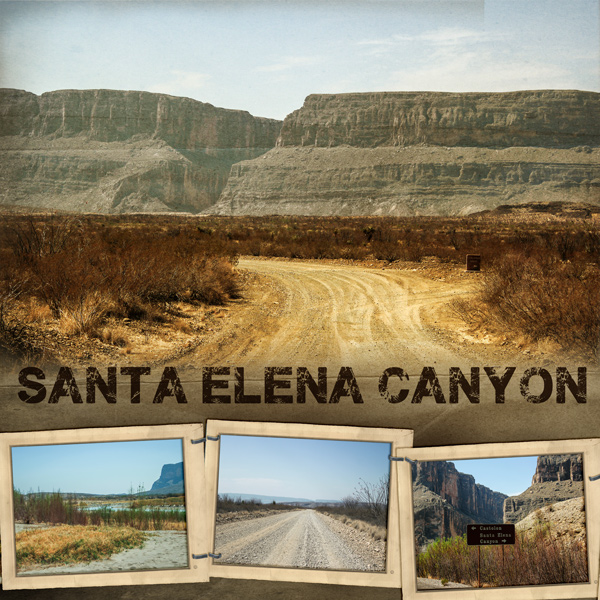
Leslie (lab130) created this wonderful photo stunning page!  Look at that! She used Chelle’s ‘On the Trail‘ paper and ‘Letters from Home’ frames and staples. Here is how she described her layouts with the blend modes – “The large photos are hard light blended. The smaller photos are multiplied and the opacity of the multiplied photo is reduced to about 50%.”

Chelle-Tutorial-Big-Bend---

Chelle-Tutorial-Big-Bend-le

Chelle-Tutorial-Big-Bend-ri


Roxana (roxanamdm) said that she Used 3 layers for the background picture to make the kids pop a little from the photo. The opacity of the layers were as follows: 1-overlay 30%, 2-soft light 30%, 3-normal 80%. I believe she used Chelle’s Make a Splash kit.

8-piscinaleft-web_zps1847a837

One last tip!  When you want to scroll through the blend modes for a specific layer, there is an easy way. Just choose the layer that you want to play with int he Layer’s Palette. Next, click on the Blend Mode list in the top left of the Layers panel to select a blend mode. Then press Shift + (plus key) to cycle down the list and Shift – (minus key) to go back up.  This little tip is a time saver!

Have a great week everyone!

by_Jenn

Tutorial: Swiss Cheese and Cut Outs \ Digital Scrapbooking Tutorials

Tutorial: Swiss Cheese and Cut Outs \ Digital Scrapbooking Tutorials

Good Morning everyone! Happy Thursday!  I’m Jenn, aka jk703, here to bring you an easy tutorial for the “Swiss Cheese Effect,” aka Cut Outs.  This effect is basically when you have more than two papers layered on your layout and you cut a shape or word out of the top most layer.  Add a Shadow, and it offers up a really cool way to change up a layout. For my example, I used Chelle ‘s Back 2 School kit and Add On, and a rarker serif. Here we go…

Step 1:  Use the Type Tool or the Shape Tool to make the shape that you want to cut out. I’ve started a layout, and used the Text Tool and wrote a word on top of my patterned paper. I will be cutting out words so the solid red paper will show from under the patterned paper. Here is what I have:

Swiss1


Step 2:  In the Layers Palette, click + Command (or Control for Windows Users) on the Thumbnail for your cut out. You will see marching ants, like these:

Swiss2


Step 3:  Again, in the Layers Palette, find the paper that you need to delete for the lowermost paper to show through. For my example, I need to delete the shape mask that my white paper is clipped to. Once you have the layer, press delete. You will see the paper underneath. Press command + D to deselect and remove the marching ants.

Swiss3


Step 4:  Add shadowing to your cut out to make it look a bit more realistic. That’s it!

Swiss4


Here is what the CT made using this technique.

Jenn used Home for the Holidays Bundle for her layout!  The swirl cut out adds some fun and movement! JennSwiss


Ronnie used Chalked Boards, Chalked (Serif)Chillin’ & Grillin’E I E I OLeafy Treetops, Lovin in the OvenStitch Me Up and Under Construction. Wow!

RonnieSwiss

Jenn V also created a cool page. Check out those musical notes. She used We Wish You a Merry Christmas,

Mark My Words, Stamp Masks, and Stitch Me Up: Frames.

JennVSwiss

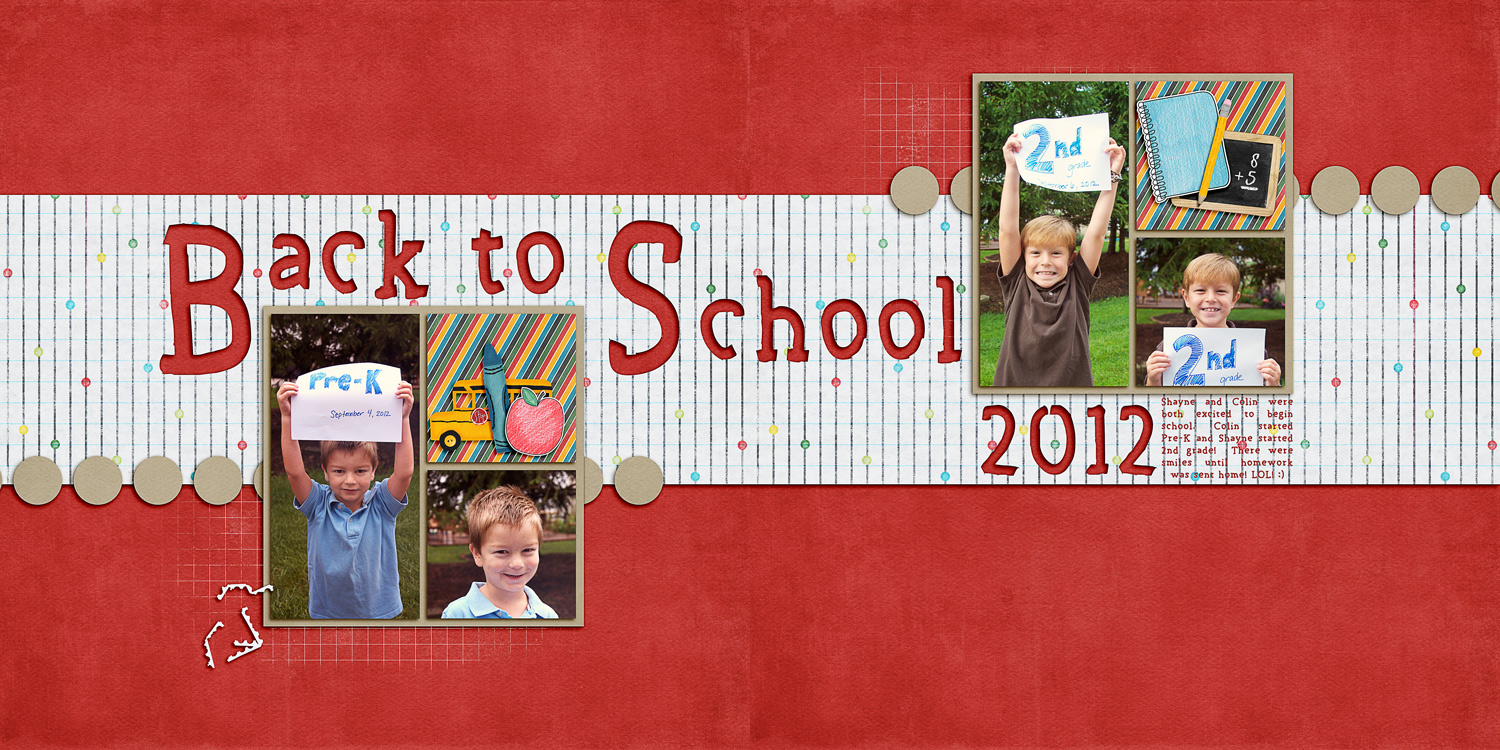
When I started my layout, I was using a different title… so my page and title work changed. I decided to cut out my whole title across the page. For my album copy, I put a little space between the “c” and the “h” so it wouldn’tget cut off when printed. Here is my final page:

SO_CC_Back2School_SwlPhotMasks_LDMarkerSeif_BoysSept2012_WEBDbl

There you have it. A pretty easy way to try out a new technique on your layouts!  Have fun, and thank you for visiting!

by_Jenn


Watery Alphas and Fonts | Digital Scrapbooking Tutorials

Watery Alphas and Fonts | Digital Scrapbooking Tutorials

Hi Everyone! Hope you are enjoying the last few days of the year; I always think it’s crazy how fast each year passes!

Today, I’m going to show you how to add a fun, if not watery, technique to your stash of Chelle’s alphas, or any fonts that you have. For my technique today, I’m using Chelle’s CU Splats, which give a great watery spots to add to your layout. Then to add a little spray or texture, you can use so many of her other products, such as the CU Texturizing Brushes 2, Stains and Spills, or even the CU Spritzers. So many options!

When I’ve used this technique in the past, I work in a separate file and then duplicate my final layers into my working layout. This way, I don’t mistakenly ruin a part of my layout, and it makes it easier to see my letters and layers.

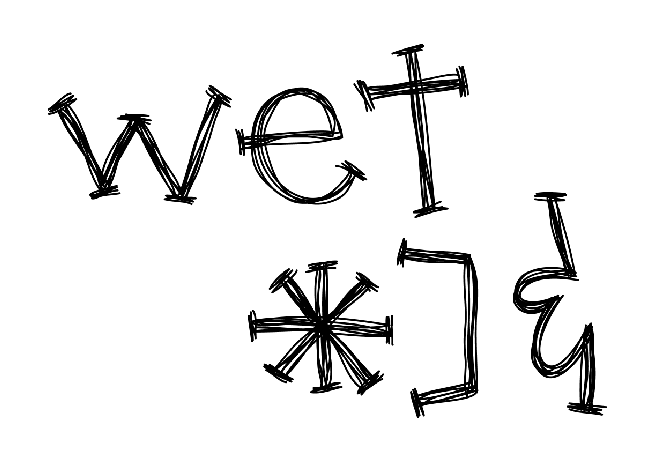
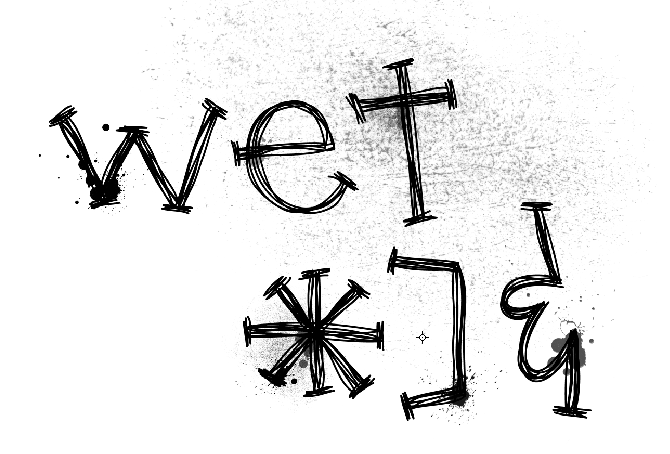
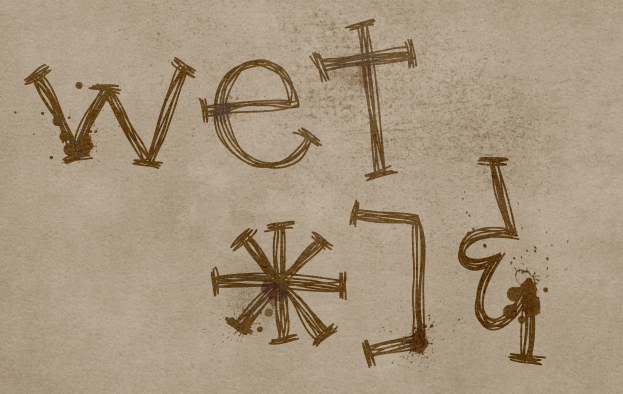
Here is my example, plain. I used Chelle’s Scribbles alphabet.
Wet1

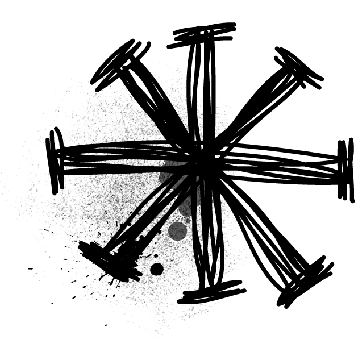
Now, I look through my stash of splats from the CU Splats and I’m going to focus on the asterisk. I’m looking for a splat that will work with the shape of the symbol (or letter). Once I bring it into my layout, I make size it smaller. You will be making the splats pretty small, so they go with the size of the letter or symbol.
Wet2

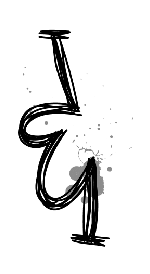
You can focus on corners, or edges. Try using long splats on long edges, or even blobs on points. Water can bleed and splash in any direction or multiple directions. Play with the blend modes and the opacity when working with the splats. You can see how they react with the layers below and the colors.
Wet3Wet4

Here is a mix of splats, spritzes and textures to my original example.
Wet5

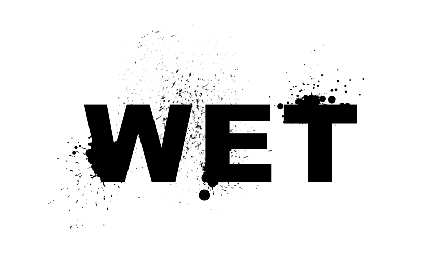
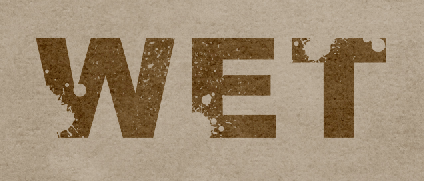
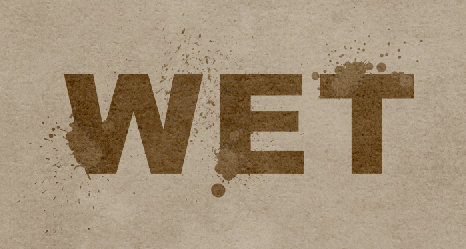
You can also use this technique on fonts. Here is “wet” in Arial. Next to the plain image is my “wet” image with splats and watery effects.
Wet6 Wet7

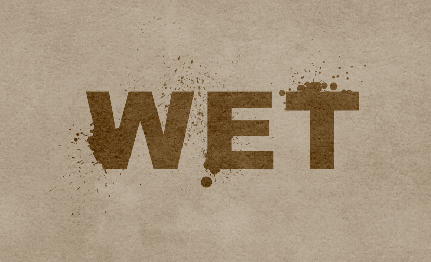
Here is what my image would look like on a background paper (from Home For the Holidays) and using two different Blend Modes.
Wet8

Wet9

Another really cool way to change this effect is to delete a selection. I merged all the splats and watery drop layers into one layer. Then press Command (Control for Windows) and click on the splats and water drop layer thumbnail in the Layers Palette. The layer will get marching ants. Next, choose the text layer, and press delete. Here is what happens:
Wet10

Another idea would be to duplicate the splat and watery drops layers. Change the blend modes on each layer, delete from the original word, and play around. Here is an example where I merged all the watery spots, then duplicated the layer. I then deleted the watery spots from the word, and applied another blend effect to the other layer. Mix and match and see what you end up with.Here is what I ended up with for the Typed Font and the Scribbled alpha…. Pretty neat, right?!

Wet12

Wet11

Here is what the CT came up with… First, Jennifer (jmljensen) created this page using Zoopendous and Apple of My Eye.

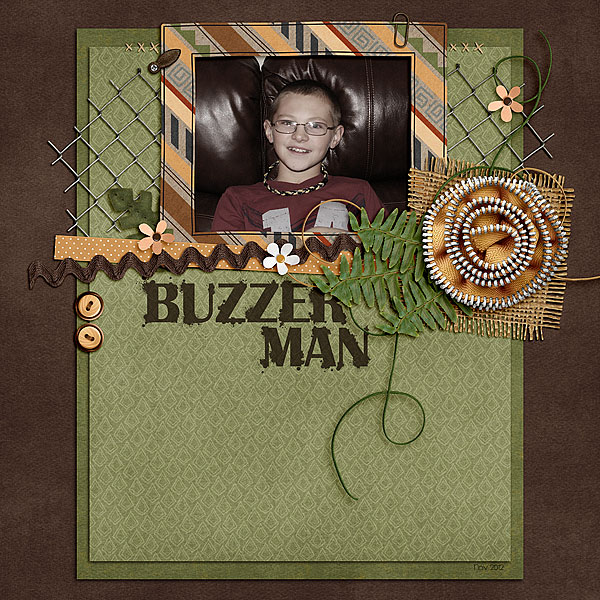
Jennifer_Wet Typography

Ronnie created her sticky page using many parts of Chelle’s Creations products – such as All Hallows Eve Staples, PrimarilyPhotoStacksCU Splats, and Rainbow Neutrals Stiches.

Ronnie_WetTypography

Give it a try… it is a fun technique to use and you can add a little oomph to your pages!

Thanks for stopping by – hope to see you again!

by_Jenn