Sneaky Peek Winner Announced | Digital Scrapbooking Freebies

Donna Penn says:
September 11, 2012 at 9:22 am • Edit
Shared on Facebook. Thanks for the chance to win.

Congratulations Donna! You are our winner. Please e-mail Chelle for your coupon code. Sari

*************************

Hello everyone!
Warm days…cool evenings.  Savoring the remnants of summer…coming soon: Indian Summer

Remember we have NEW RULES!!!
You can enter to win by sharing the sneak peek. You can…
1. share it on your blog
2. share it on Facebook
3. share it via twitter
4. share it on Pinterest
Remember, since the winner is chosen using a random number generator, be sure to come back and know in a new comment when you’ve done each way.
Deadline: 11:59 PM EST Wednesday.

Creating & Saving Siggys | Digital Scrapbooking Tips

Hello everyone!  Hope you are enjoying September already! Whenever the seasons change, I always see new signatures (aka siggy) popping up in the forums!  It is always a reminder to grab some pre-made ones or get cracking on a new one for myself! So, today I’ve got some tips today on how to scrap a siggy, and save it for the forums. It’s a bit photo heavy, so let’s get to it! For my siggy example, I used Chelle’s wonderful Family Tree – it had just the colors I wanted.

When I usually scrap siggys, I scrap like I regularly do for a cluster on my page. I do this so I am not re-sizing to an extremely tiny size. Another reason to scrap large is so you can see your shadows and how they will look. I know the first time I made a siggy, I made my canvas the size that my signature had to be – I think it was 400 x 250. It was hard to scrap for that size!

OK… Once my cluster is complete, I add my name last. Here is what I would see.
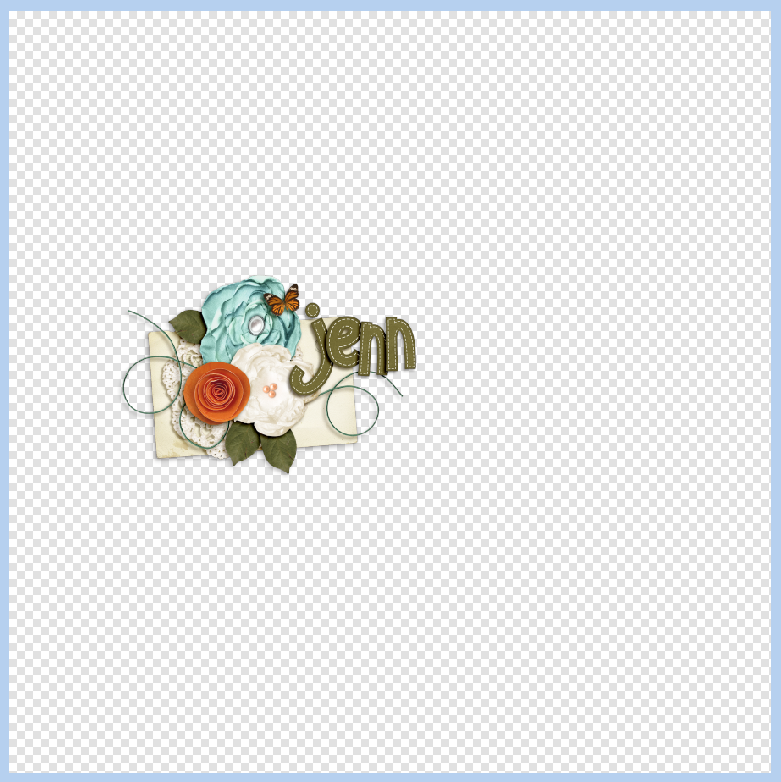
 From the Tools, I’m going to choose the Crop Tool. It is the one that looks like a box.  After this tool is chosen, I crop to just outside my cluster. Make sure not to cut anything off, especially splatters or paint!  

Here is what my cropped signature looks like:
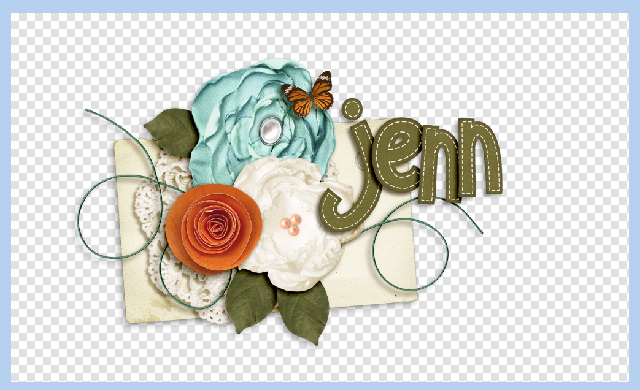
Next, I’m going to save it so I can upload and use it in forum settings. First, click on File > Save for Web and Devices:
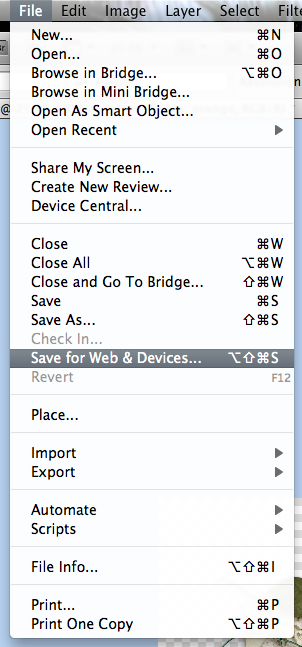
Next, a pop up screen will open. Toward the left of this screen there is a lot of information – some important. You can see that my signature is approximately 2014 x 1203 in pixel size, and my image right now is a JPEG, with a high quality. This is way bigger than any forum would allow!  First… here is what you are looking at:
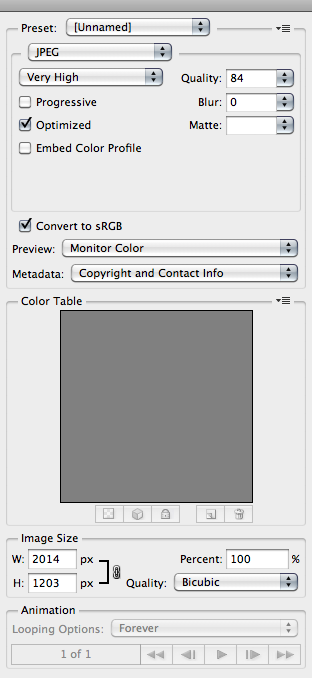
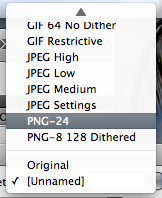
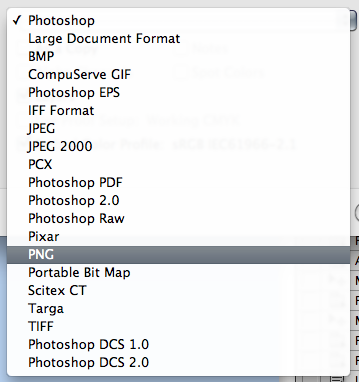
For signatures, you would like to have a transparent background. This is not important, but based more on what you prefer and what you find pleasing. If you have a transparent background, your signature will look just like what you see on the checkered box above. If you prefer JPEG, your image will have a white box where the grey and white checker box pattern is. Purely preference. I decided to choose PNG from the presets menu.
Next, I’m going to change my pixel size. The forums you post in should advise you of the signature size you are allowed in their guidelines – each one is different. For this example, I decided to make my signature 450 x 269. The 269 came about by itself. The lock feature will keep the sizing intact. See the pixel sizes and lock feature here:

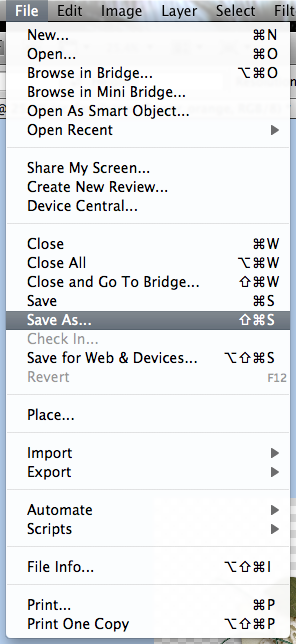
Now, you are ready to save your file. Click on File > Save As and save as you wish. Make sure to have the file extension as you want – PNG, JPEG, etc.
            

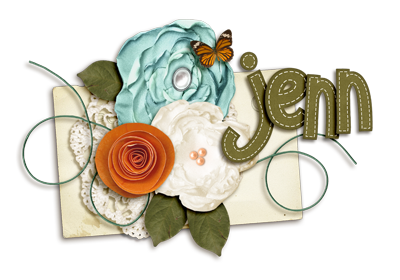
Here is my final signature (I changed the size to 400). All I would add would be the teams that I am creative for, as well as my own blog. Hope that helped.
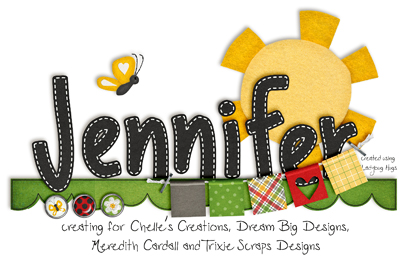
Here are a couple signatures that the CT made. Jennifer (jmljensen) made this awesome and bright siggy!
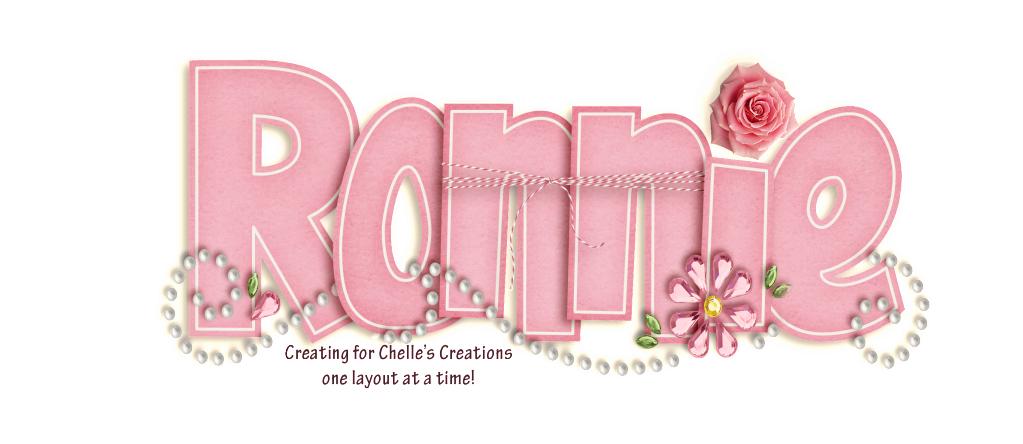
Ronnie (ronnie_texas) made the prettiest signature:
Have a great week and I’ll see you again at the end of the month!  Thanks for stopping by!

Perspective | Digital Scrapbooking Words on Wednesday

Hey everybody! Hope your Wednesday is going G-R-E-A-T! This week’s topic is perspective. I was talking with Chelle last night and we were brainstorming perspective. She gave these ideas: What if your “things” could talk to you? Your purse: “Would you quit stuffing things in me? I am getting SO overweight? Besides, if you put less in here, then you could FIND your keys.”Your paypal account: “Holy Moses! You are working me to the BONE this week. Look at all these fantastic things you’ve found.”Your alarm clock: “Hey. Quit hitting me. It’s not my fault you went to bed at _____. Come on. Get up. You’ve got a busy day ahead of you. If you don’t hurry the kids will miss the school bus.”So, if you nightstand could talk, what would it say? How about your cell phone? Remote Control? Garage Door?


So I set out thinking about other ideas during my workday. What about plants, what do they think? “Blah Blah Blah, she says the same thing everyday…. over and over again. Does she think I’m deaf or have Alzheimer’s? Here comes that woman with the mister (hose). Does she think we aren’t thirsty, I don’t care about optimum watering times, I want a drink now! Shiny leaf spray? Whoppie! Those bugs/insects are going slide right off of me!”

Or weeds at the side of the road? “Here comes that dog again. Wish I had a sneeze screen that could spray him instead of him spraying me. Ooh!  Here comes a kid with shoelaces, I’m gonna attach myself to them and go for a little ride around the yard. I’ll get out of this (barrow) pit yet. Here comes that Swather (tractor), it’ll probably run right over me AND cut my head off!”

A trampoline? “I have the best view of the starry sky each night. I’m the most romantic toy on the playground. Why do they keep on jumping and jumping and jumping? I can only stretch for so long. My stretch marks have stretch marks! Pul-ease, pul-ease don’t point your toenails!”

What could you see with a little change of perspective? Here’s what the CT came up with. Heather’s (aka snowdrop) up first with Chelle’s Oh Snap Kit. It’s amazing how often the team uses the Oh Snap! ellies. Great idea Heather!

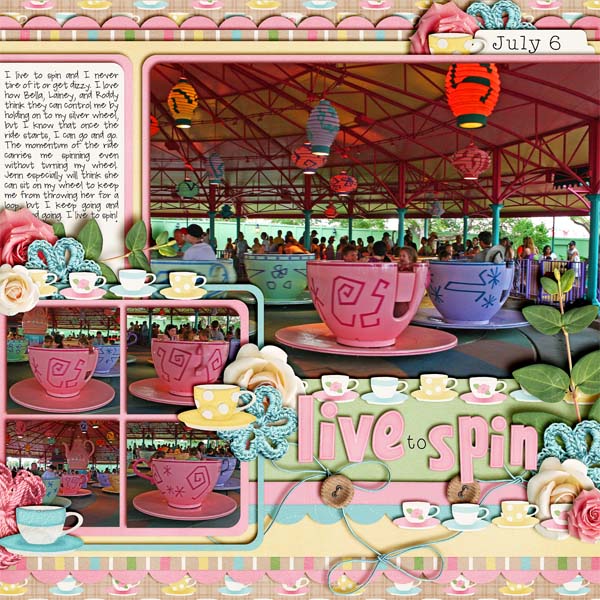
Next we have Jenn Schultz. Love the teacup’s perspective. Funny! She used Chelle’s new Tea for Two Bundle.

I bet you have dozen’s of ideas simmering in your teapot.  Try changing up your LO’s with a change in perspective.

Hugs!

Midnight Crow | Digital Scrapbooking Classics

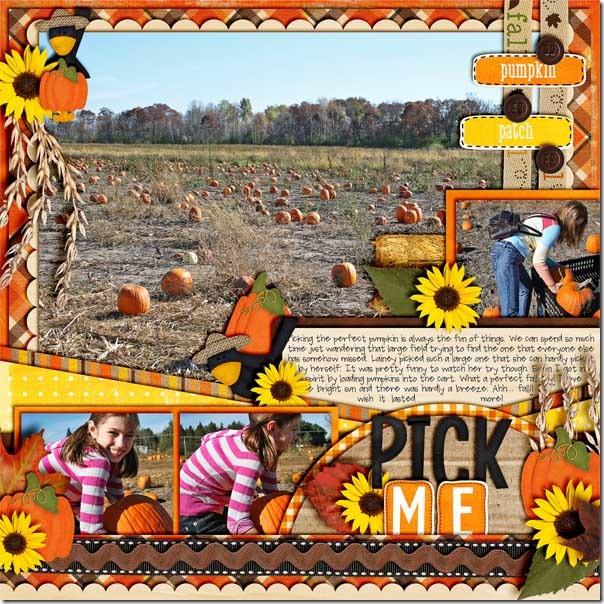
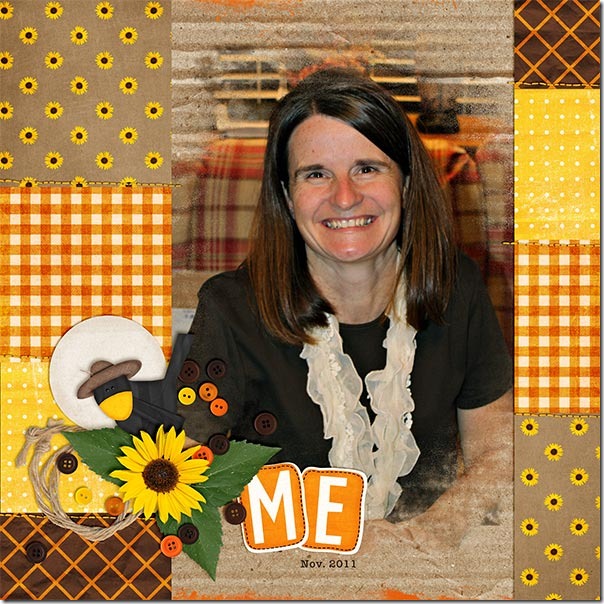
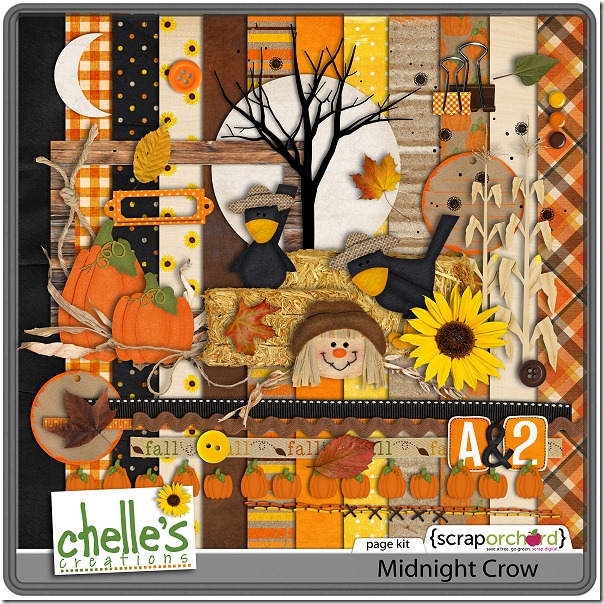
The first breeze of cool air blew into my neighborhood this week, and it really made me excited for Fall and all that is special about this season. I love going to pumpkin patches and picking out a special one to carve, and I love getting lost in a good corn field maze. Chelle’s classic kit Midnight Crow is all about these good things of the season, and her creative team members have been playing with this kit this week to show you its possibilities for your digital scrapbooking layouts.

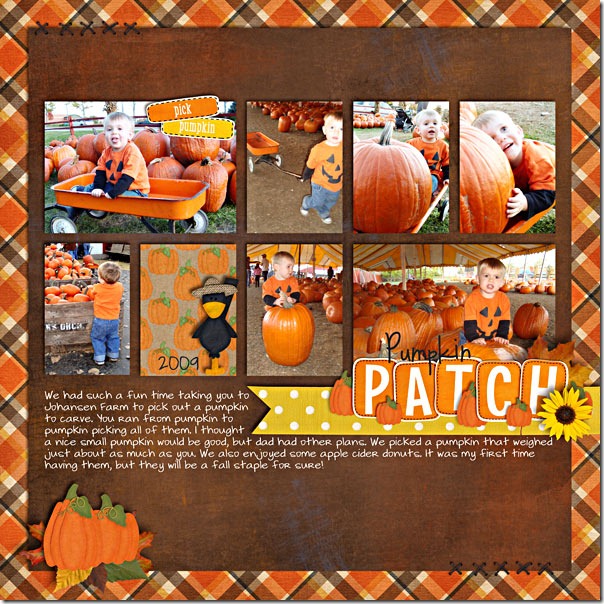
Mary and Jenn love to go to the pumpkin patch like I do, and they each made new pages about their experiences in different pumpkin hunting episodes. First, Mary’s page tells a story about her little guy picking a pumpkin as large as himself! Look at that photo of the pumpkin in the wagon with him. There’s barely room for him! And, apple cider donuts sound like a fantastic idea for a treat. I love the blocked layout pattern she used and the word art for the title.pumpkinpatch2009MaryJenn’s page tells a similar story to Mary’s. Her daughter also wanted to pick one too large to carry. I think all children must do this as I’ve seen the same thing happen with mine. Look at that gorgeous, large photo with all those pumpkins begging to be picked, and her clusters of pumpkins, flowers, and hay around the page really accent her photos well.pickmeJennSFinally, Kayla took a little different approach. She had a lovely photo of herself that she used to make a page, and the Midnight Crow kit was the perfect choice. The colors in the photo and the kit match perfectly, and I love the way she made the page have a quilt-type feel. I also like the way she used the cardboard paper behind her photo and blended the photo into it so that some of the cardboard texture would show. Me_Nov11_webKayla

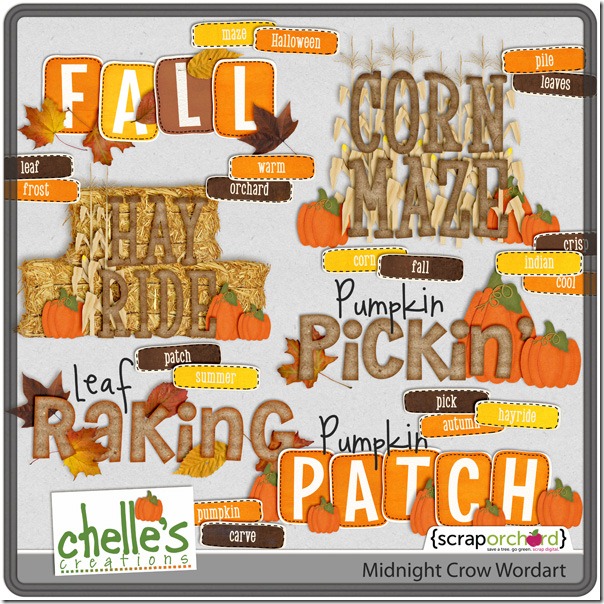
I’m sure you will have some photos of activities soon that will be begging for this kit, so let’s take another look at it in the market. Here’s the kit and the Word Art. The images are linked.cc_midnightcrow_kitcc_midnightcrow_wordart_preview2post

Sneaky Peek & Chance to Win! | Digital Scrapbooking Freebies

Hello everyone!

Warm days…cool evenings.  Savoring the remnants of summer…coming soon: Indian Summer

Remember we have NEW RULES!!!
You can enter to win by sharing the sneak peek. You can…
1. share it on your blog
2. share it on Facebook
3. share it via twitter
4. share it on Pinterest
Remember, since the winner is chosen using a random number generator, be sure to come back and know in a new comment when you’ve done each way.
Deadline: 11:59 PM EST Wednesday.

Getting More From Alphas | DIgital Scrapbooking Words on Wednesday

Hello Friends!

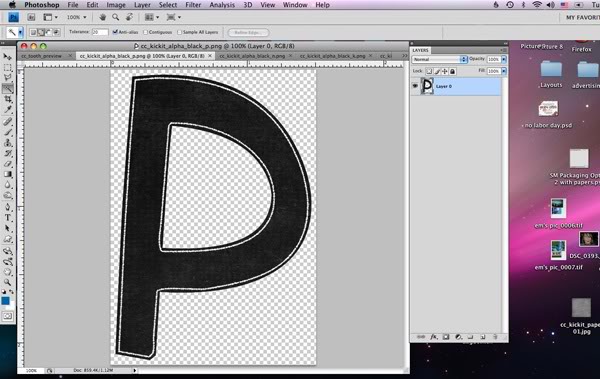
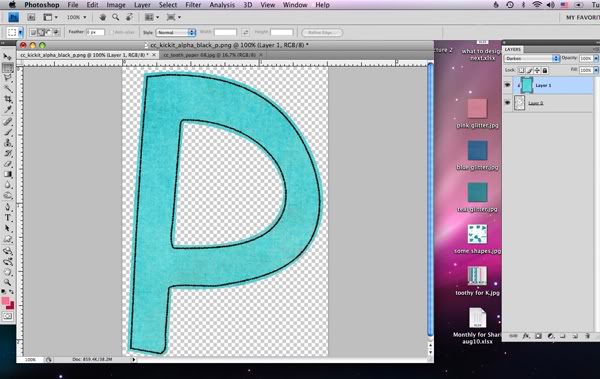
I wanted to highlight this digital scrapbooking tutorial from Chelle’s website. It works for alphas that are nearly black and white, like Jump Zone or Movie Night or even Fire Alpha.  If you use the tip at the bottom of this tutorial will work with the alphas in Boho Summer or Liberty. Start with one of the letters in the alpha. You can do all the letters at once if you flatten them to one layer (but not if they overlap…then just repeat this for every letter)


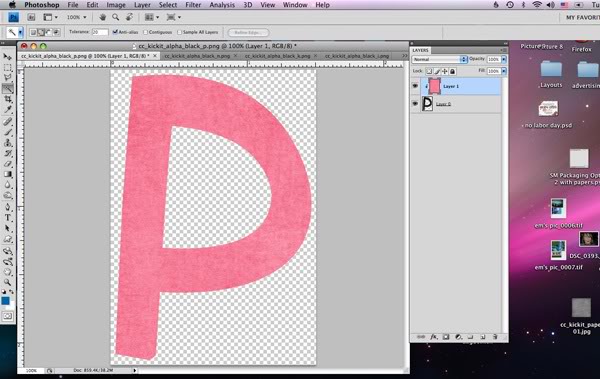
Add your favorite paper on the layer above and group the two together. (Ctrl-G or alt click when you mouse over the crack between them in your layers palette)

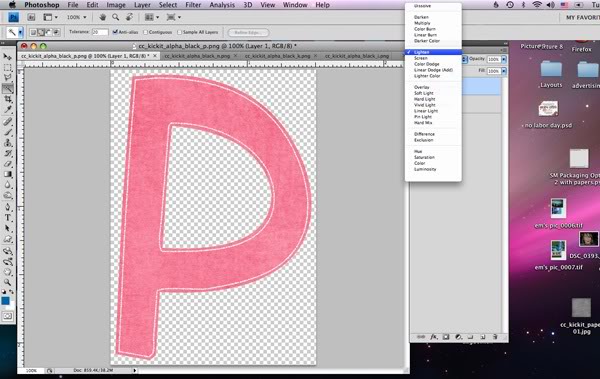
Now change the blending mode to lighten. (This won’t work for papers darker than the black of the letter, nor papers lighter than the white of the border…but stay tuned I have a tip for those borderline papers)

TA DA!
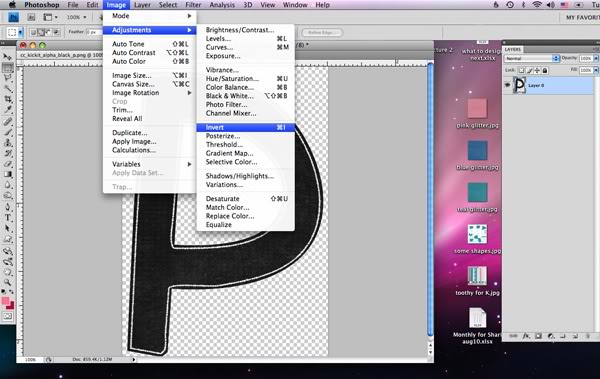
Here’s another twist to make it even more versatile…what if you don’t want white around the edge, what if black would suit your needs better. Go back to just the letter, but this time the first step is to invert the letter. Invert is found under Image or just use Ctrl-I. Now the alpha is white (kinda grey) with a black edge.

Add your favorite paper and clip, this time choosing darken as the blending mode:

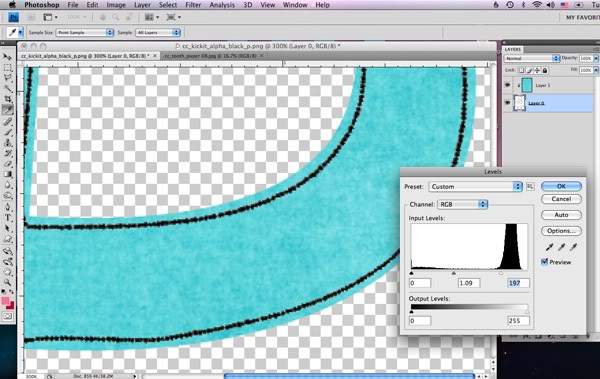
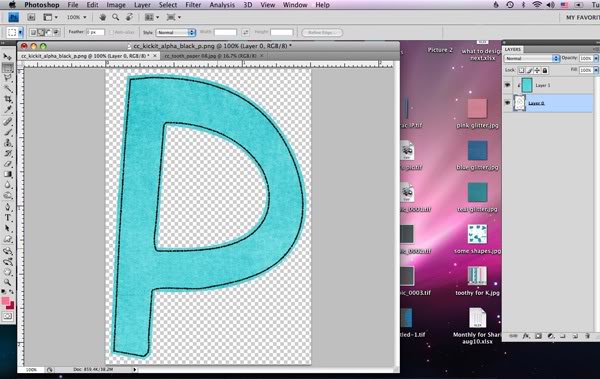
If you look closely, some of the grey of the alpha is showing through. So here’s the extra tip (it works for those borderline papers too.) Use the levels command (ctrl-L with the alpha layer chosen) to adjust the original alpha. If you are working with the black version, move the far left slider (the black one) to the right. If you are working with the white version — like we are here–then move the far right slider to the left.

It’ll take out the light grey leaving our alpha perfectly aqua.

Here are some ideas from the Creative Team. Jenn J (jmljensen) provided this layout and instructions of what she did. She used Aviator, Liberty {alpha} and Teacher’s Pet. She recolored the alpha and Teacher’s Pet wordstrips by clipping a dark gray paper from the Aviator kit to each letter/wordstrip then changed the blend mode of the paper to lighten. Cool huh?

Jenn J

cc_teacherspet   cc_aviator   cc_liberty_ap

Go ahead. Try it. You’ll be surprised how easy it is.
by-Sari


Friday Freebie: Midnight Crow | Digital Scrapbooking Freebies

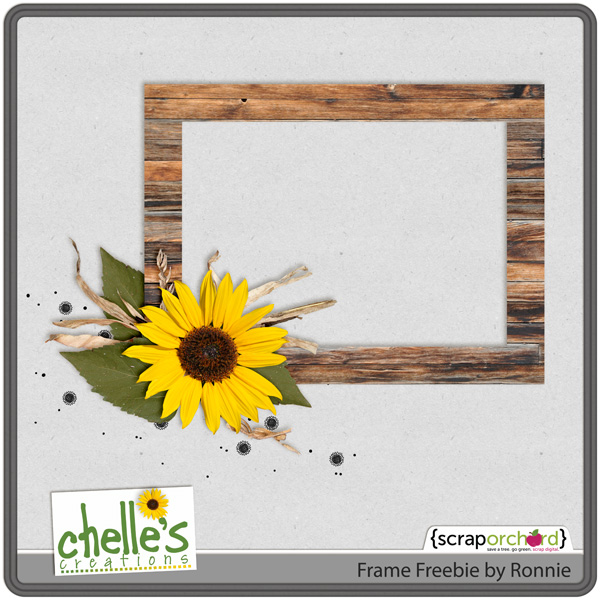
Hey Everyone! Sari here. Our good friend Ronnie made this clever frame using Chelle’s Midnight Crow (Reloaded) bundle of fun..


You can download it here.
Here are Chelle’s designs for Autumn-time. Well, some of them. (Teaser alert!) I’ve seen her designs for this week. (Hint!) Check back soon… you’ll definitely love ’em. Dang! Where’s my wallet, now I have to go buy some candy corn! LOL

Capture Your 365 Idea List | Digital Scrapbooking Resources

Hello! Today I get to remind you about Katrina Kennedy’s Project 365. I went to her website and found some great information to share.  Not only does she give us a monthly list, she  chooses 4 camera features to focus on each week. This week it’s light, aperture, shutter speed, & point of view.

She starts by printing out her October list! or downloads it to her smartphone. There is no wrong way to use the list. Here are a few things she mentioned:

  • I love to have a printed hard copy. I like how tangible and real it becomes then. Perhaps that is indicative of my age, born into the paper culture. Maybe not. I look at it each morning and let it set my focus for the day.
  • I don’t necessarily seek out the prompt for my photo, but I let it guide my creativity. Consider the prompt PLAID. I honestly thought there was no plaid in my house. I know there is none in my wardrobe. In my plaid-less stupor, we left the house the morning of the prompt with PLAID, emblazoned across my thoughts. And then I began to see it. It popped up at me in the strangest of places. There was the woman with the plaid purse perched on the chair at Capitol Dog, our local spot for vegan hotdogs. I didn’t photograph it, but I thought about all of the ways I could.
  • There was the little boy who bounced out of the house with plaid shorts on. Once again, I didn’t photograph him or his shorts, but I thought about ways that I could. And then I came home. I’d taken many others shots throughout the day. And from those, one was destined to be my photo of the day. None are plaid, but they were inspired by plaid. Inspired because I set out into the world ready to see. Ready to scavenge something that I might not have otherwise been looking for!

You know how that happens. You buy a red car and you suddenly see them everywhere. Someone mentions a restaurant and then suddenly you see ads for it everywhere. That is how the prompt list works. Just gets you thinking and seeing so that suddenly everything around you has the potential to be your photo of the day on this day. And then as you type you’ll realize  you do have a plaid thing in your life. Every day your husband and your son put on button up short sleeved shirts. Friends call them, “Shea shirts,” because he wears them so often. And yep, they are plaid. I can see them hanging in the closet from where I sit at this very moment. Funny how inspiration can be right in front of you!

Diana made this comment:

I love things in print as well. I also really appreciate that you explained how you use the list. I hadn’t thought of simply looking for items in the prompt and then imagining how I would photograph them — that makes such sense, particularly since we can’t always simply take photographs of other people’s children or their articles of clothing, for instance. Now I don’t have to feel that I’ve “missed out” when there is another way to think of the prompt word.

I think this an intriguing idea. I don’t have a camera, but I can see photo opportunities. I can always use a “word” to think about during the day at my real job. I’m gonna do it, I’m gonna give it a try! Join me…. Katrina will even send you a daily inspiration e-mails. Get on her list. How could you use an idea list? What could you capture?

Hugs!

Perfect Pairs: Oh Snap! & Main Street | Digital Scrapbooking Kit Combinations

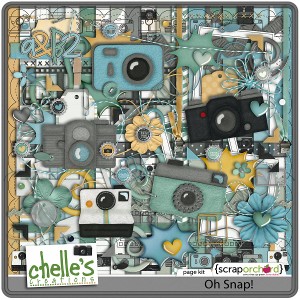
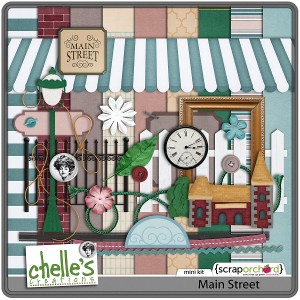
Hello Everyone! This week we challenged the CT members to combine 2 of Chelle’s kits: Oh Snap! & Main Street Kits. Let me show you the kits first, and then I’ll show you the LOs.

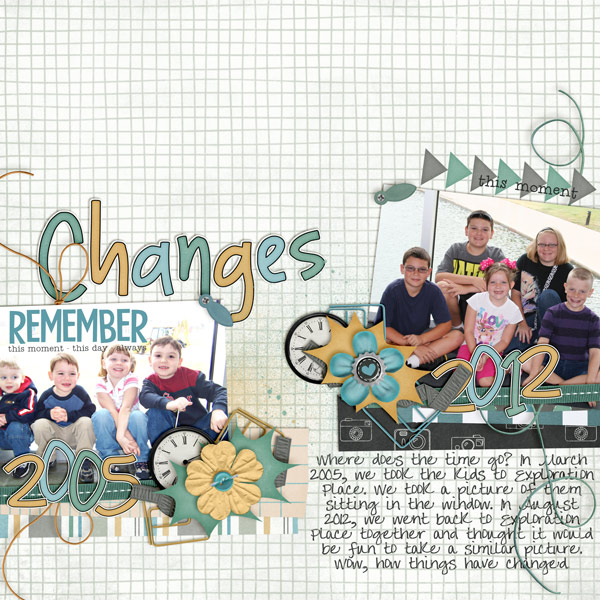
First up is Melissa N who shows us “Changes.” Love the then and now of her children at the same location, several years apart, and the clusters she built are just perfect!

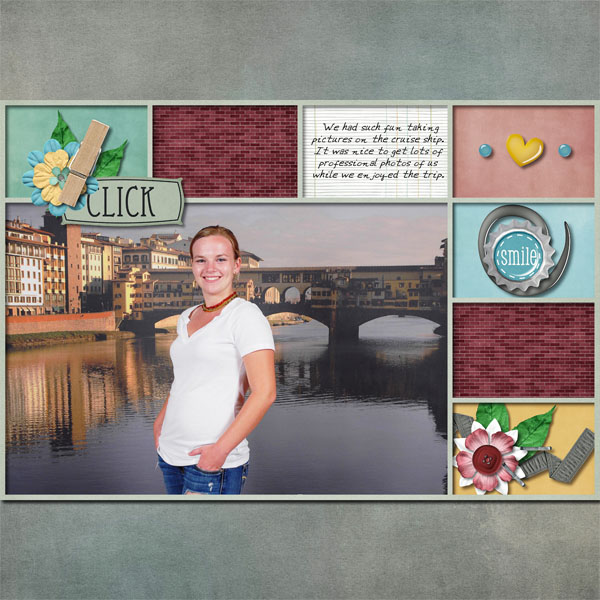
Next we have Lynette who uses shows us the main street at one of her travel destinations on her cruise. I bet we all have photos that we could scrap in a similar fashion. A cityscape if you will.

In our final LO, Carol shows us the Main Street where she used to live in Iowa. What a great idea! Each of us memories where we used to live. Carol’s LO made me think of main street’s in ghost towns, pioneer villages, or even restored main streets. We’ve got a picture of several of my grandparent’s and great-grandparents pioneer homes. Some have been renovated and we could do similar LOs like Carol’s.

Hope these inspire you to use Main Street Mini and the Traveler Bundle for some of your LO’s.

Hugs!

Scrap Skills: Blending Photos | Digital Scrapbooking Skills

One of the things that attracted me to digital scrapbooking was the ability to use photos in unique ways on a page. Blending photos is definitely something that can’t be done with traditional paper and scissors, but the effects can be so very striking.  Chelle pointed me to this GSO post of blended photos that inspired her here . The pages there are amazing, and when I first looked at them, I thought, “I’ll never be able to do that,” so I searched through Chelle’s YouTube channel for a video on blending. She has lots of terrific tutorials there, including one on blending photos into the background of a page here. She does such a good job explaining it, I can’t wait to try it!

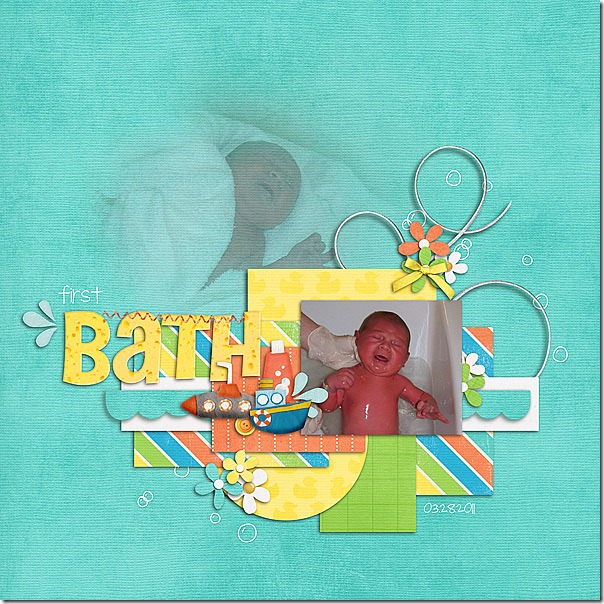
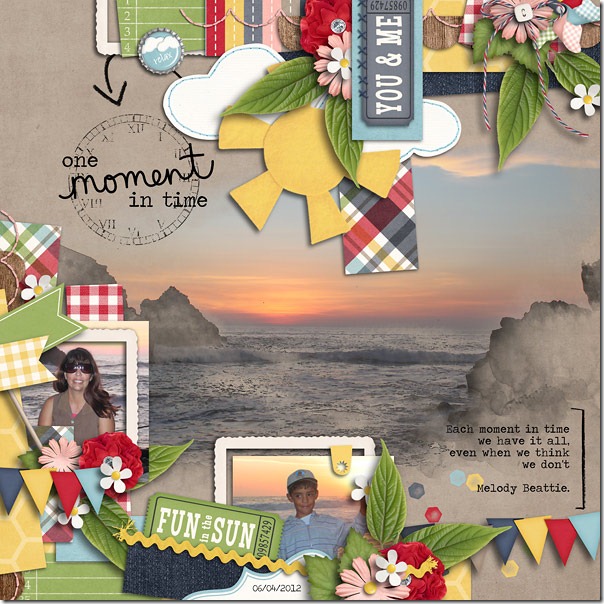
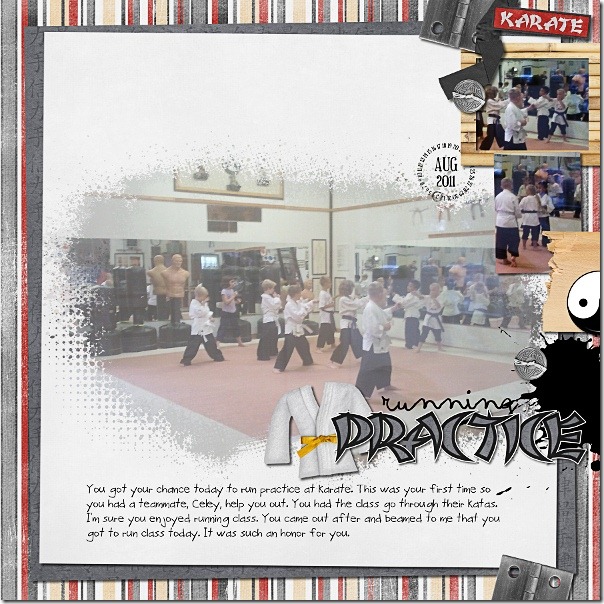
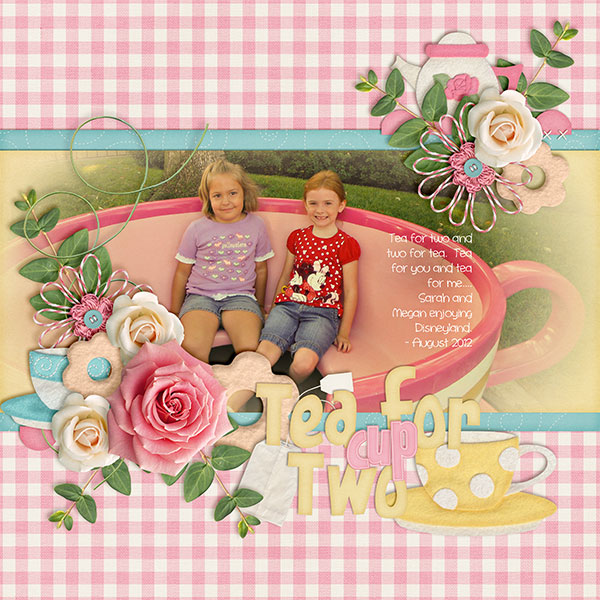
Chelle’s very creative team members have made some example pages for you to see. Melissa has an adorable little boy, and she made a page about his first bath given to him by the nurse and his daddy while she was recovering in the hospital. A special event like this deserves special attention, and she gave it the emphasis it deserved by blending the photo of him wrapped in a towel into the background while the focus picture is out front and matted. First-Bath-RSMelissa Next, Roxana made a gorgeous travel page, and instead of blending a person’s photo into the background, she used a scenery photo for a stunning effect. Roxana’s pages always make me want to travel to where she has been, and this one is no exception. That sunset looks spectacular in the center. 29-sunset-webRoxana Next, Ophelia has used Chelle’s Black Belt kit to scrap a page about her child leading the karate class in their practice session. Blending the class photo is such a unique way to show the whole room on the page. 2011-08-03-runningpractice_smOphelia Finally, Kayla used Chelle’s newest kit Tea for Two to make a gorgeous page with a photo she took on a recent family vacation to Disneyland. She chose to use the blended photo as the only photo on her page, and it looks awesome.  By the way, the Tea for Two Bundle is still on sale for a short time more, and right now, the gingham papers are free with purchase of the bundle.

Each of these layout artists has used a different blending mode for her photo and a different type of photo, but each page looks amazing. I hope you are inspired as I am to give this technique a try. If you haven’t stopped to watch Chelle’s video, stop to watch it now. You won’t  be sorry!