Adding a Bokeh Texture

Adding a Bokeh Texture

Hi everyone…. It’s Thursday and that makes me happy! This is Jenn (aka jk703) and I get to bring you a fun and super easy tutorial today. We are going to add a little oomph to your photos, by adding a bokeh texture. Bokeh what?!? I know… sounds odd and even when it’s typed it looks odd – but I promise it is fun.

In the past, bokeh was always known as the blur that is in your photos, mostly around the things that are in focus. You take a picture of a child, and the area all around the child is in a blurry state, while the child remains in focus. The blurry areas, aka areas out of the depth of field, are referred to as bokeh. Bokeh usually, though not always, has reflective out of focus points of light. Nowadays, with improvements with cameras and equipment, bokeh is used to refer to those specific out of focus lights or shapes in your photo.

Bokeh is easy to add to your photo, but it takes time, patience and a little effort. You will need to play with different bokeh textures to find the ones that fits with your photo. That is the biggest hurdle to this tutorial – trying out many bokeh textures. Good thing there is only about 5 steps to add the texture! :) ok… let’s get to it.

So… where can you get bokeh textures?  Try out this awesome site – Lost and Taken – specifically this post about 94 Free Colorful Bokeh Textures  – http://lostandtaken.com/blog/2012/1/25/94-free-colorful-bokeh-textures.html. Here is their About Page to learn more about this wonderful site. Once you have downloaded the textures, take a peek at them to see what you like, and what may work with your photo. Also, pick a couple that you think would look bad with your photo too. lol!

First up, open up both your photo and the bokeh texture that you want to use. Here is my photo of La Romana, DR:

Screen shot 2013-04-02 at 10.12.47 PM

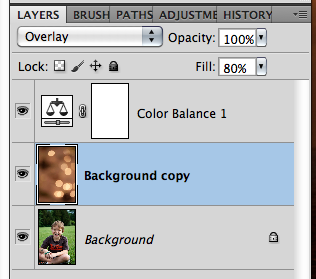
Next, click over to the bokeh texture, and Copy it into your photo’s file.  Make sure to have your Bokeh on top of your image in the Layers Palette. Screen shot 2013-04-02 at 10.13.41 PM
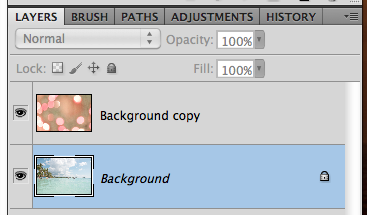
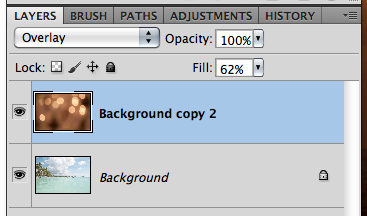
With the Bokeh layer selected in the Layers Palette, change the blend mode to Overlay. Screen shot 2013-04-02 at 10.14.17 PM

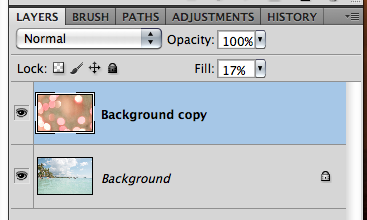
Once you have overlay selected, you will then play with the opacity of the bokeh layer.

Screen shot 2013-04-02 at 10.14.44 PM

Here is what my image looks like with the Bokeh overlay and opacity played with. Simple, subtle and pretty. Screen shot 2013-04-02 at 10.14.35 PM

Here is another boken and it’s effect. Screen shot 2013-04-02 at 10.19.11 PM
Screen shot 2013-04-02 at 10.18.51 PM

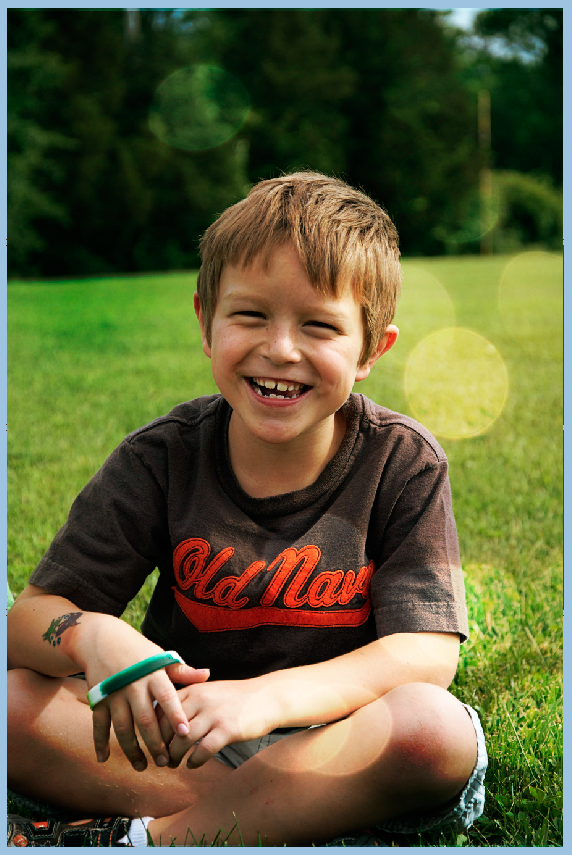
One last one with my son and a bokeh effect. If you find that your image takes on too much of one color, you can always make an Adjustment Layer to remove that cast of color. For these images, I created an Adjustment Layer to remove some of the orange coloring. Screen shot 2013-04-02 at 10.52.38 PMScreen shot 2013-04-02 at 10.54.22 PM
Screen shot 2013-04-02 at 10.52.51 PM

 Here is what the CT came up with….

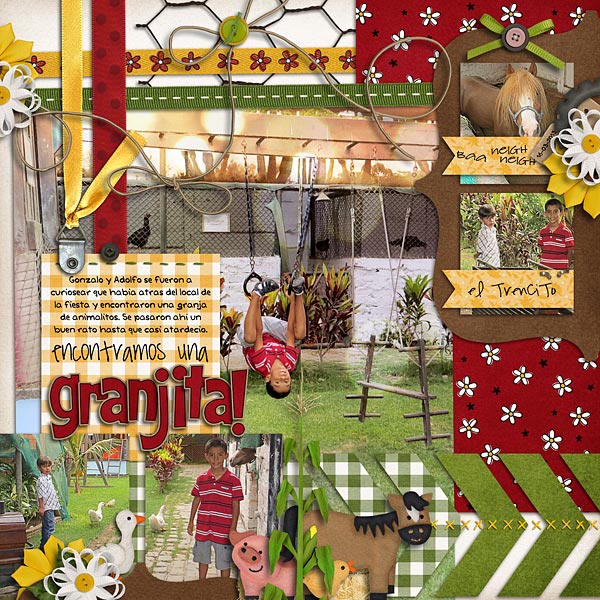
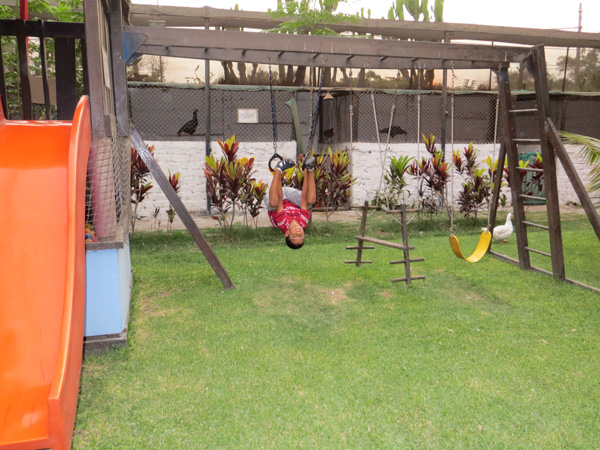
Roxana (Roxanamdm) said it took her some time to choose the bokehs and then the correct color and opacity. It wasn’t easy to find the right bokeh for her photo. I used Bookeh #21 and #12. EIEIO was used.

41-granja-web
Her original image…. img_0110
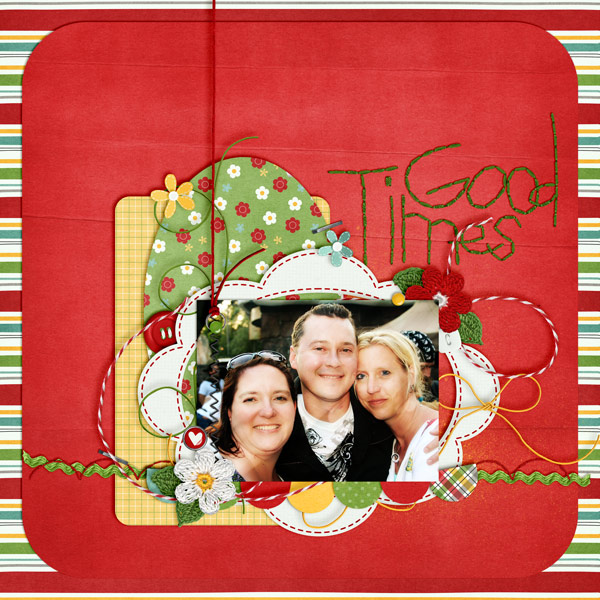
Here is Mel’s (KSCroppyChick) layout…
Good-Times-MKA
Original
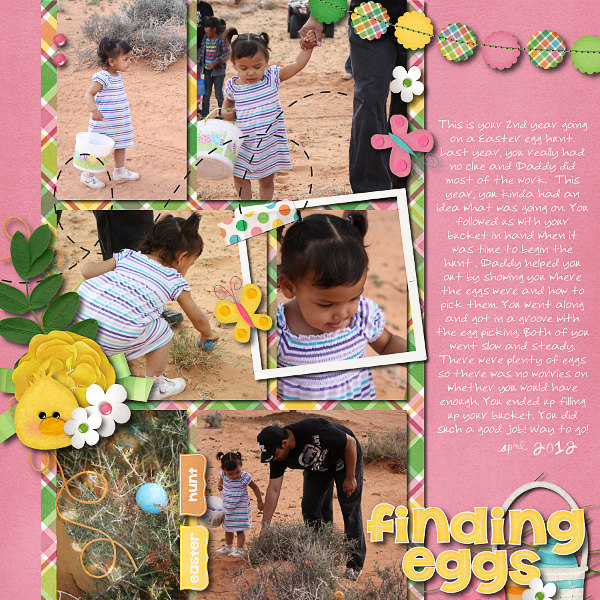
Lastly, Ophelia created this page. She didn’t use the bokeh texture that is linked above – she made an overlay with a star bokeh that she made herself. It’s on the photo in the lower left corner. Cool, right?!
2012-04-08-findingeggs_sm-1
I hope you give it a chance, and play with the bokeh’s… they can be a lot of fun!  Happy scrapping!
Jenn (aka jk703)
by Jenn

Snappy Titles | Digital Scrapbooking Words

Hello Friends! Titles & Words really make your digital scrapbooking layout. I wanted to talk about Titles that all start with the same letter. They convey action, feelings, moods. Then tell the tale. They make us think or reminisce.They keep us engaged with our memories. Let me show you what I mean.

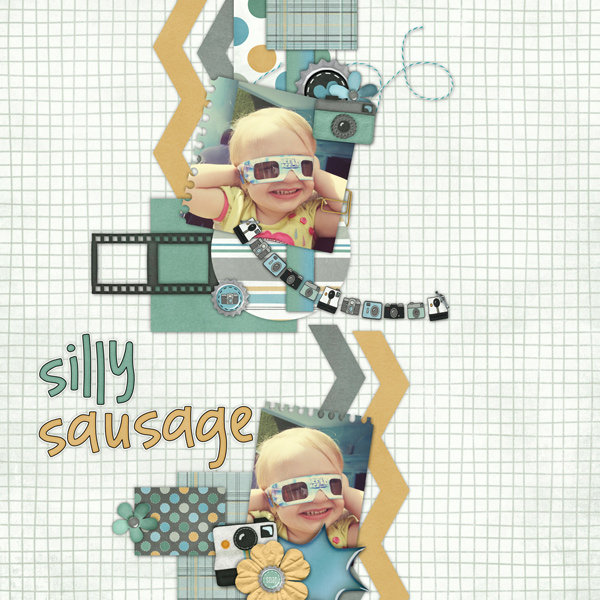
Helen (winipeg1) She used Oh Snap!

Helen (winipeg1) made “Silly Sausage” using Chelle’s Oh Snap! Love the repeating elements the work with the double “S” used in the title.

xctmpDp8yutxctmpIdS8d9xctmp0E4KfG

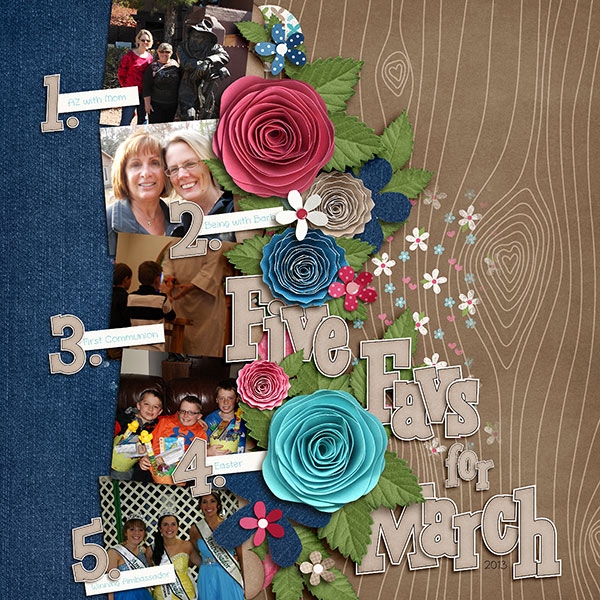
Next, Jenn J (jmljensen) used “Love Grows”  as the background for her layout titled “Five Faves for March.” She then emphasizes the “five” by using numbers to make them stand out. Here cluster work is beautiful.

Jenn J (jmljensen) She used Love Grows


xctmprJ0dMExctmp0RA2rRxctmpaLmoXwxctmpzsEd12xctmpzW8VGL


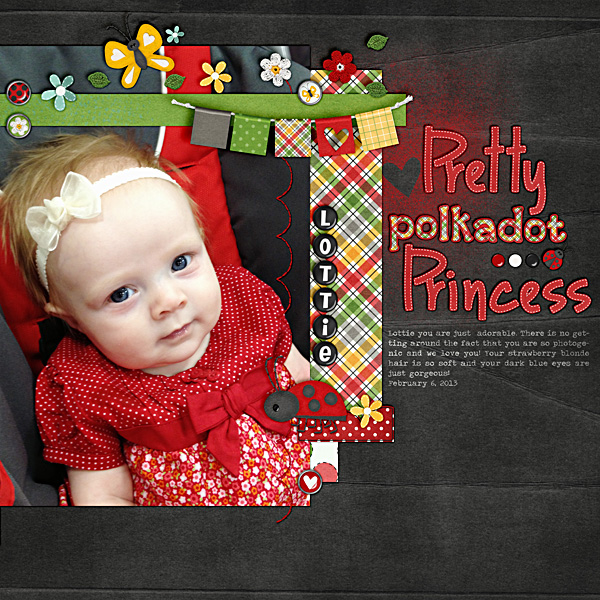
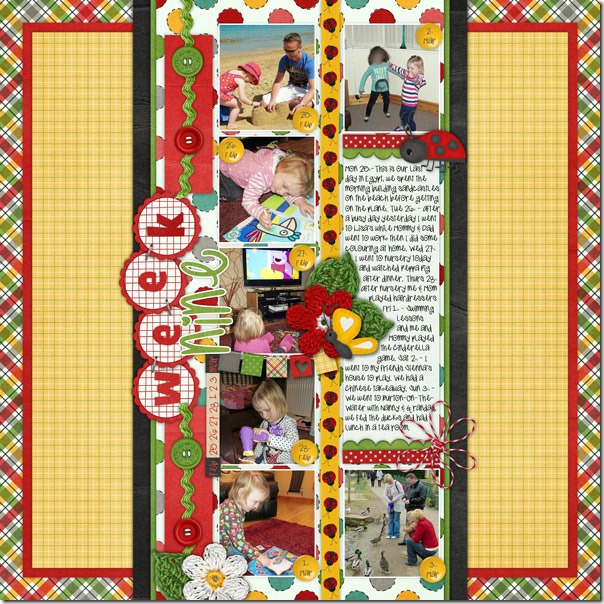
Our third layout comes from  Jan G. (GrahamLiketheCracker) use “Ladybug Hugs” to show off her “Pretty Polkadot Princess.”  Isn’t it adorable with the paper used for “polkadots” being made from plaid?

Jan (GrahamLiketheCracker) She used Ladybug Hugs, Button Alpha, & CU Sunny Alpha Doodles

xctmph858oqxctmpxd2pS5


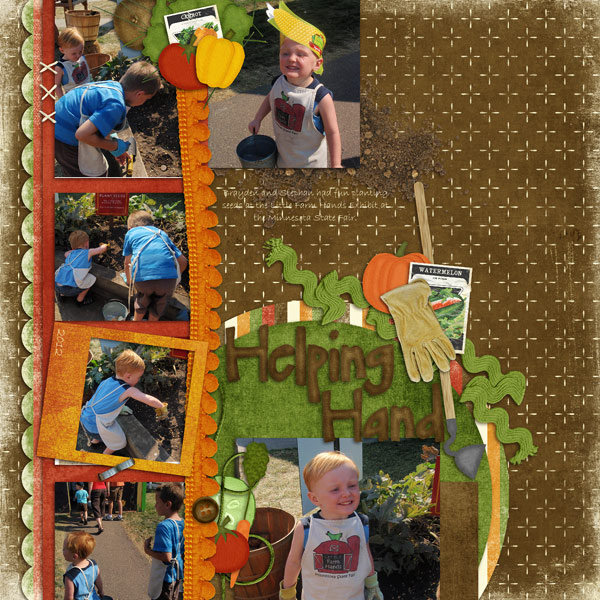
Jenny (Jenn18) used Grandpa’s Garden to highlight her layout about giving Grandpa a “helping hand.”  The page border she created really adds to the garden theme. Great cluster work.


Jenny (Jenn18) Shu used Grandpa's Garden


xctmpA0ypb3xctmpLjlTW9xctmpJu5rTVxctmpe6mcE5xctmpyzjfTg

Sit down. Relax, Take a breat! Give you mind a chance to help you think of some other snappy titles that would help you tell the tale of your digital scrapbooking layout. Hugs!


Ladybug Hugs | DIgital Scrapbooking Classics

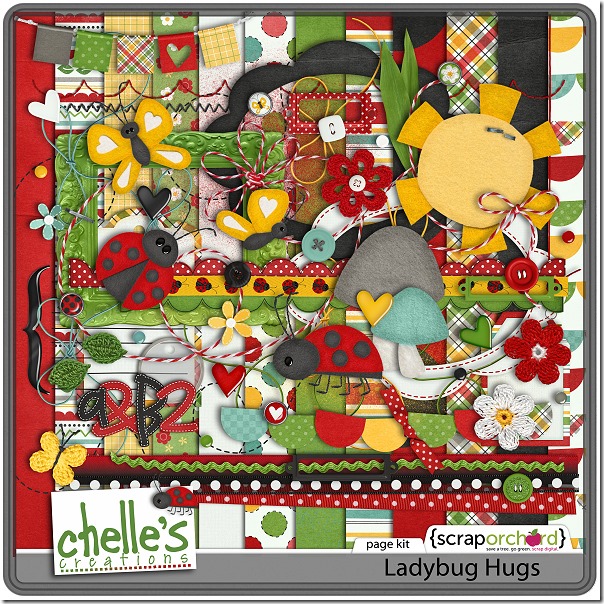
In 2012, Chelle introduced us to a wonderful digital scrapbooking kit called Ladybug Hugs, and I was instantly enamored with it. She tells the personal story of how she was inspired to create it, and  you can find that story  plus a few ideas on how to use the kit on YouTube here. If you haven’t seen it, go ahead and take a few moments to watch it. You won’t be sorry. This week, Chelle’s very talented creative team has been playing with this kit again, and I want to show you their amazing pages.

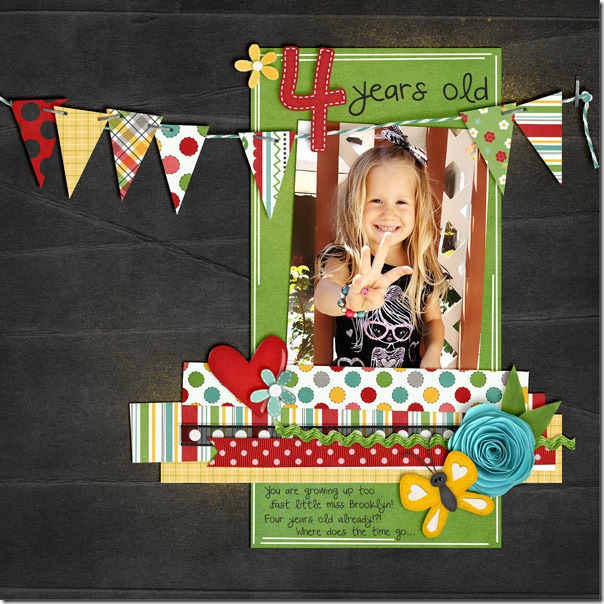
First, Kassie has a most adorable page about her little girl Brooklyn being a proud 4 year old. Look how cute she is holding up her 4 fingers. I love the banner that is stapled across the page, and the hint of paint spatters behind the photo are the perfect highlights on the dark background.4yearsoldKassie

Next, we have a page from a guest team member. Helen has used this kit as the perfect compliment to her 365-day photo project. The bright colors give the page a happy-go-lucky feeling that goes  well with her photos. She also used the coordinating Ladybug Hugs Bonus Alpha, and I love the way she used the little felt ladybug to crawl between her journal space and the top photo.Helen-ladybug-hugs

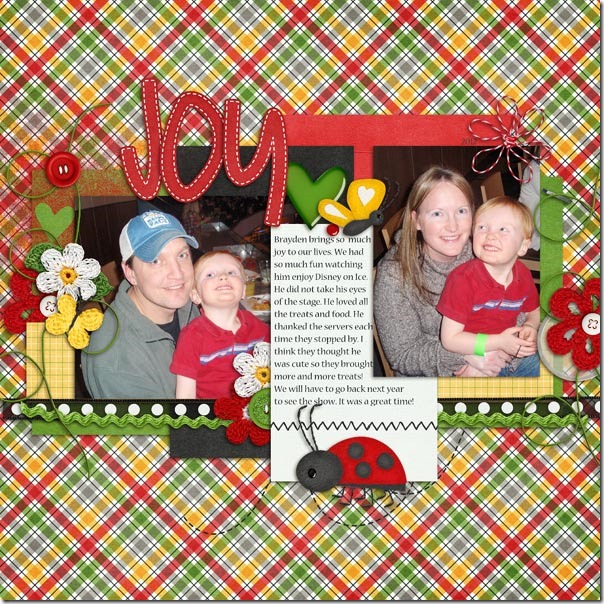
Another of our guests for this month also volunteered a page, and you will love it. Jenny used the same plaid paper as Helen for her background, and she also used the felt ladybug on the edge of her journal paper, but she chose to use him in a slightly larger size than Helen did. That’s a great feature of digital scrapbooking – your embellishments can be any size you need them to be! I love the little hearts Jenny has scattered about on her page – they really convey a feeling of love and joy so very well.So-Much-Joy_WebJenny

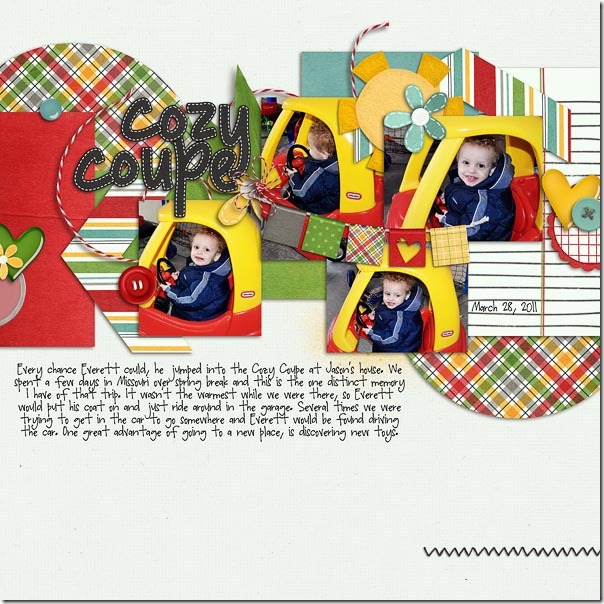
Finally, one of our long-time team members Erica made a page for us with Ladybug Hugs, but she didn’t use any of the ladybugs, and her page is just as perfect as the others. She had pictures of her son enjoying his toy car, and the colors of the kit worked perfectly with them. I love the banner she has used, and the horizontal placement of all the papers and elements really gives the page movement appropriate for a page about a car. Ladybug Hugs- by Chelle's Creations<br />
Perfect Mess Template- by LGFD

Would you like to see more of the kit? Check it out here; the image is linked.cc_ladybughugs_kit

by_Cheryl

Gallery Standouts | Digital Scrapbooking Inspiration

Hi Ladies! I”ve been over looking in the Scrap Orchard gallery at some really great digital scrapbooking layouts that I wanted to share with you.  I think I must be into the square shapes lately because I just noticed that each of the layouts I’ve chosen this week have something in common. LOL

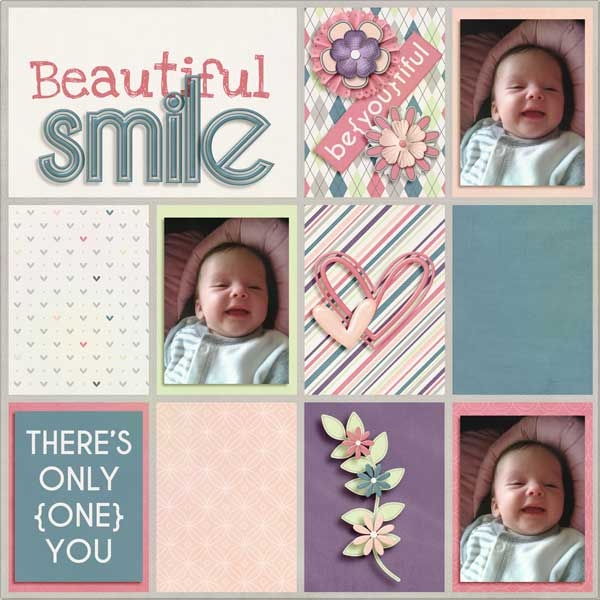
Smurfie created this layout using a FREE template she found on the Chelle’s Creation’s Blog. (Hint! Go check ’em out.)  She used the same picture throughout the layout in a triangular pattern. Doesn’t that face just make you smile also?

Smurfie She used a template freebie from the blog.


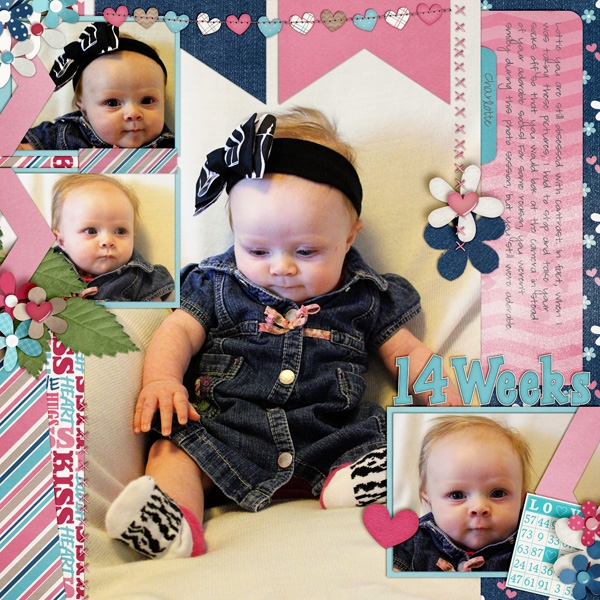
Next Jan (GrahamLikeTheCracker) used “Love Grows” to do her delightful layout about a little 14 month old. Love that big bow and her hair. I like the clustering and the journaling turned on it’s side. Really really cute!

.GrahamLikeTheCracker. She used Love Grows


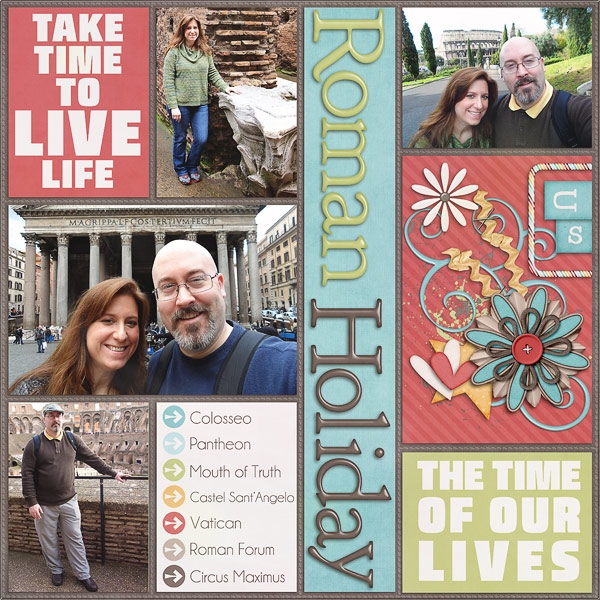
Hey Jude takes on a journey with her to Italy. She used “In The Pocket {Strips}. Love all the dynamic photos and the list of places they visited. This layout is one to remember
JeyJude. She used In the Pocket {Strips}


Hope that you have some great ideas for your digital scrapbooking pages. I’ll be watching. Maybe you’ll be in our next Gallery Stand Out post. Thanks to all our digi friends for happiness we enjoy when we share our memories together.

Hugs!

Scrappin’ On The Go | Digital Scrapbooking Resources

Hello Friends!

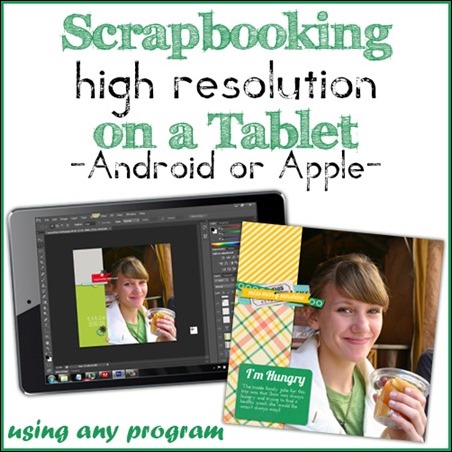
I love my laptop.  I carry it around with me nearly everywhere…well, anytime I might end up sitting and waiting (carpool…doctor…etc).  But it sure would be nice to  be able to just grab my tablet.  However, every tablet-based scrapping solution I’ve seen results in a web-sized (low resolution) layout.  And I want to be able to print my layouts.  :(

That’s why I was THRILLED when I saw that Steph (of The Daily Digi)  found a high-resolution scrap on your tablet solution.  You can check out her post here.

Scrapbooking-On-a-Tablet

Can’t wait to try it out!

by chelle

Freebie: Gnome Sweet Gnome | Digital Scrapbooking Freebies

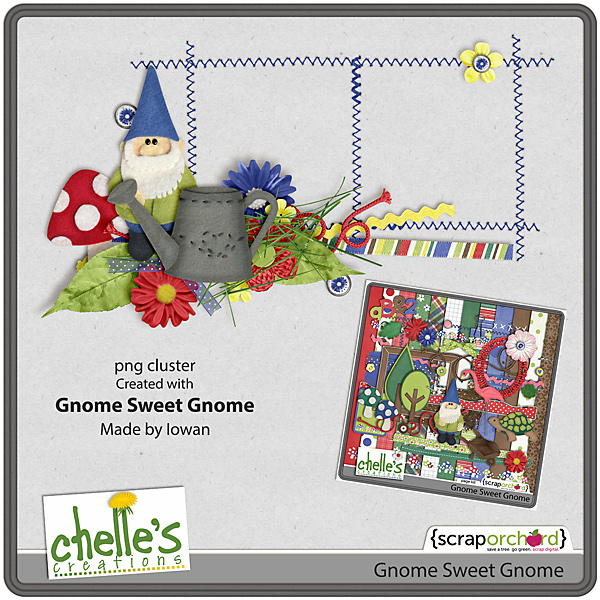
Happy first Friday of April!  Carol (aka Iowan) here to bring you this week’s freebie from Chelle. Spring is here and it is time to do some yardwork, so here is a little cluster to help you scrap those gardening memories. I hope you enjoy it. You can download the file HERE.

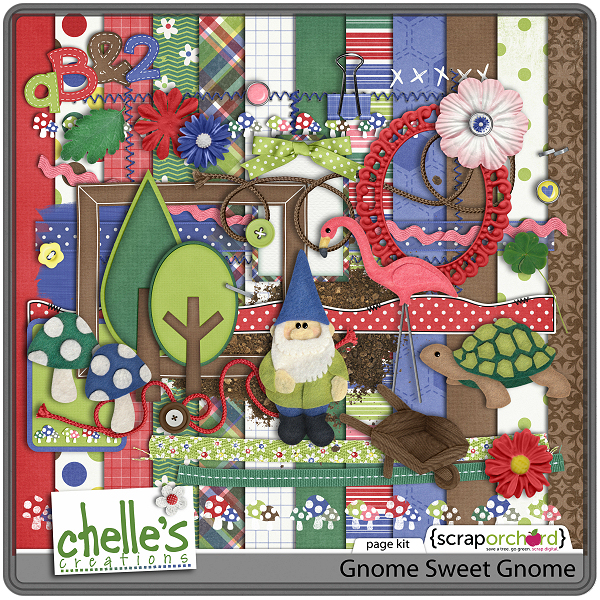
Chelle4-5-2013_FreebieIowan-copyFor the cluster, I used Chelle’s Gnome Sweet Gnome. I hope you will love this kit as much as I do.

cc_gnomesweetgnome_kit

Happy Scrappin’

by_Carol


Scrap Skills: Shadow Styles

Hello Chelle’s friends! I hope your Easter was wonderful and you’ve got lots of new photos to include in your digital scrapbooking projects. Today, I want to show you a tool that will speed up your scrapbooking process so you can get those photos onto pages for everyone to enjoy. Chelle has a collection of shadow styles for sale in the market that can save tons of time, if you’ve been making custom shadows, and increase the realistic look of your pages, if you’ve been using the standard drop shadow styles in PS or PSE. Me & My Shadow is a collection of styles for all different types of elements in 3 popular shadow directions: Lower Right (LR) (120 degrees), Lower Left (LL) (45 degrees), and Upper Left(UL) (-43 degrees). Start a page with any of Chelle’s quickies, and then use the Upper Left setting for any additional elements on your page to match her pre-shadowed styles. Also, she has a video on her YouTube channel to show you how easy it is to use the shadow styles.

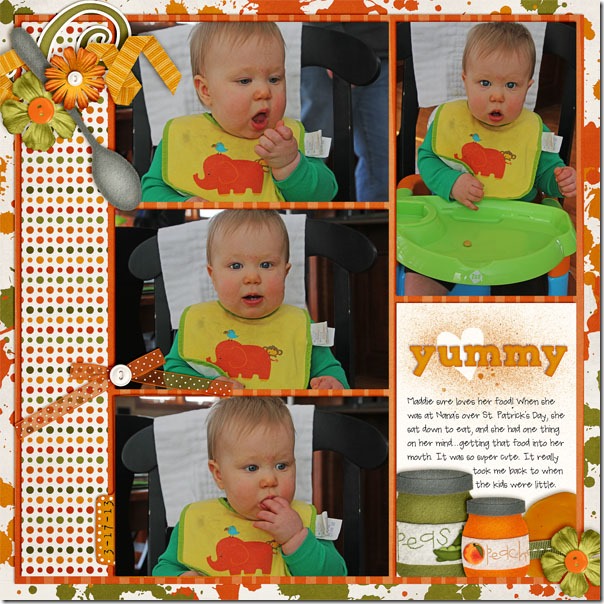
Let me show you some sample pages using Me & My Shadow. First, Jenn made a page for us using Chelle’s First Foods kit and the adorable photos of Maddie easting in her high chair. She used the UL paper shadow style for all the photos and paper mats on the page, the felt/chipboard style for the felt pieces, the small flower for the flowers, and the curly ribbon/string for the ribbon on the left. In addition, she used vellum style for the bow that has a slight transparent appearance.yummy2Jenn

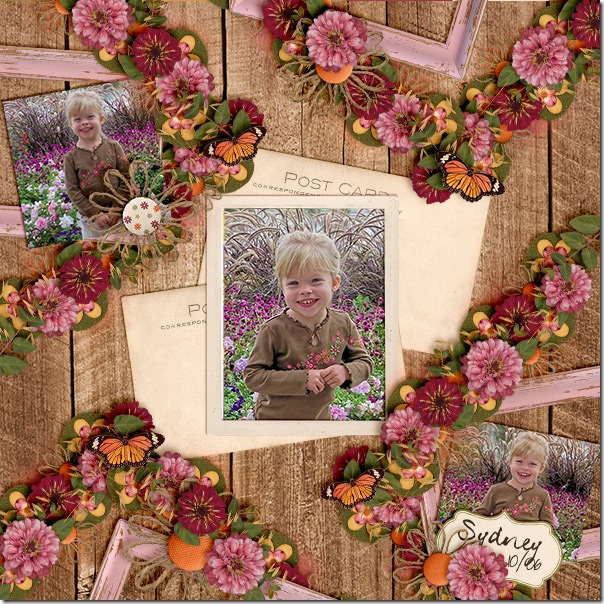
Next, Karen has a page that beautifully illustrates how to do lots of flower clusters to make them look realistic. She used Indian Summer – a perfect kit for her photos. Look closely at how the flower clusters on the page are a perfect match to the flowers on her little girl’s blouse. You can see she has used the thin paper style shadow for her photos and the post card elements from the kit. The flowers, leaves, and butterflies have larger thicker shadows by using the  flower style, while the felt elements on the bottom layer of the clusters have the felt/chipboard style applied. Sydney-flowers_zps81808b3bKaren
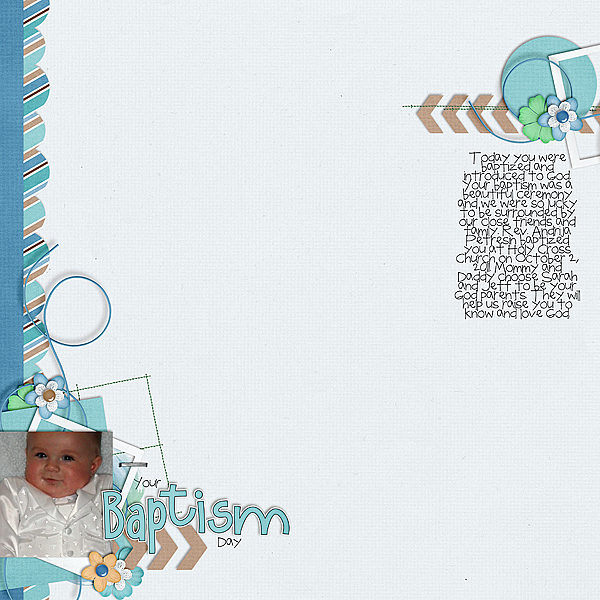
Melissa has made a page with a lot more white space, and yet the shadowing is just as important as a page filled with clusters. Notice how she used the string/ curling ribbon shadow style for her blue strings, and they seem to pop off the page. Also, she has the tiniest stitches perfectly placed on the page, and she has used the staples/ stitching layer style for those as well as for that little staple attaching the frame to the page.
Baptism-Day_zps4043a1d4


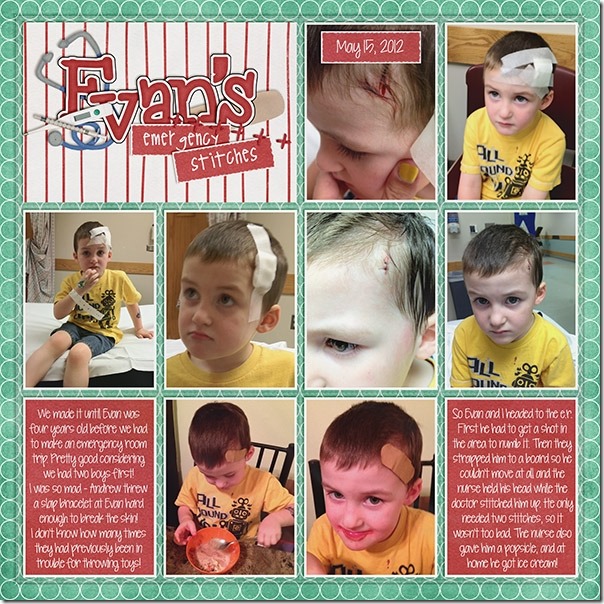
Finally, Brandy has been a guest on Chelle’s team for the past two months, and she has contributed some fabulous pages for us. Today, she has made a page to illustrate how to shadow the plastic pocket layer on one of Chelle’s In the  Pocket {Small} pages.  Here she has documented little Evan’s trip to the emergency room for stitches with lots of photos, and each photo has the paper shadow style applied. She used the acrylic shadow style to give a proper effect to the plastic pocket top layer on the page, and it completes the page with a very realistic look.13177Brandy

Do you own Chelle’s Me & My Shadow? Here’s a closer look at it in the market (the image is linked). Don’t forget, if you’re using any of Chelle’s pre-shadowed quickies, you’ll want to use her Upper Left shadow style from Me & My Shadow. cc_memyshadow_preview

by_Cheryl

Perfect Pairs: About A Boy & Techno Love | Digital Scrapbooking Kit Combinations

Hello Friends! I think we just might have Spring here in Northern Utah. We have a couple of fabulous kits to highlight for you this week. About A Boy & Tencho Love. I love the bright colors of About A Boy and the Black & pink/red tones of Techno Love will spark your imagination. I’ve a few layouts to show you from our creative team to help get you started.

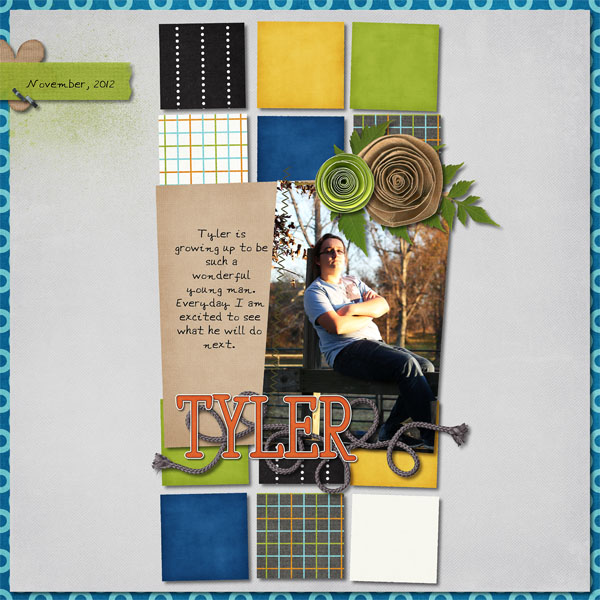
Lynett (lynett_rock) created this layout about her son Tyler. I like the wonky shapes of the shadowed squares. They caught my eye and I looked at her layout longer to see if I could figure out more detail about the shadows. A great example of how shadowing can add dimension to your layout.

Lynett (lynett_rock)


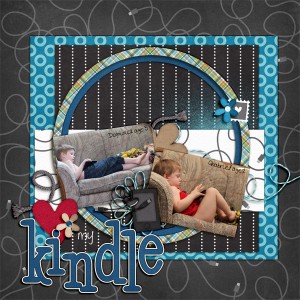
Teri (ta_merkins) shows us this great layout about her son and the Kindle he loves to play with. Love the bright pops of red that she includes to help us recognize he is in Kindle “LOVE.”

Teri (ta_merkins)

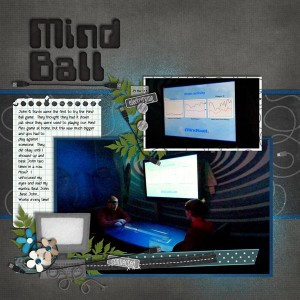
Jan also used gaming as her representation of  Tehcno Love.  Love her journaling about beating her son, John. I wonder if we all have a mantra about our kids… “Beat John. Beat John. Beat John.” Go Mom.Great Job on showing the big screen of the game statistics.  Love the clusters!

Jan (quiltymom)

Here are the links to the products used by the Creative Team.

cc_aboutaboycc_technolove_bundle

Enjoy your week. Hugs!

Gallery Standouts | DIgital Scrapbooking Inspiration

Hello Friends! I have some great digital scrapbooking layouts to share with you from the Gallery at Scrap Orchard. Let’s start with DigiCheryl.  T really like this look  at the Fall season. She used Chelle’s Indian Summer and Through The Year designs. The pictures of the gourds and fall vegetables add to the background. The corn stalks tied together really make you thing of Fall. A lovely reminder of Fall.

Chelle's Creations Indian Summer http://scraporchard.com/market/Indian-Summer-Digital-Scrapbook-Kit.html cc_indiansmr Through the Year (tree) http://scraporchard.com/market/Through-the-Year-Digital-Scrapbook.html cc_tty  Artful Musings word art; Scrapping with Liz template #chelle #cc #SWL

Indian Summer     Indian Summer Plaids     Through the Year

Next we have jk703. This is such a “pull you in” photo. I want to jump into the photos and play in that pool. Great photos. I really like the use of her own font, Typative Tall, it’s the perfect color to add to this layouts. Both kids look like their pool time is their favorite time of the year.

Hole in One Collection (http://scraporchard.com/market/Hole-in-One-Digital-Scrapbook-Bundle.html), Toadally Add On by Chelle's Creations #chelle cc_holeinone_bundle cc_toadally_ao Mix and Match 2 by Scrapping with Liz #swl SWL_MNMDT2 (http://scraporchard.com/market/Mix-Match-Double-2-Digital-Scrapbook-Templates.html), Typative Tall (my handwriting) by wm[squared] (http://scraporchard.com/market/wm2-typative-scrapper-tall-font-digital-scrapbook.html) #wm2

She used two of Chelle’s Bundle products: Hole In One & Toadally (Add-on).

Hole In One Bundle     Toadally Add On

Nest we have a great hybrid idea. LoriJ created a pillow box and invitation that could be used over and over again for other ideas. She used an idea by WendyBird Designs.

#chelle #wendybird #honeybee #hybrid  wbd_pillowbox  cc_streetsmarts_bundle<br /><br />
Hybrid Template - Boxed In Vol. 07: Pillow Box by WendyBird Designs<br /><br />
http://scraporchard.com/market/Boxed-In-Vol-07-Pillow-Box-Digital-Scrapbook-Hybrid.html<br /><br />
All digital papers and elements - Street Smarts {bundle} by Chelle's Creations<br /><br />
http://scraporchard.com/market/Street-Smarts-Digital-Scrapbook-Bundle.html<br /><br />

Lorij used Chelle’s Street Smarts Bundle.  There’s so much to be creative about. I’m sure you’ll have other ideas.

Street Smarts {reloaded}     Crayon Alpha     Make-a-Monster

I hope i’ve shared some layouts you haven’t seen and that you’ll be able to use them as a jumping board into your own creations.

Hugs! Talk to you soon.